¶ Generate Documents
Now that you have created the Document Solution, used the Query Builder to get Salesforce data, and created the Document Template for the Sales Quote document, all that's left to do is to generate the document.
There are several ways to do that. For example, you can build and run a Flow or use code solutions. But now, you are going to do it in the easiest way possible – just by clicking a button.
The first step in that direction is to add a Button Configuration.
¶ Button Configuration
Every Document Solution record can have multiple Button Configurations added to it.
Let's first take a look at how to create a Button Configuration record with the essential fields populated. Later in the article, we focus on the additional opportunities of the Button Configuration.
-
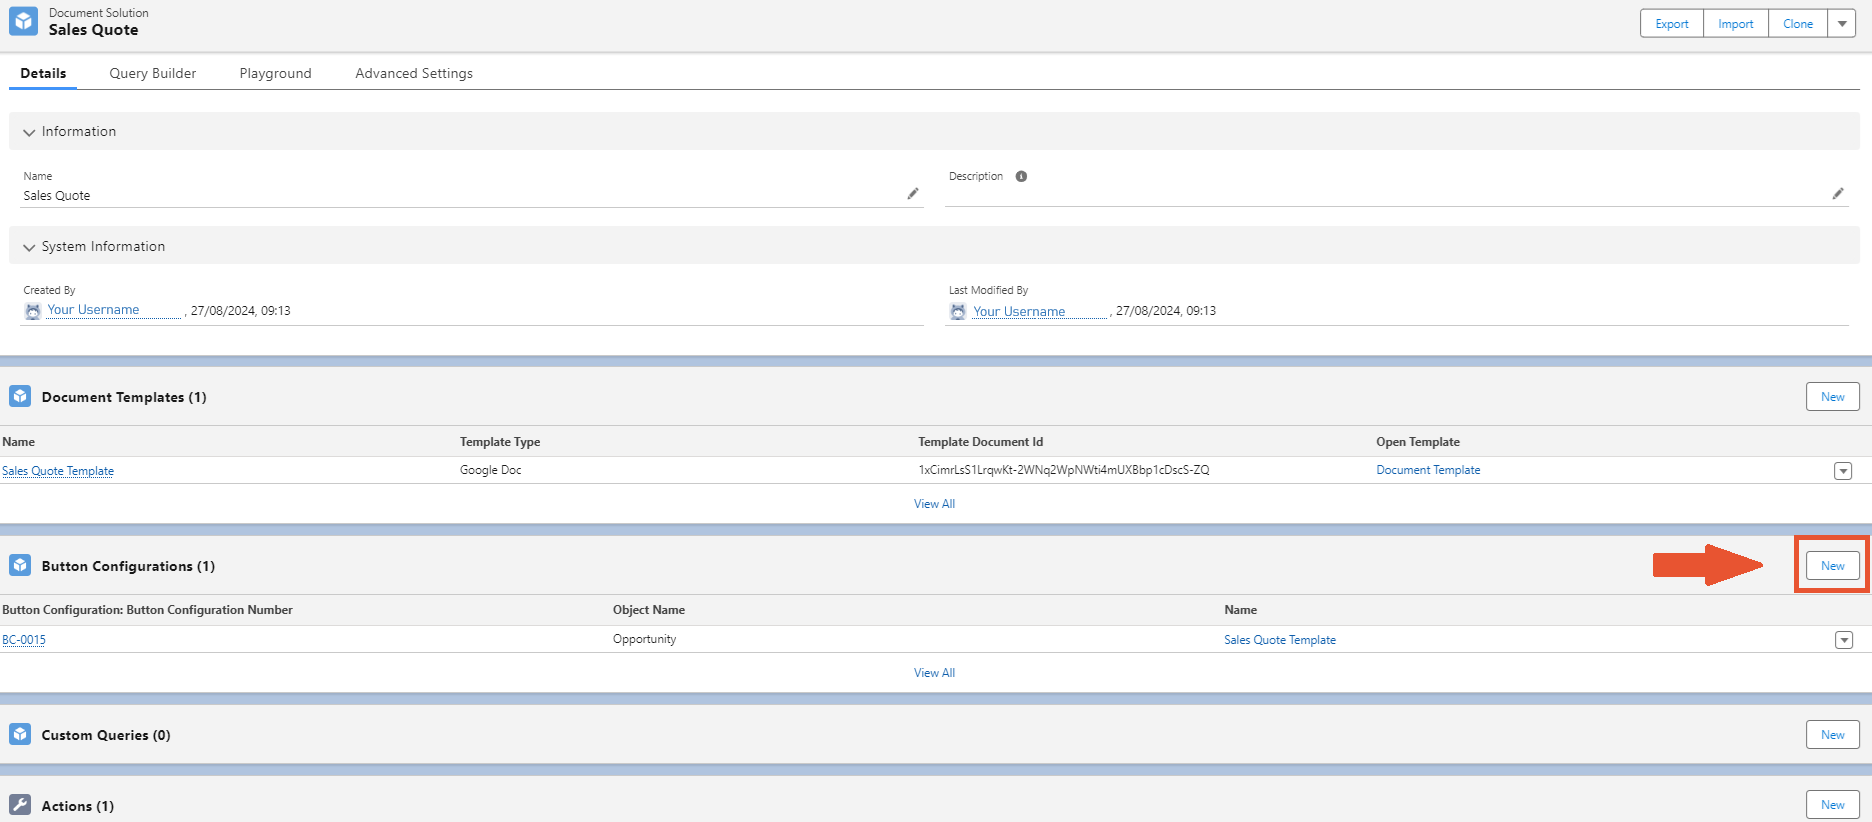
Open the Sales Quote Document Solution.
-
Find the Button Configuration related list and click New.
-
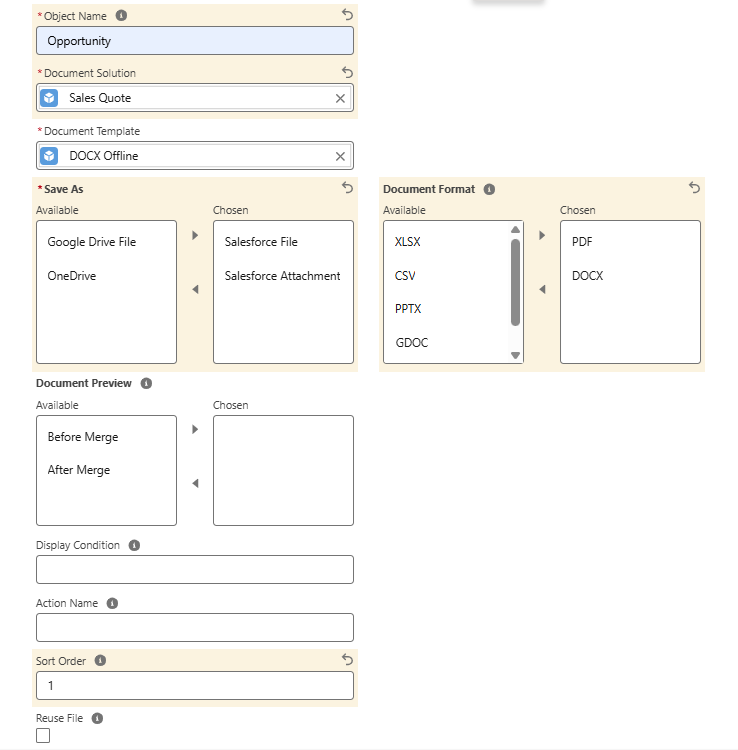
In the opened window, fill in the fields with the following values:
- Object Name. Type Opportunity here, because we generate our document from the Opportunity record page.
Keep in mind that the Object Name field should contain the API name of the object.
-
Document Solution. The field is prepopulated with the name of the Sales Quote Solution.
If you are creating the Button Configuration from the Document Template record, then the list of available Document Solutions is provided in this field.
-
Document Template. The list of available Document Templates is shown in this field.
Choose the Sales Quote Template as the Document Template.
If you are creating the Button Configuration from a Document Template record, the field is prepopulated automatically.
- Save As. The field lists the available options for storing the generated file.
Select the Salesforce File and Salesforce Attachment options. After the generation process, the document can be saved only in Salesforce, either as a file or an attachment.
- Select the OneDrive option, if you would like to save the generated file only on OneDrive. It allows you to further collaborate with other users on the generated document by editing or sharing it.
- Select the Google Drive option if you would like to save the generated file only on Google Drive and continue working with Google Docs instead of Salesforce Files or Attachments. For this option to work correctly, you should also select GDOC in the Document Format field. If you want to learn more about the Save as GoogleDrive option, go to the Google Settings in Salesforce section.
By default, the generated Azure and Google files are removed from OneDrive and Google Drive after generation. The files remain in the respective drive only if the OneDrive or Google Drive option is selected in the Save As field.
If you want to have the generated document in Salesforce and on Drive at the same time, use the Copy Document to Salesforce Action.- Document Format. Defines the format of the generated file.
Select the DOCX and PDF options.
- Select the XLSX or CSV option if you would like to work with the generated document in Microsoft Excel. These formats are only available for the XLSX and Google Sheets Document Templates.
- Select the PPTX option if you would like to work with the generated document in Microsoft PowerPoint. This format is only available for the PPTX and Google Slides Document Template.
- Select the GDOC, GSHEET, or GSLIDE option if you would like to save the generated file on Google Drive only.
- You can also select the PDF format for XLSX, PPTX, Google Sheets, and Google Slides Document Templates. In that case, the template book or presentation is converted to a PDF file after generation.
- Sort Order. The value in this field defines the position of the Button Configuration record in the corresponding list while setting up the generation process.
In our example, input 1 as a value.

Check the screenshot below as a reference and save the changes.
That is how you create the Button Configuration record.
¶ Generate Document Action
¶ Creating the Action
The next step is to create a custom Action on the Opportunity Object. This Action generates the template document using values from the Button Configuration.
-
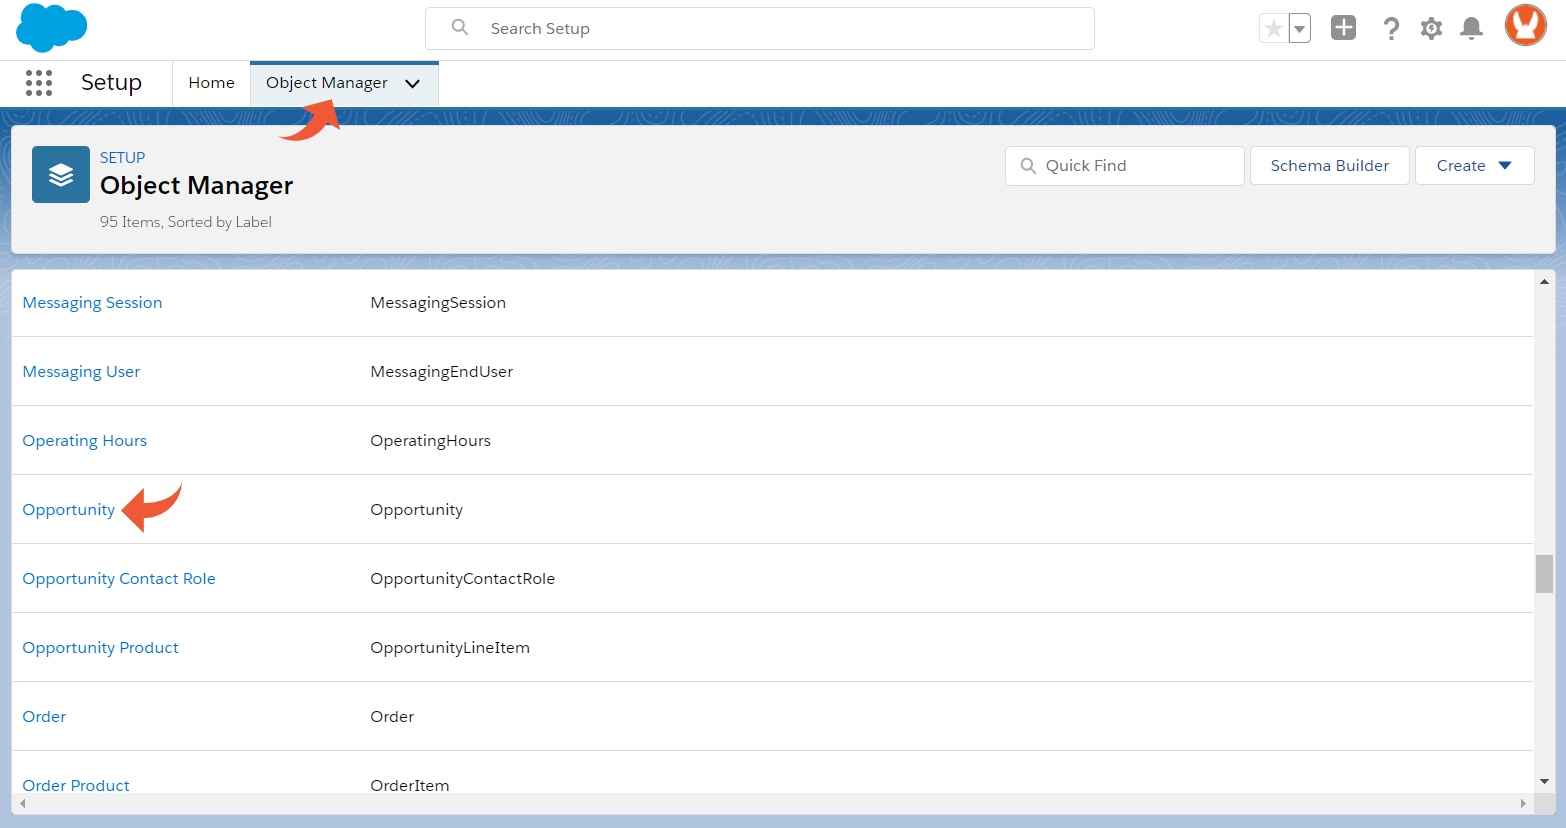
Open Setup by clicking the gear icon in the upper right corner and selecting Setup.
-
In Setup, open the Object Manager tab, navigate to Opportunity Object, and open it.
-
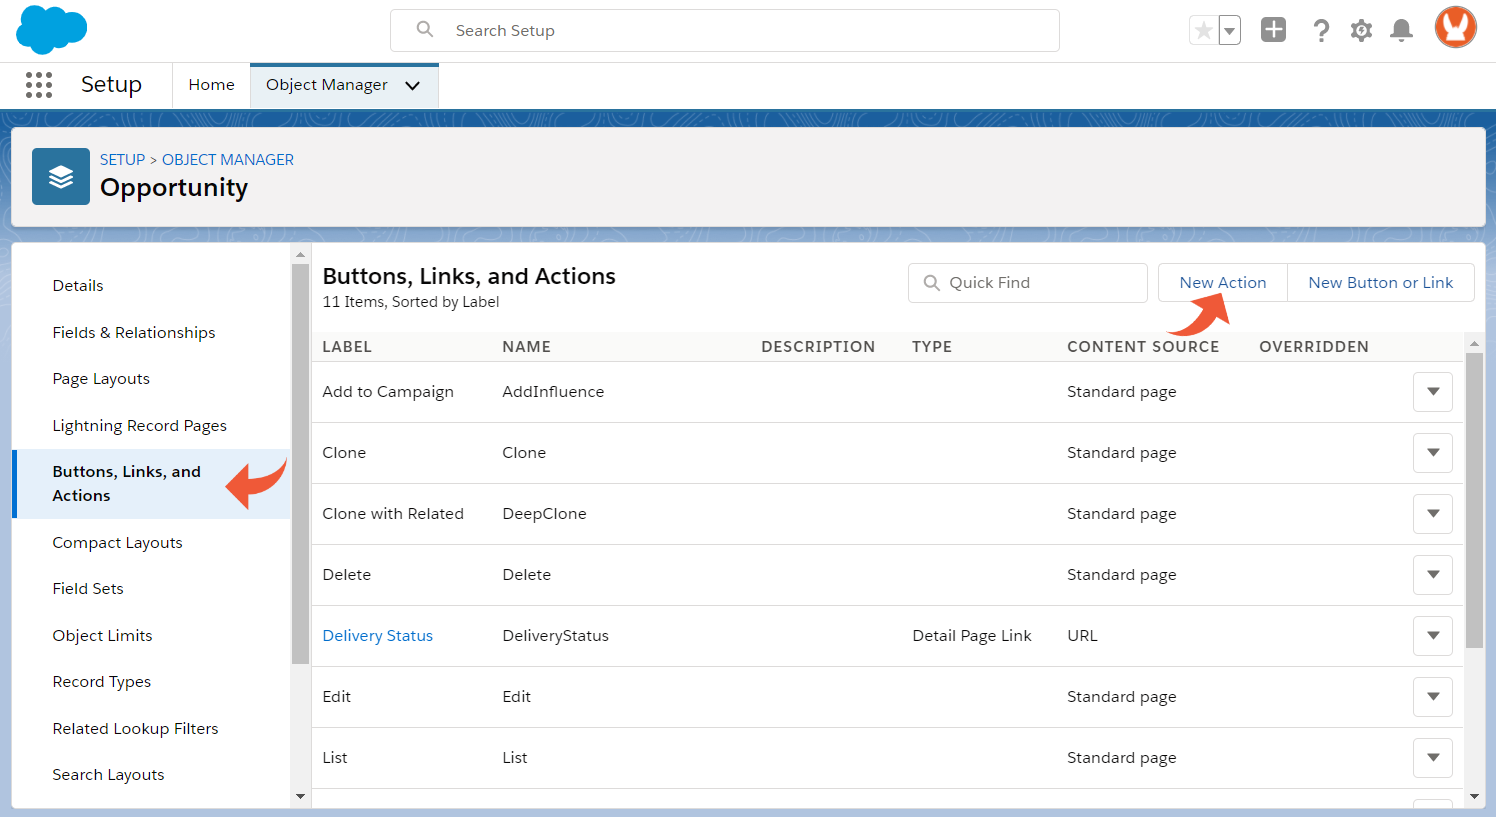
In the Opportunity Object setup page, open the Buttons, Links, and Actions tab and click New Action.
-
In the New Action window, set up the following values:
- Action Type: Lightning Component.
- Lightning Component: mmdoc:GenerateDocumentAction.
- Height: 250px (default).
- Label: Generate Quote.
- Name: Generate_Quote.
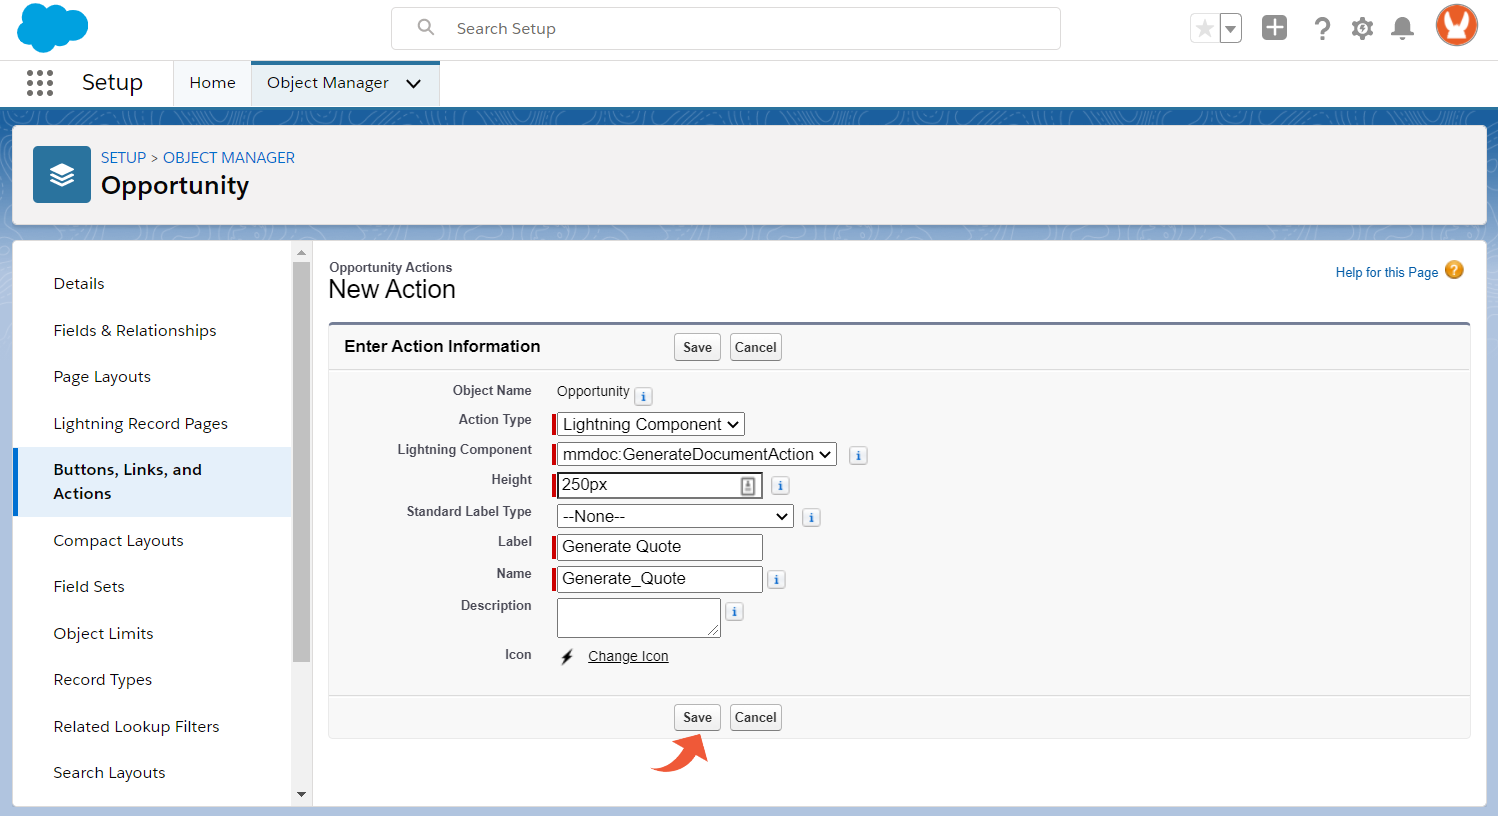
-
Click Save.


The custom Action has been created and is ready. To use it, you need to add it to the Object's Page Layout.
¶ Adding the Action to the Layout
That is how you can add the Generate Quote Action to the Object's Page Layout:
-
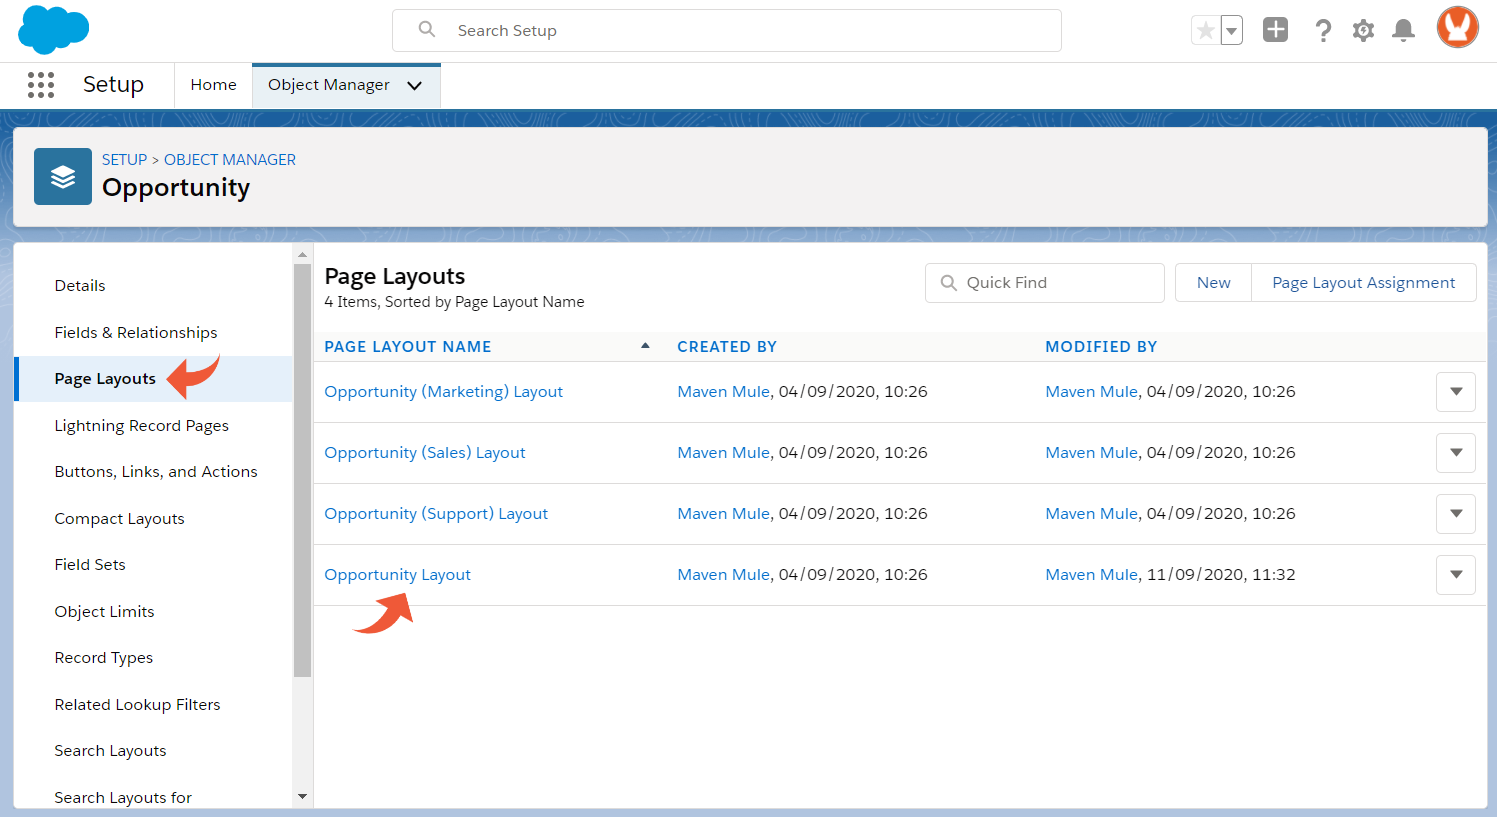
In the Opportunity Object setup page, open the Page Layouts tab.
-
Select Opportunity Layout (or whatever layout you're using).
-
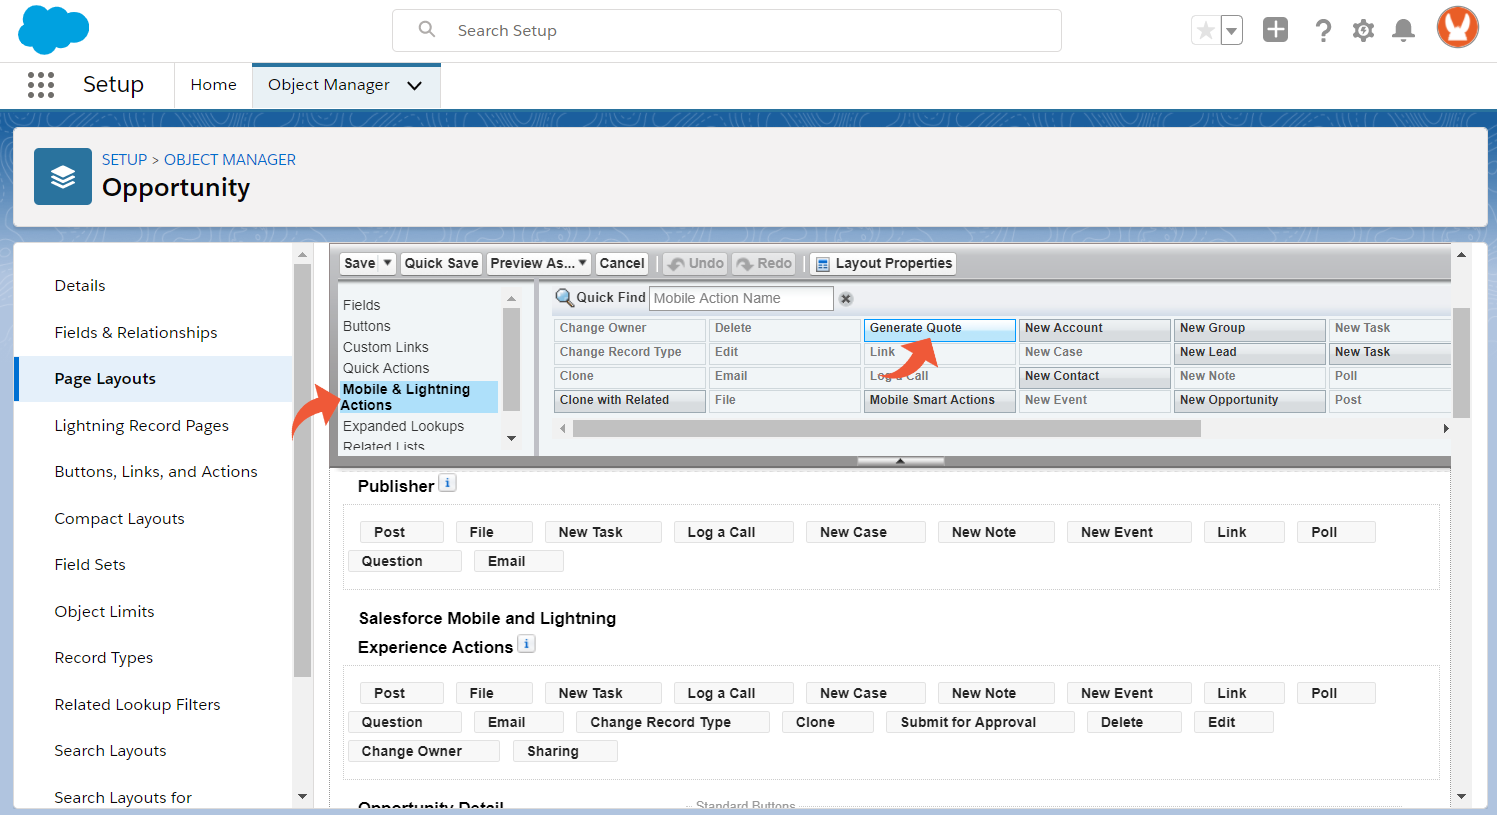
In the Edit Layout page, select the Mobile & Lightning Actions tab.
-
Find the Generate Quote Action and drag it to the Salesforce Mobile and Lightning Experience Actions section.
-
After you've successfully added the action to the layout, click Save.
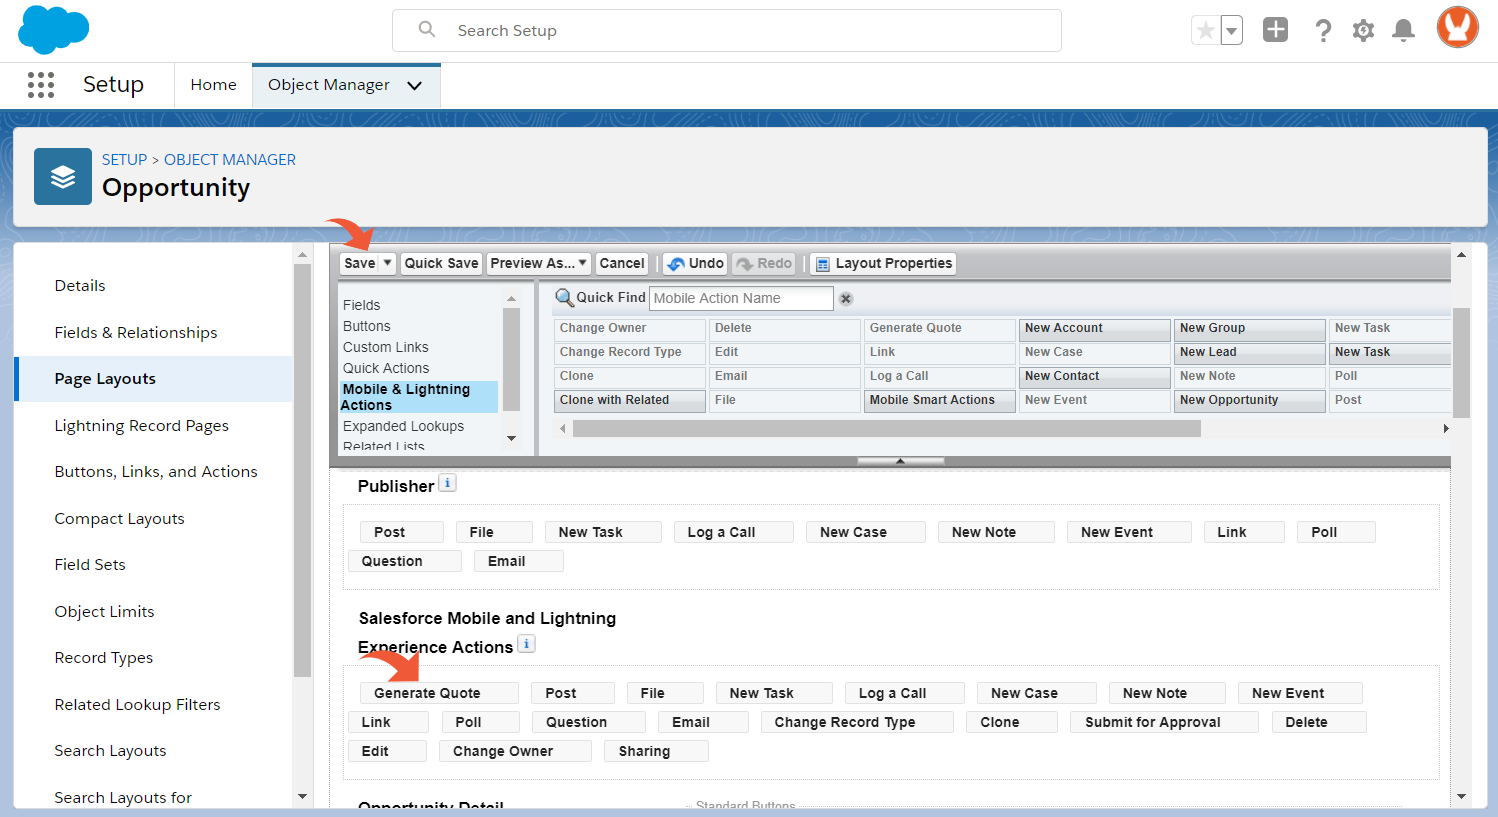


With that, the Generate Quote Action is now added to the Opportunity Layout. You can now access it from every Opportunity record and create a Document Request for the quote.
Create a custom Action and put it on the Layout when you use the related object in the Button Configuration for the first time. After that, the current component will automatically grow with additional choices when you add new Button Configurations.
¶ Generate the Document
After everything you've done so far, you can finally generate the quote document. All you need to do is open an Opportunity record and generate the quote from there. In this example, we will use the generic Salesforce Edge SLA Opportunity.
Ensure that the record you use for document generation contains all the necessary data you want to retrieve with the built query. For instance, ensure the record includes information about products, contacts, or amounts.
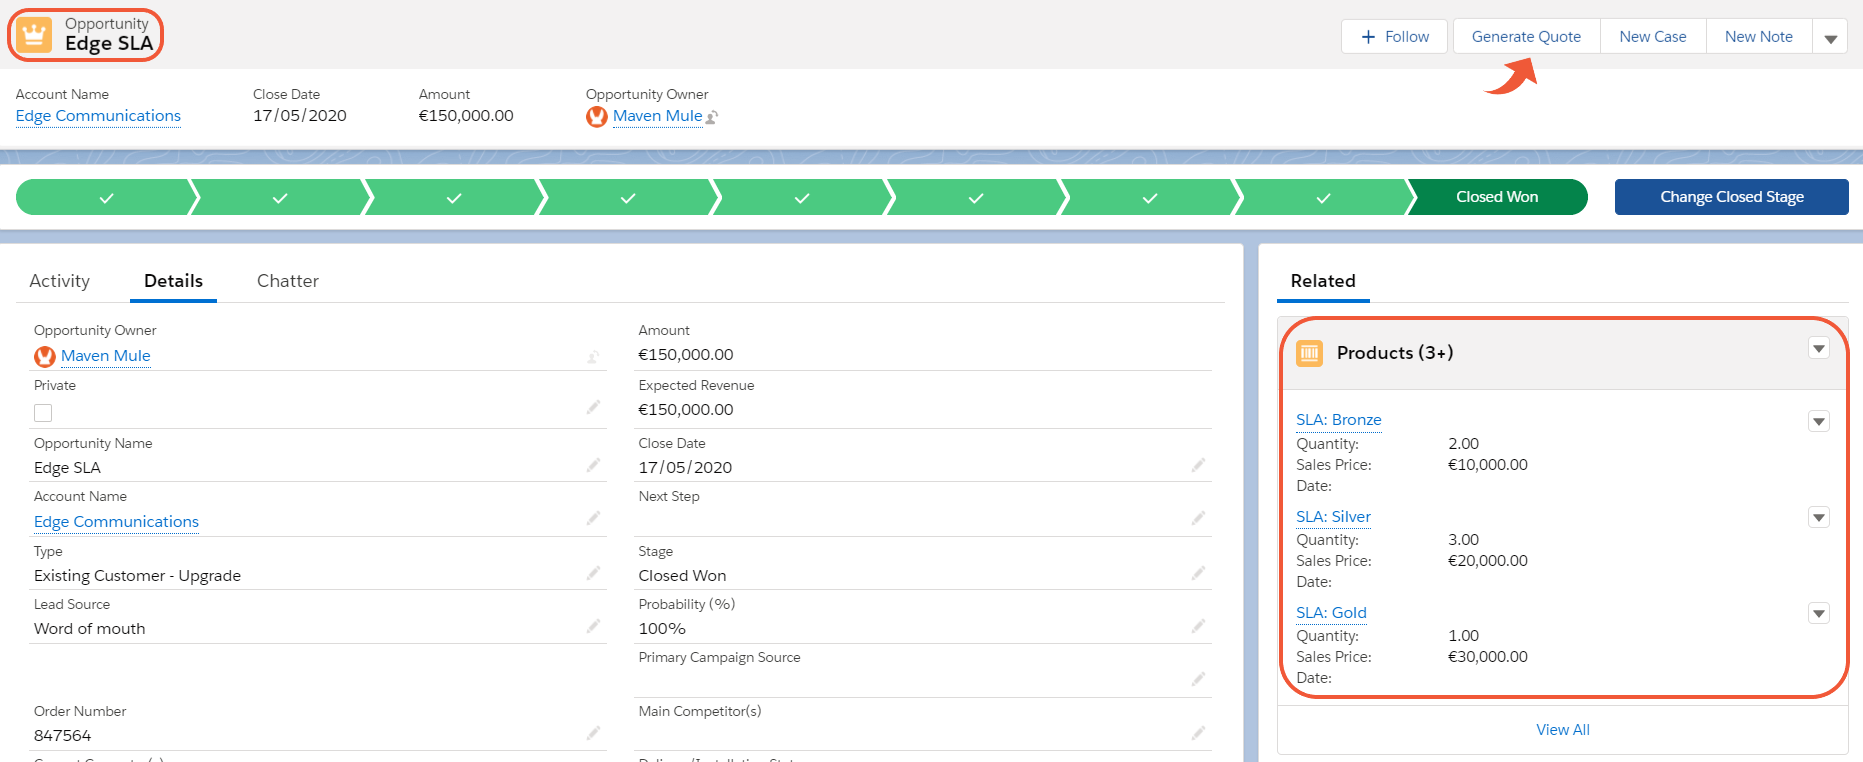
Once the data is set, click the Generate Quote button. The button triggers the Action you created and added to the layout in the previous step:
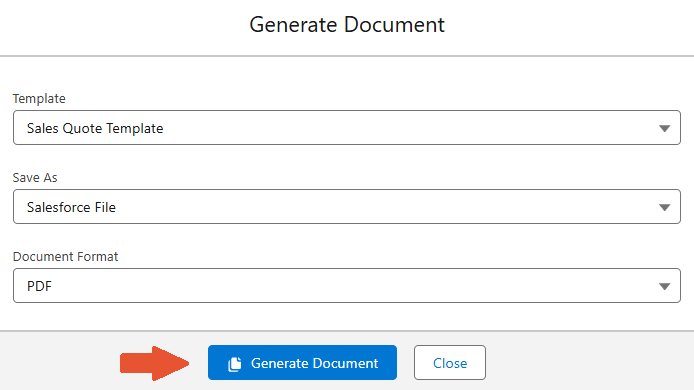
- Select the Format.
- Select the Save As option.
If you are unsure about the difference between the File and Attachment on Salesforce, this article might help.
- Click Generate Document.
After a few seconds, you receive a Success message if the document was successfully generated.
If you get an error, it means something went wrong in the generation process. Check the detailed explanation about identifying and fixing some errors in the FAQ section.
After generating the document successfully, you can find it in the Notes & Attachments related list on the Opportunity record.
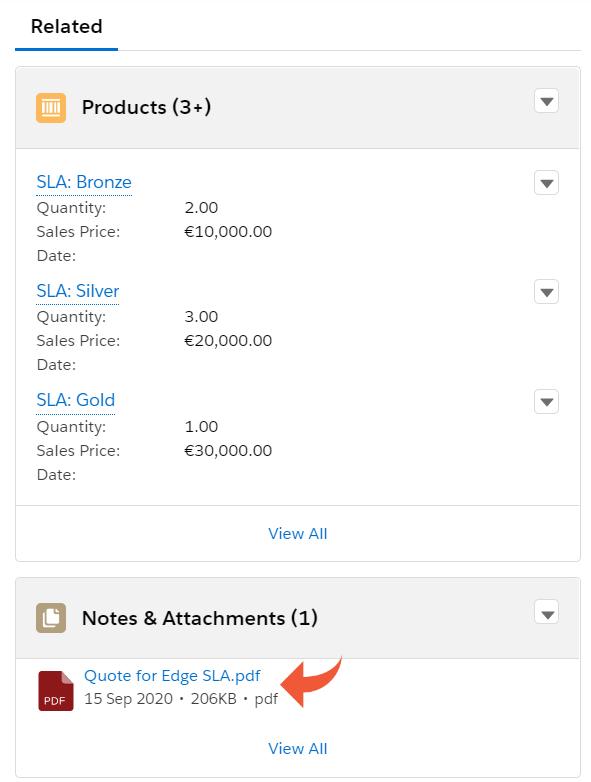
Once you press Generate Document, besides the new file or Attachment, the new Document Request record is created. The record is created after generation, regardless of whether it is successful or not. You can find more detailed information about the Document Request here.
And finally, here is how the document looks after generation.
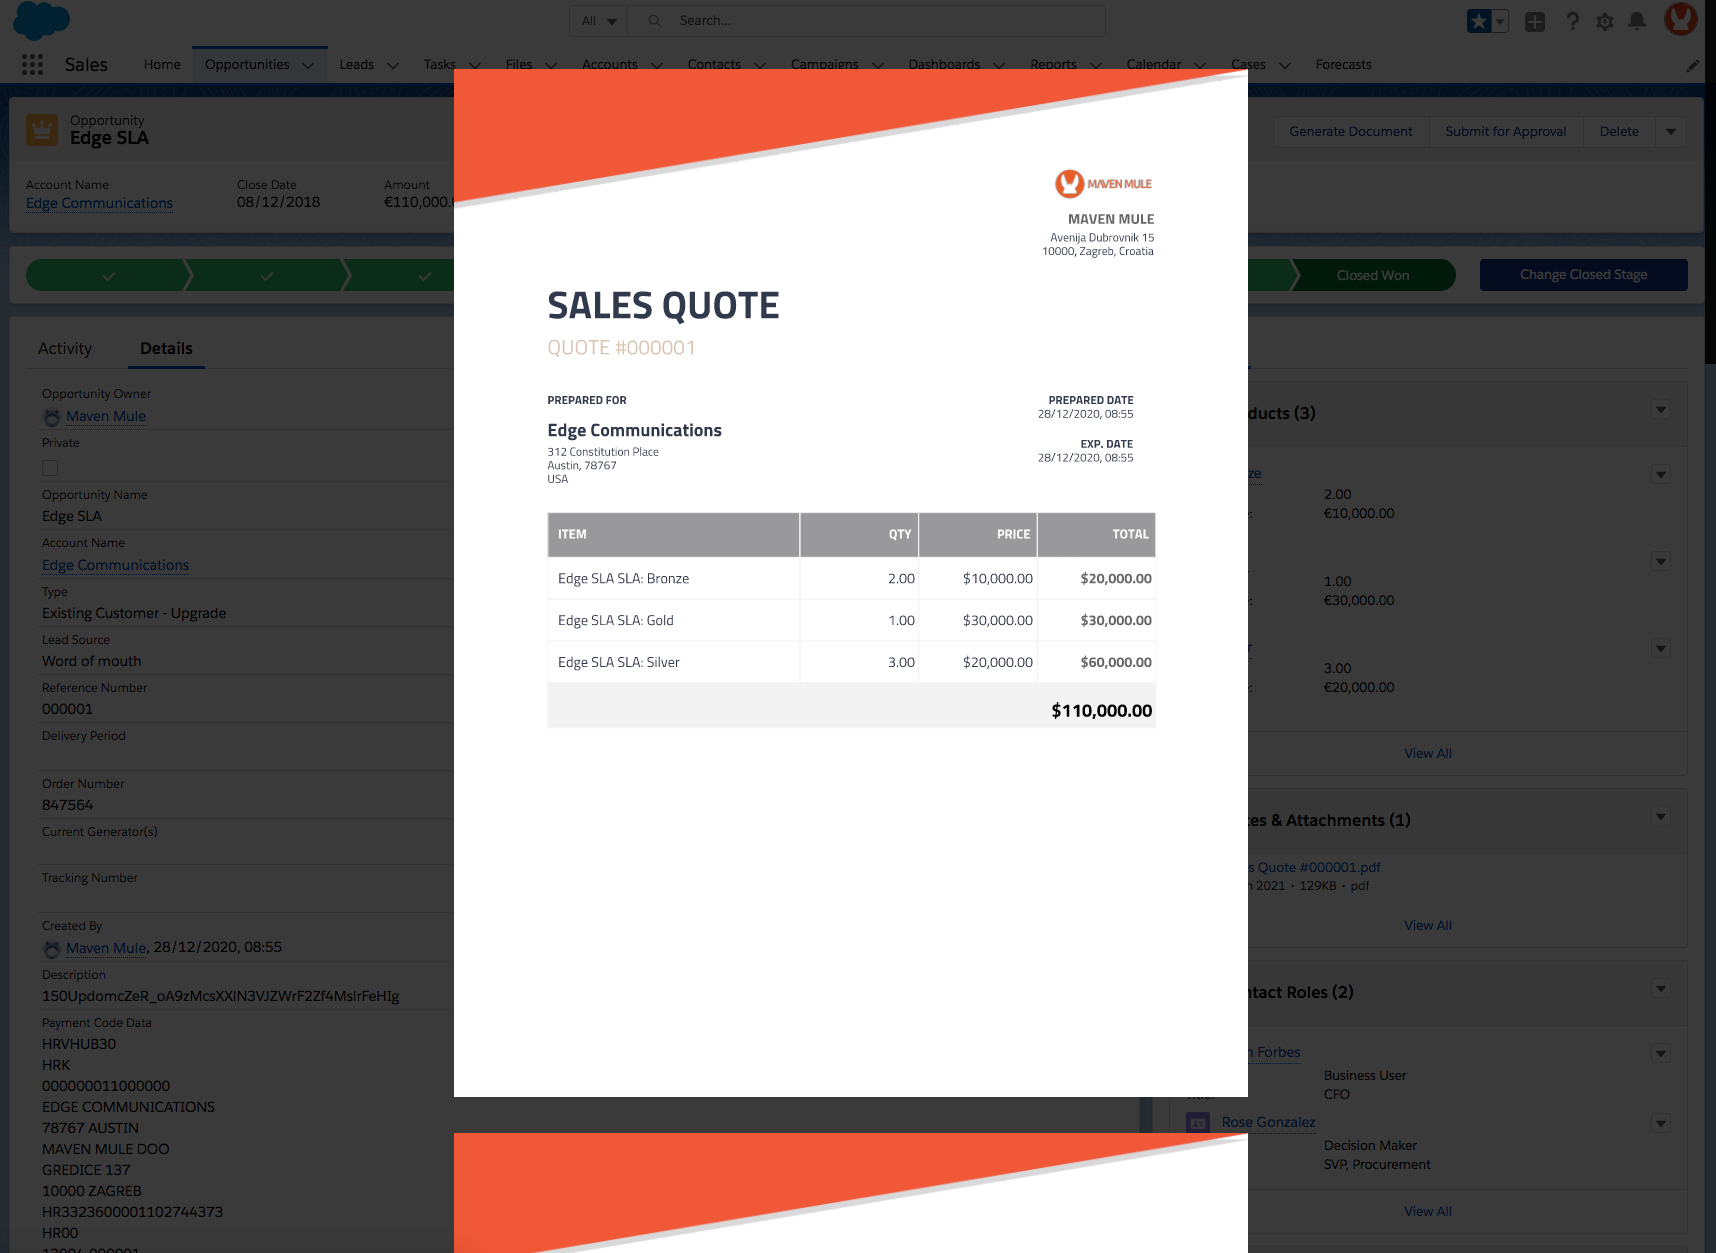
As you can see, everything we intended to demonstrate is present: the fields have been replaced with values, the table has been created with the products added, and on the remaining pages, the link, payment code, and other information have been successfully included in the quote document. You can now send it to a customer and close the deal.
When you save the generated document as a Salesforce file or attachment, it stays only in Salesforce. The respective file on Drive is removed.
If you would like the generated documents to appear on Google Drive or OneDrive, you should use the respective option in the Save As field.
That's it! We have now shown you from start to finish how to generate your documents. From now on, if you want to generate the quote for any other Opportunity record, all you have to do is open the record and click the Generate Quote button.
If you want to continue learning about Maven Documents features, you can check the following pages:
- Actions. Learn how to create and execute actions after generating a document, such as sending a quote to a customer.
- Export/Import. Discover how to easily export and import Document Solutions.
- Automate with Flow and Automate with Code. Learn how you can automate the document-generation process.
¶ Additional Button Configuration Settings
There are also some additional options available in the Button Configuration. Let's check what we can achieve with them.
¶ Document Preview
With this feature, you can preview and edit the generating document before its content is merged, after its content is merged, or before and after its content is merged. In other words, the document can be edited before or after the merge fields are replaced with the corresponding values from Salesforce.
By selecting these options, you are choosing when the document is previewed and optionally edited.
¶ Before Merge
The template document is previewed before it is merged and saved on Salesforce.
The Before Merge preview is not available for the offline DOCX, XLSX, and PPTX templates.
-
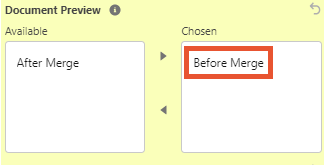
Select the Before Merge option in the Document Preview multi-select picklist in the Button Configuration.
-
Generate the document.
-
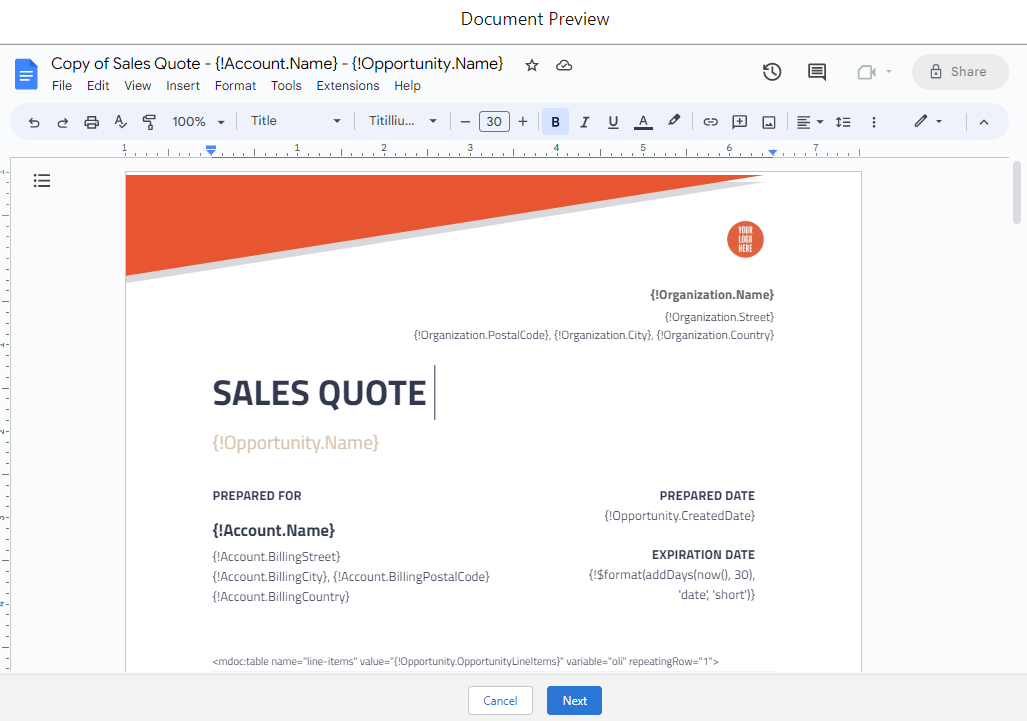
Since you've selected the Before Merge option, the Document Preview is shown. You can edit the document to your taste.
The Before Merge preview is always shown in the corresponding frame, regardless of the selected sharing options.
-
Let's click Next here. (If you click Cancel, you return to the previous step.)
-
As you can see, the document is now generated with your custom changes applied.
Since the Before Merge view is actually showing you the template document, any changes in the preview are applied to and saved in the template.
¶ After Merge
The Document Template is previewed after it is merged, but before it is saved on Salesforce.
Having a value in one of the Share User Edit List, Share User View List, Create Organization Edit Link, or Create Organization View Link fields, or having the Create Shareable Edit Link or Create Shareable View Link checkbox marked, is the prerequisite for the After Merge preview. If you don't have any of them populated, the generation process doesn't start: the validation error is thrown.
Because of Microsoft limitations, the same functionality is a bit different for Azure and Google templates:
¶ Azure Templates
-
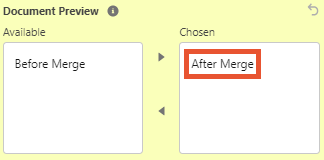
Select the After Merge option in the Document Preview multi-select picklist in the Button Configuration.
-
Fill the Share User Edit List or Share User View List field with the email address of a user, or mark the Create Shareable Edit Link or Create Shareable View Link checkbox.
-
Generate the document.
-
Generate the document with the corresponding options.
Since you've selected the After Merge option, the Document Preview is shown.
On Azure, the preview works in two ways, depending on which type of fields you used: Share User List or Create Shareable Link:- Share User List fields and Create Organization Link checkboxes. The pop-up Document Preview window with a link to the previewed document appears on the screen. The link leads to OneDrive, where you can edit the needed document.
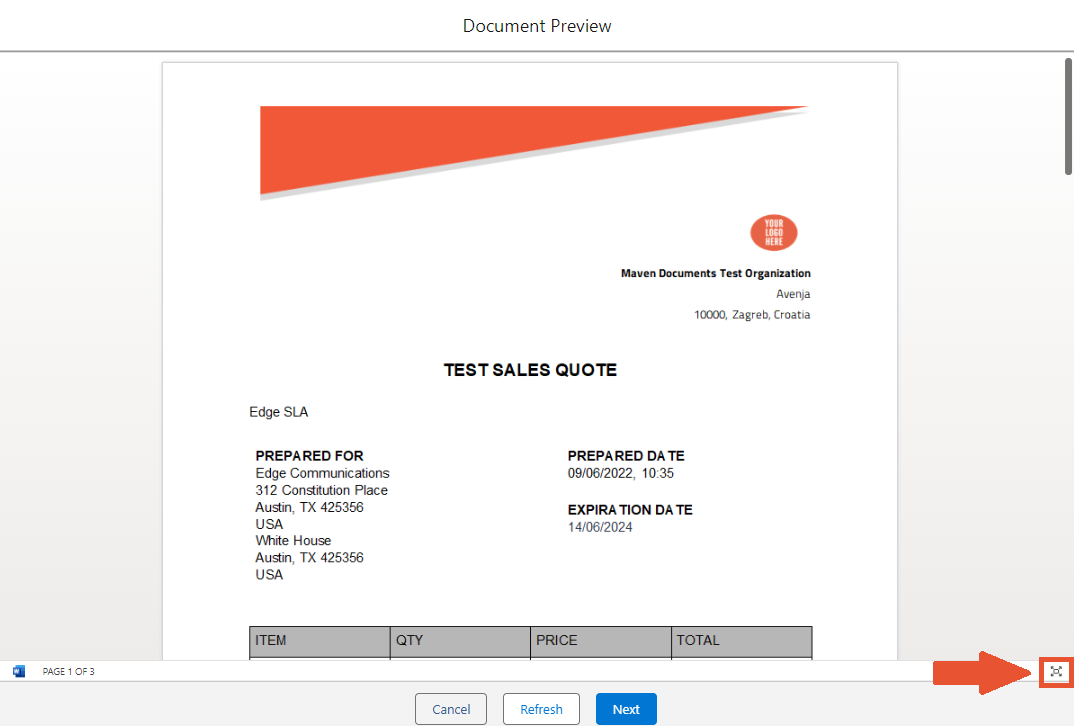
- Create Shareable Link checkboxes. The document is displayed in the Preview frame on Salesforce. The document is already merged, with all the merged fields and elements replaced by corresponding Salesforce values. In comparison to Google templates, you can not edit the merged file in the Preview frame.
-
To edit the document in the Preview frame on Salesforce, click on the Full-Screen button in the bottom right corner of the Preview frame. The merged file created on OneDrive opens in a new tab in View mode.
-
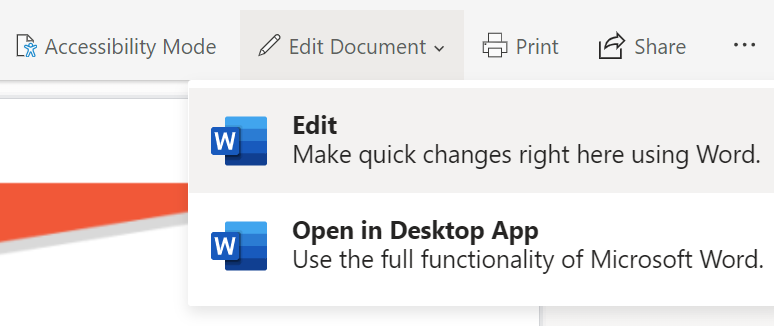
After you click Edit Document and select the Edit option, you will be free to make changes to the merged file.
-
Once you are done, close the tab.
-
You are returned to the Preview frame on Salesforce.
-
To see the changes in preview, click the Refresh button.
-
-
If you have a preview on OneDrive, click the link you have on the screen.
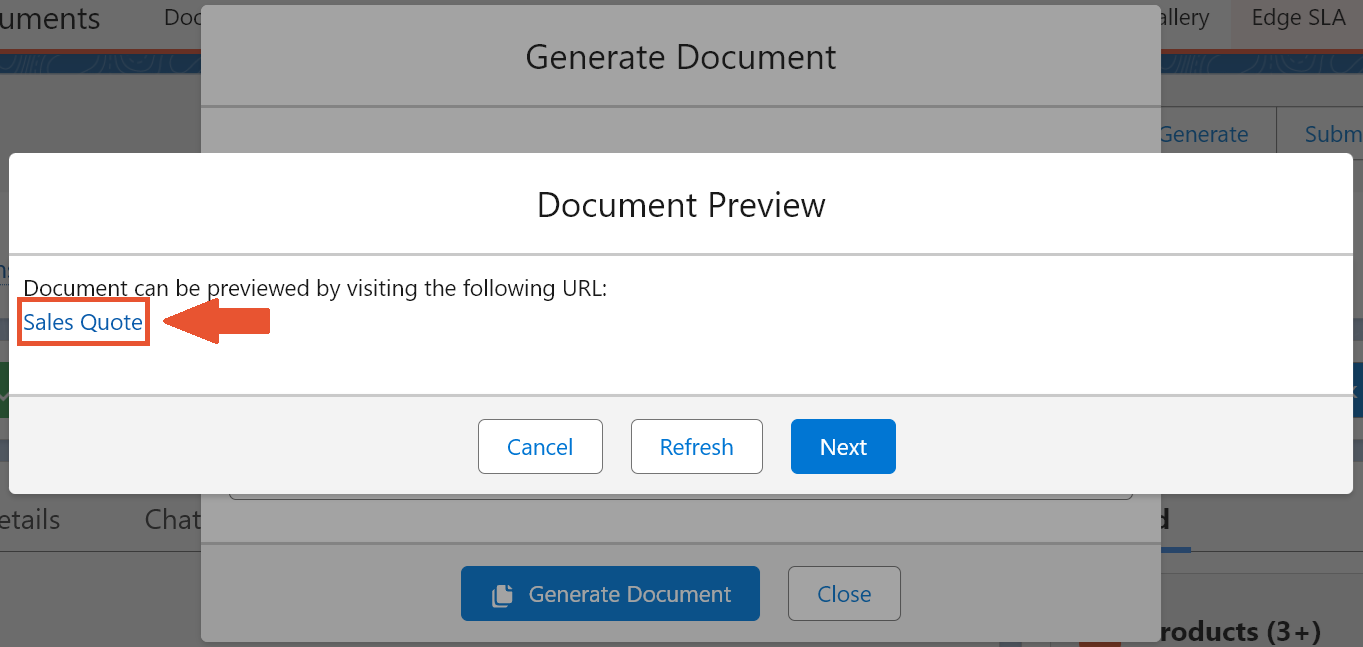
- The generated OneDrive document opens in a new browser tab. Here you can make all the needed changes and close the tab.
- You are returned to the Document Preview window with the link. Changes you made will be applied to the document. You will see it after the generation process ends.
-
Click Next here. If you click Cancel, you return to the previous step.
-
As you can see in the final Preview, the document is now saved with your custom changes applied. You can go to OneDrive and double-check it.

¶ Google Templates
When generating Google files, the After Merge preview is always displayed in the Preview frame.
-
Select the After Merge option in the Document Preview multi-select picklist in the Button Configuration.
-
Fill the Share User Edit List or Share User View List field with the email address of a user, or mark the Create Shareable Edit Link, Create Shareable View Link, Create Organization Edit Link, or Create Organization View Link checkbox.
-
Generate the document.
-
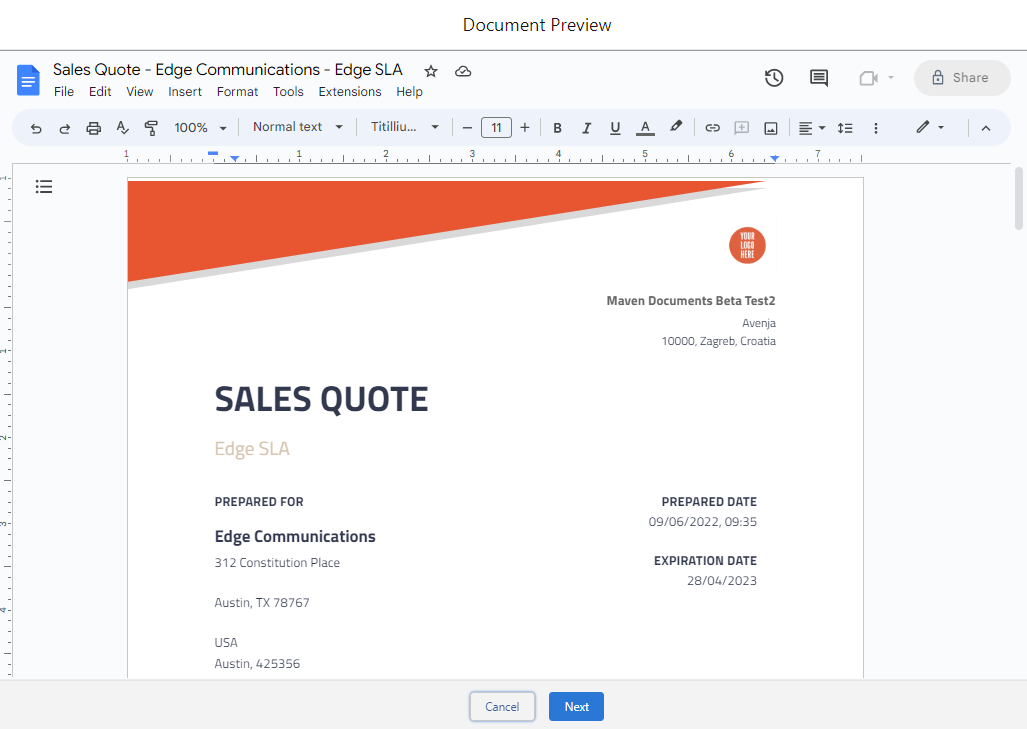
Since you've selected the After Merge option, the Document Preview is shown in the respective frame. The document is already merged, with all the merged fields and elements replaced by corresponding Salesforce values. However, you can still edit this generated document to your taste.
-
Click Next here. If you click Cancel, you return to the previous step.
-
As you can see, the document is now saved on Salesforce with your custom changes applied.
¶ Before Merge and After Merge
The Document Template is previewed before it is merged and saved in Salesforce.
The Before Merge preview is not available for the offline DOCX, XLSX, and PPTX templates.
Having a value in one of the Share User Edit List or Share User View List fields, or having the Create Shareable Edit Link, Create Shareable View Link, Create Organization Edit Link, or Create Organization View Link checkbox marked, is the prerequisite for the After Merge preview. If you don't have any of them populated, the generation process doesn't start: the validation error is thrown.
Here is how the process looks if both the Before and After Merge options are selected:
-
Select Before Merge and After Merge options in the Document Preview multi-select picklist in the Button Configuration.

-
Generate the document.
-
Since you've selected the Before Merge option, the Document Preview is shown. You can edit the template document to your taste.
The Before Merge preview is always shown in the corresponding frame, regardless of the selected sharing options.
Since the Before Merge view is actually showing you the template document, any changes in the preview are applied to and saved in the template.
-
Click Next here. If you click Cancel, you return to the previous step.
-
Because you've also selected the After Merge option, the Document Preview is shown again. Note that the document has already been merged, with all fields and elements replaced by their corresponding Salesforce values. But you can still edit this generated document.
The After Merge preview works differently for Azure and Google. Check the section above for more information.
-
Click Next one more time. As you can see, the document is now saved on Salesforce with all the changes you've made.
¶ Display Condition
The feature comes in handy if you want the Template available for users only if certain criteria are met. For example, if the Opportunity record has the Closed status, then the Order Template should be visible. Otherwise, it should be hidden.
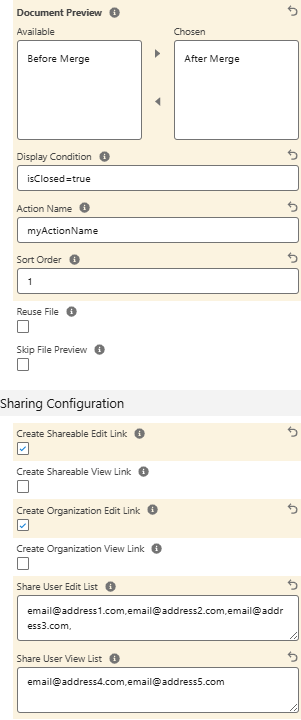
In the screenshot, you can see how to set that field in the Button Configuration, following the example mentioned earlier.
This field should contain SOQL condition syntax.
¶ Action Name
We've already shown you how to generate the document by creating the custom Action. But you also have the option to create a shortcut in the form of a custom Quick Action. It will automatically run the document generation without requiring any further user input.
Here is what you should do:
- Create the Quick Action.
- Add it to the layout as you would normally do.
- Write down its name inside the Action Name field in the Button Configuration.
Once that Action is clicked, Maven Documents immediately starts generating your document based on the Button Configuration record that contains that Action Name.
The Action Name should not have any spaces, so ensure to input the Action API Name and not the Action Label.
¶ Sort Order
Once you select the Generate Document Action, Maven Documents sorts the Document Templates based on the Sort Order numbers. This field accepts integers.
If no number is provided, sorting is based on the Document Template names.
¶ Reuse File
If the Reuse File checkbox is selected, the generated document (as a Content Version) reuses an existing Content Document record, if one exists. Otherwise, a new Content Document and Content Version are created each time you generate a document.
¶ Skip Document Preview
By marking the checkbox, you are disabling the preview of the document after the generation process is complete. You’ll still see a green toast message upon successful generation, but the document preview will not be displayed. You will find the generated document in the Notes and Attachments related list on the corresponding record.
¶ Create Shareable Edit Link
By selecting this checkbox, you make the generated file on Google or OneDrive editable by anyone with the link. The link can be found in the corresponding Document Request record. On the Drive, you can see how it looks in the Manage Access setting of the file.

¶ Create Shareable View Link
By marking this checkbox, you are making the generated file on Google or OneDrive available for viewing to anyone who has the link to it. The link can be found in the corresponding Document Request record. On the Drive, you can see how it looks in the Manage Access setting of the file.

¶ Create Organization Edit Link
By selecting this checkbox, you make the generated file on Google or OneDrive editable only by members of your organization. The link can be found in the corresponding Document Request record. On the Drive, you can see how it looks in the Manage Access setting of the file.

¶ Create Organization View Link
By marking this checkbox, you are making the generated file on Google or OneDrive available for viewing only by members of your organization. The link can be found in the corresponding Document Request record. On the Drive, you can see how it looks in the Manage Access setting of the file.

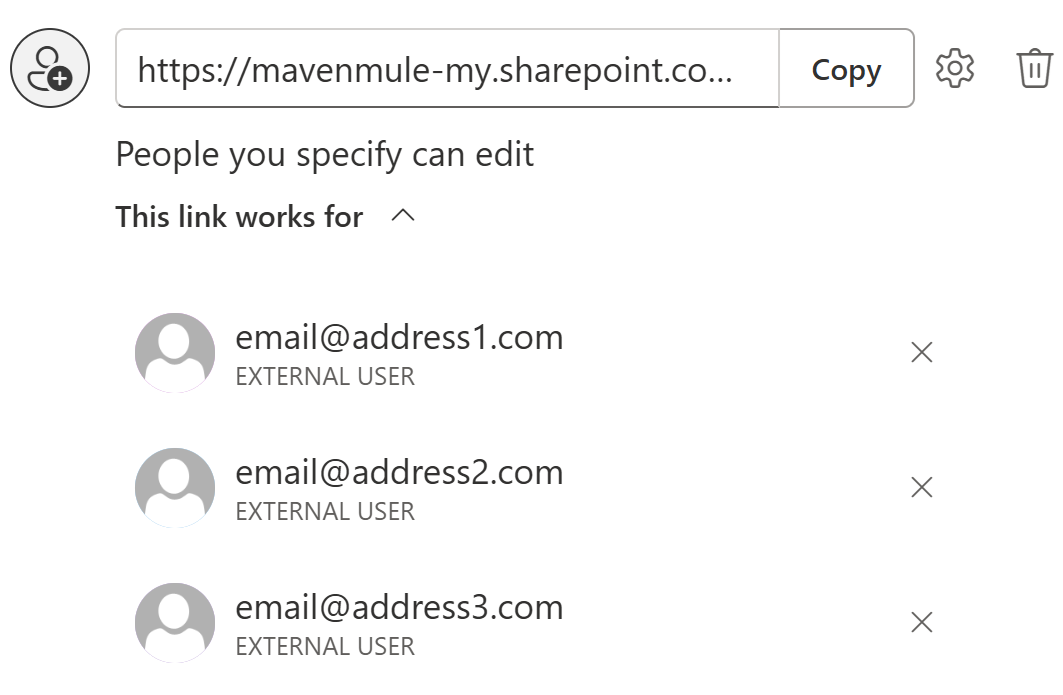
¶ Share User Edit List
In this field, you can place the email addresses of users who will have Edit access to the generated file on Google or OneDrive. For others, the file will be in read-only mode. The link to the file can be found in the corresponding Document Request record. On the Drive, you can see how it looks in the Manage Access setting of the file.
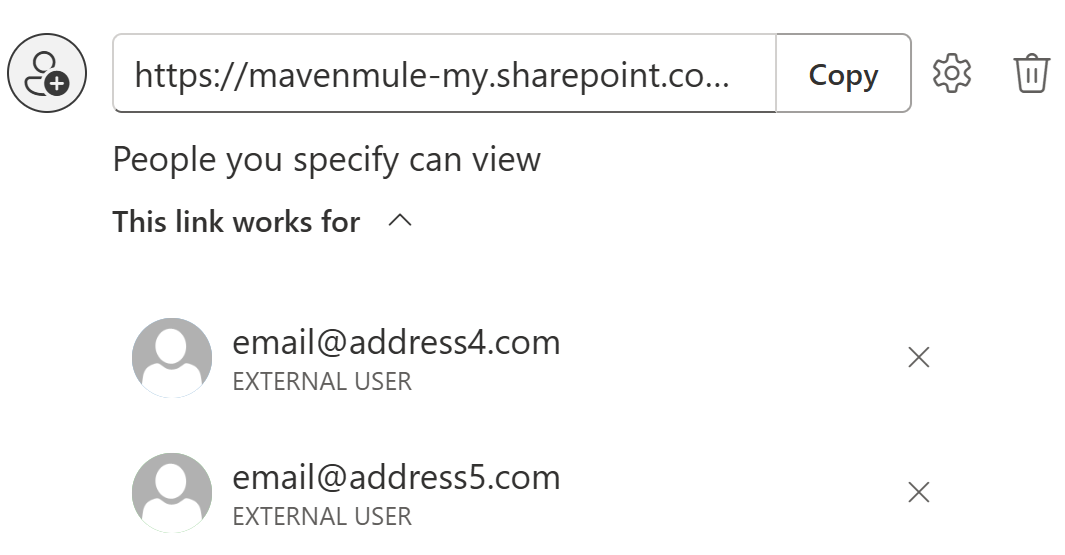
¶ Share User View List
In this field, you can place the email addresses of users who will have View access to the generated file on Google or OneDrive. The link to the file can be found in the corresponding Document Request record. On the Drive, you can see how it looks in the Manage Access setting of the file.
- Emails in the lists are separated by a comma.
- If sharing fails for any of the listed email addresses, those emails are displayed in the Failed_Document_User_Edit_URL__c or Failed_Document_User_View_URL__c field on the respective Document Request.
Having value in one of the Share User Edit List or Share User View List fields or having the Create Shareable Edit Link, Create Shareable View Link, Create Organization Edit Link, or Create Organization View Link checkbox marked is the prerequisite for the After Merge Preview option. If you don't have any of them populated, the generation process will not even start: the validation error is thrown.
We summarized the information on sharing access in the table below.
| Field | Shared with | Azure templates preview | Google templates preview |
|---|---|---|---|
| Create Shareable Edit Link | Anyone with the link can edit | In the Salesforce pop-up window | In the Salesforce pop-up window |
| Create Shareable View Link | Anyone with the link can view | In the Salesforce pop-up window | In the Salesforce pop-up window |
| Create Organization Edit Link | People within your Organization domain can edit | On OneDrive | In the Salesforce pop-up window |
| Create Organization View Link | People within your Organization domain can view | On OneDrive | In the Salesforce pop-up window |
| Share User Edit List | Only specified users can edit; other users don't have document access | On OneDrive | In the Salesforce pop-up window |
| Share User View List | Only specified users can view; other users don't have document access | On OneDrive | In the Salesforce pop-up window |
Using these 4 options, you can tailor access to the generated file according to your preferences and security policies.
¶ Best Practices for Large-Scale Sharing
When generating and storing documents on OneDrive or SharePoint, Maven Documents utilizes Microsoft APIs to manage access permissions. To ensure optimal performance and reliability, please consider the following:
The Limitation: Sharing a document directly with a large list of individual email addresses is a resource-intensive operation. Internal testing indicates that sharing with up to 100 users typically functions without issues. However, exceeding this limit may trigger Timeout exceptions from the Microsoft API.
The Impact: Direct sharing with numerous individual accounts significantly increases the overall document generation and delivery time.
Recommended Approach: For sharing with a large number of users, we strongly recommend using built-in Microsoft 365 mechanisms: