¶ Actions
One more way to automate business processes is to add Actions to a Document Solution. Actions automatically happen after you generate a new document.
To create a new Action, follow the steps:
- Open the Document Solutions tab.
- Go to the Actions related list.
- Click the New button.
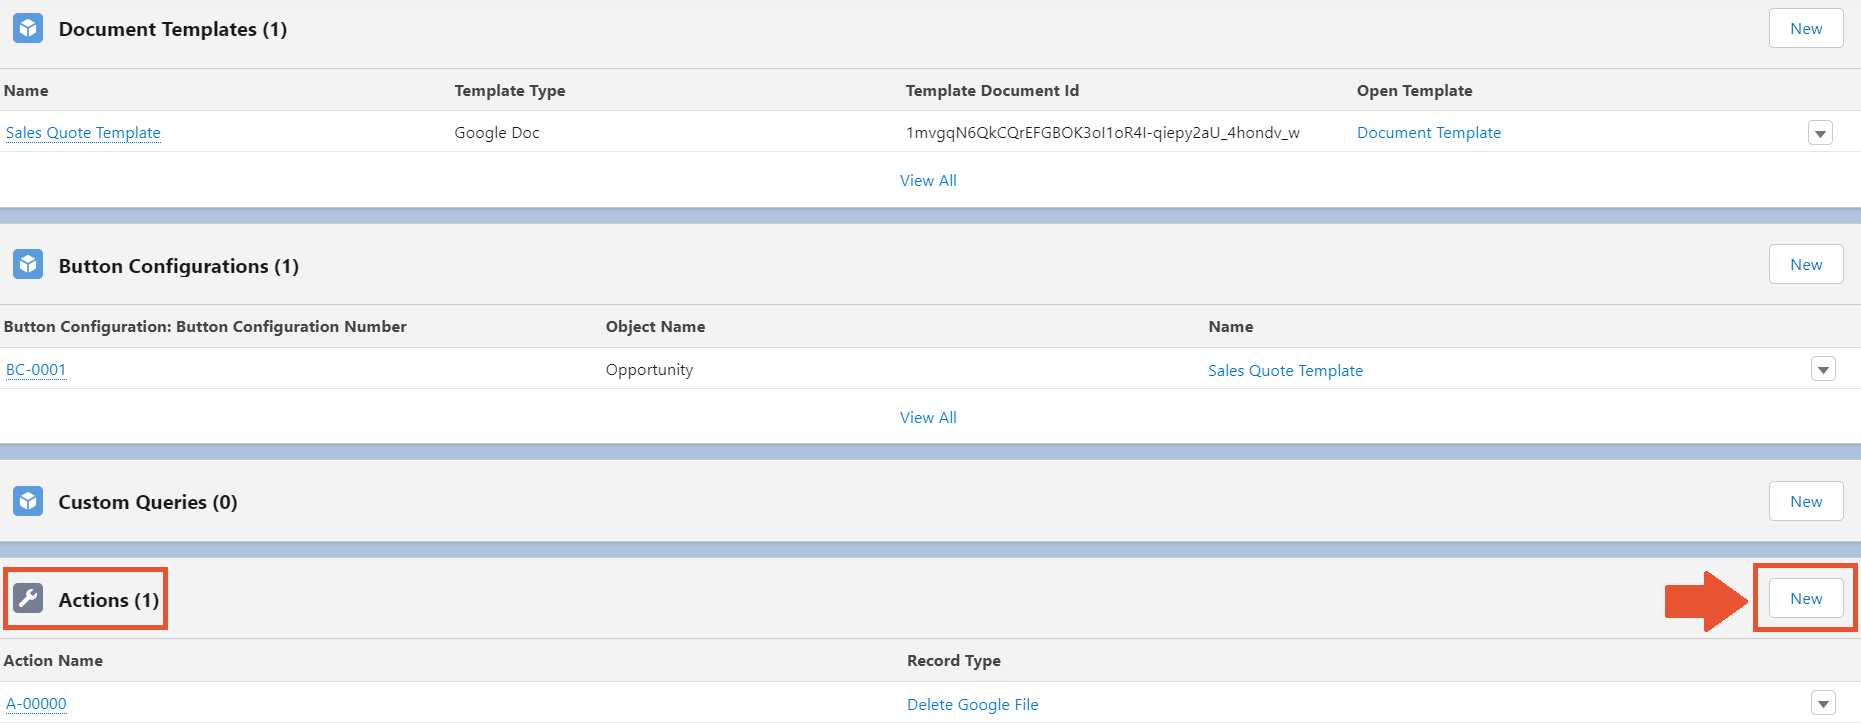
After you click New, the modal with the list of available Actions opens. You can choose only one Action, and after that, click Next to continue.
¶ Email Autosend
This Action allows you to send the email with the generated document as an attachment.
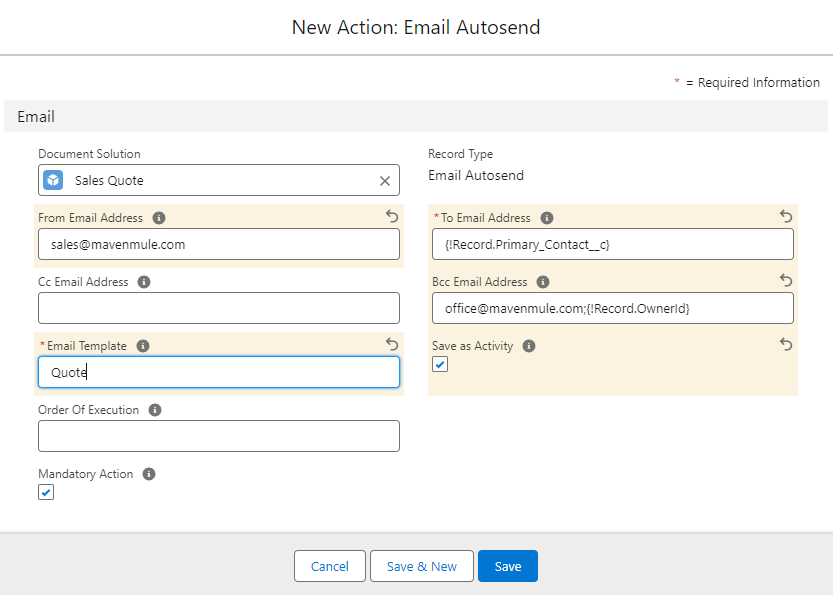
Email Autosend Action has the following parameters to specify:
- Document Solution. Predefined with the name of the Document Solution you are working on.
This information is mandatory. - From Email Address. The org-wide email address from which the email is sent. If not provided, the email is sent from the current user's address.
- To Email Address. The list of email addresses or Object IDs (e.g., Contact ID) to whom the email is sent.
This information is mandatory. - Cc Email Address. The list of email addresses or Object IDs (e.g., Contact ID) to whom the copy of the email is sent.
- Bcc Email Address. The list of email addresses or Object IDs (e.g., Contact ID) to whom the copy of the email is also sent.
- Email Template. The developer name of the Salesforce Email Template that you want to use.
This information is mandatory. - Save as Activity. Defines if the email will be saved as an Activity on the original record.
The Order of Execution and Mandatory Action fields have the same functionality as was explained in the first Action.
To Email Address, Cc Email Address, and Bcc Email Address can accept multiple addresses or IDs separated by a semicolon (
;).
If you would like to get recipients from the original record dynamically, you can use expressions in the following format{!Record.Field__c}where Field__c is the name of the field where the recipient email or ID is stored. For example, the To Email Address field can holdoffice@mavenmule.com;{!Record.OwnerId};{!Record.Primary_Contact_Email__c}.
¶ Email Preview
For the Email Preview Action to work properly, make sure that the Activity component is open on the record where you generate the document.
With the Spring '23 Release, Salesforce introduced the Dynamic Activity Composer (DAC), which changed the way the Activity tab on Salesforce records behaves.
Currently, the Email Preview Action doesn't work with DAC. So you need to switch back to the Tabbed Activity View to have the Action available:
1. Click Edit Page in the Setup menu.
2. Select the Activities component.
3. In the Properties panel, check the Use tabbed activity view checkbox.
4. Save changes.
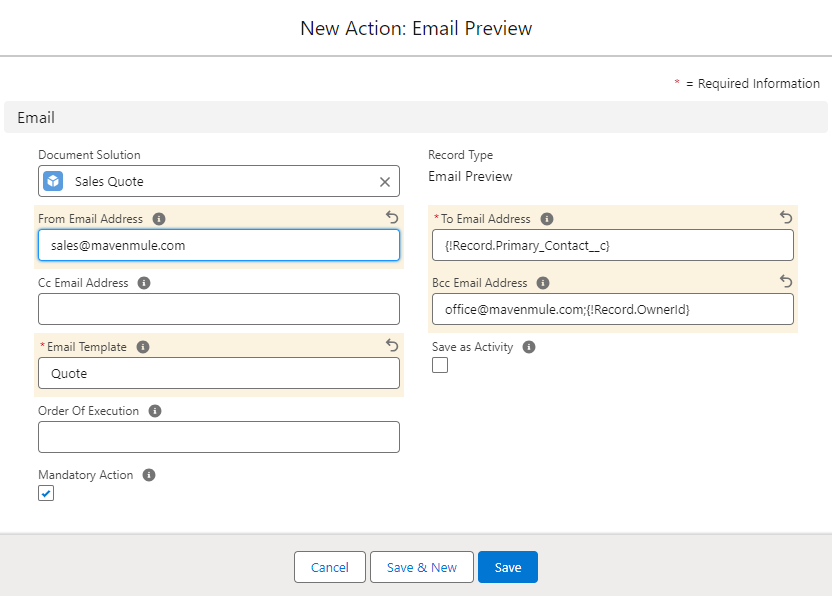
This Action is similar to the Email Autosend Action, with the difference that you have the option to review an email before sending it to the customer.
After the document generation process is over, email fields are populated with the data you define while setting up the Action. The generated document is also automatically attached to the email. Review the email, make any necessary adjustments, and then send it. The form for the "Email Preview" action is identical to that of Email Autosend.
The Order of Execution and Mandatory Action fields have the same functionality as was explained in the first Action.
¶ Copy Document to Salesforce
This Action allows you to copy a file generated and stored on OneDrive or Google Drive, and place it on the specified record in Salesforce. To accomplish that, you need the following data:
- ID of the destination record.
- Type of the Drive.
- ID of the desired file.
You can change the name of the file, define its format: either PDF or DOCX, and how the file is saved on Salesforce: as a file or an attachment.
However, this action stands out from the ones we described above.
First of all, you won't find it in the list of available actions on a Document Solution. This Action is only available in a Flow.
Secondly, it is not a post-generation Action. That means, you can execute Copy Document to Salesforce regardless of whether the document was generated or it was not even intended. Of course, you can embed this Action in the document-generating Flow and use data from the Flow elements to create a process that suits your business logic most.
We’ve provided instructions for using the Action both on its own and as part of a Flow. Follow the link to check it out.
¶ Merge Files
This Action allows you to merge two or more separate PDF files into one:
- You can merge the generated PDF file with PDFs that were generated earlier or uploaded to your Salesforce org.
- You can merge separate PDFs into one without generating the template.
All the PDF files that you want to merge should be preliminarily uploaded to Salesforce.
You won't find the Action in the list of available actions on a Document Solution. You can call it from the Flow or by inserting it with the code via the Developer Console.
Using code can be too technical, so we recommend checking out the article where we explain how to build the required Flow and use the Merge Files Action within it.
The Field Update, Delete, Move, and Share Google Document Actions are still available but only from the Flow