¶ PPTX Templates
In the steps below, we break down how you can create a presentation using data from Salesforce.
Currently, the Maven Add-in doesn't support PPTX templates.
¶ Add fields and expressions
With Maven Documents, you can insert Salesforce merge fields into the PowerPoint template, along with other information. Using such fields makes the template's data dynamic.
First of all, you need to have the prepared data in Salesforce and build the query with the needed structure using the Maven Document Query Builder.
Once you prepare all this, we can add some dynamic data.
-
Add merge fields.
- Place the cursor on the slide where you want to have the merge field.
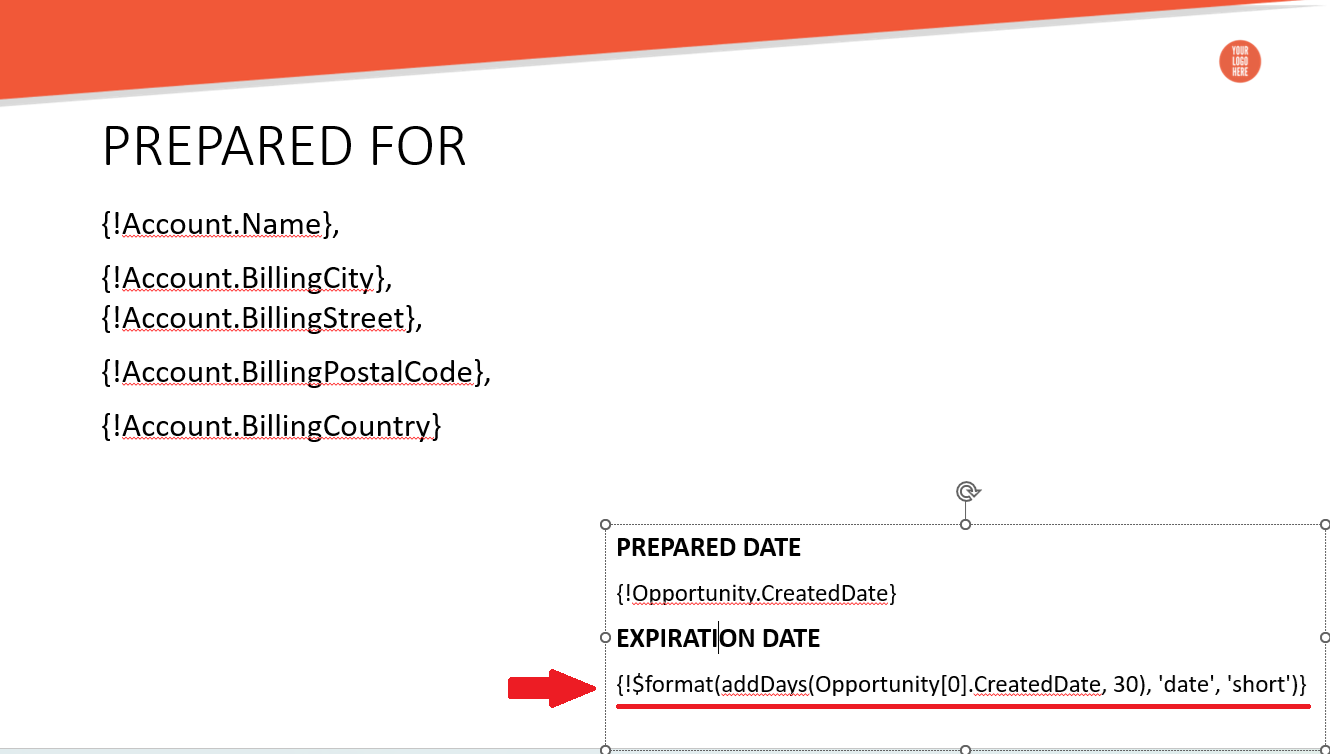
- Using information from the Query Builder, add the needed merge fields in the {!Object.Name} notation.
- Format fonts if needed.

-
When merge fields alone are not enough, you can use them as part of an expression.
- Compose the needed expression with merge fields using Playground.
- Copy the expression and place it on the slide.
¶ Insert elements
Apart from merge fields and expressions, PowerPoint templates support the following Maven Documents' elements:
¶ The Repeater element
It iterates through the records defined in the Value parameter and returns the content of a collection according to the specified structure.
The Variable parameter represents the current record in the iteration.
The Hidden parameter defines whether the content of the Repeater is visible in the generated document or not. The parameter supports expressions that result in true or false.
This element can nest other elements, such as Text, Link, or another Repeater, inside.
Follow the instructions below to place the Repeater element on the slide.
-
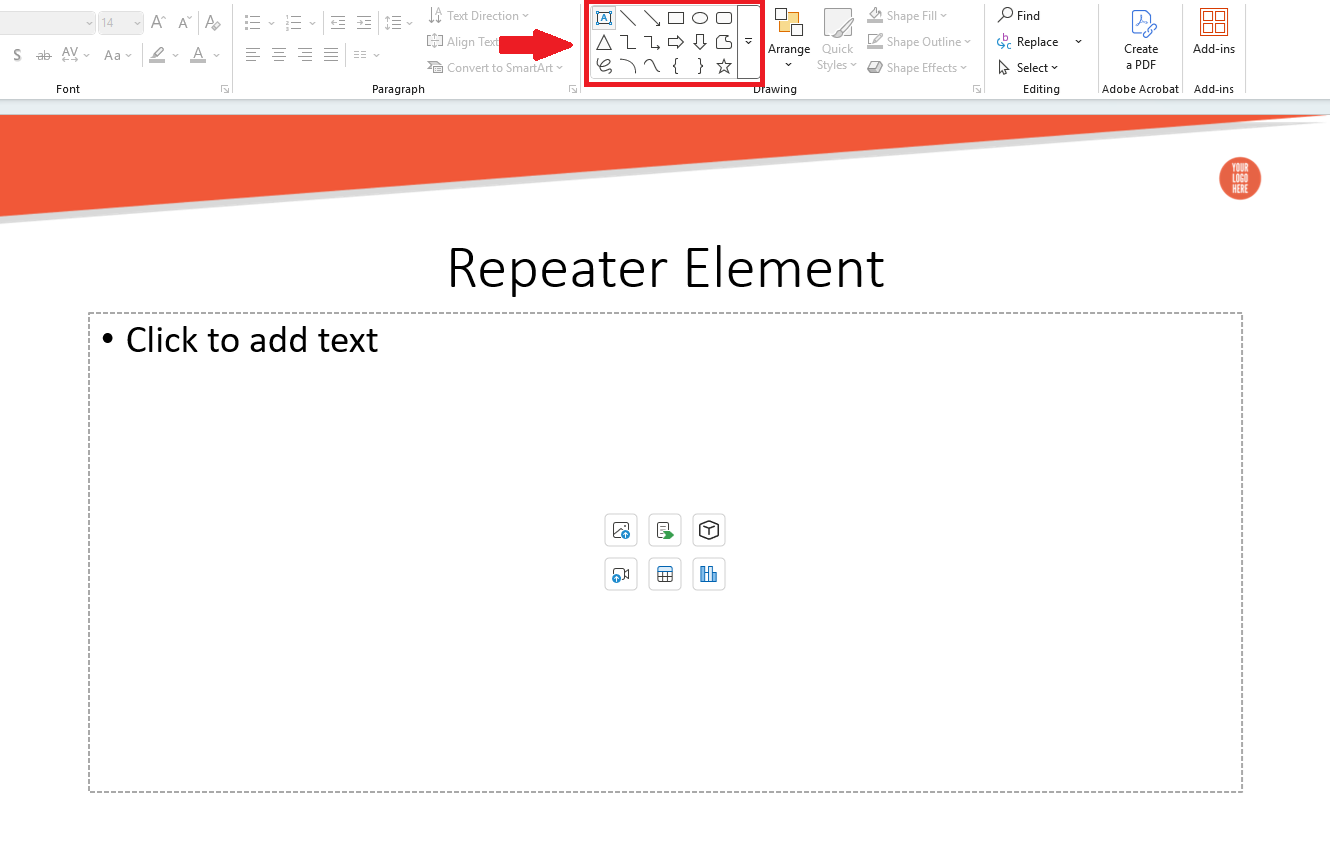
Insert the text area or ready-made shape from the PowerPoint collection.
-
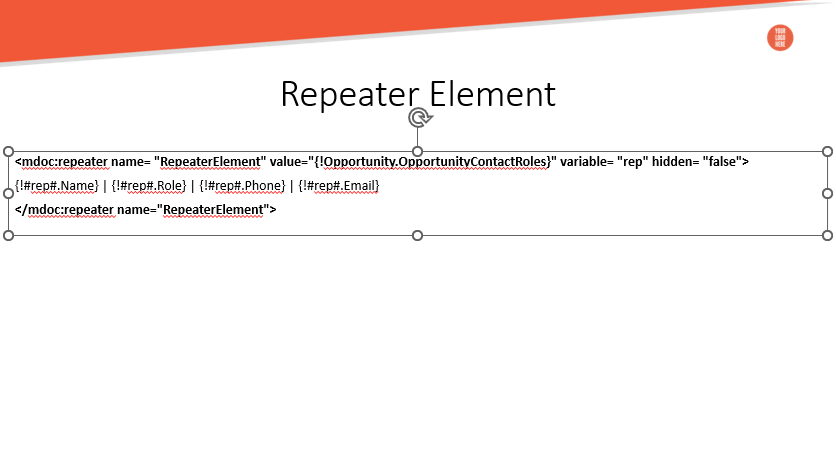
Insert the element's body in the added area or shape:
<mdoc:repeater name= "RepeaterElement" value="The needed collection of records" variable= "Variable Name" hidden="false">The repeating content.</mdoc:repeater name="RepeaterElement">
To get more detailed information about the element, check the following page.
¶ The Table element
The Table iterates through records defined by the Value parameter. For every record in the iteration, the table row is repeated.
The Variable parameter represents the current record in the iteration.
The RepeatingRow parameter is the index of the row to be repeated.
The Hidden parameter defines whether the content of the Table is visible in the generated document or not. The parameter supports expressions that result in true or false.
This element can nest other elements, such as Repeater, Text, or Link, inside.
Follow the instructions below to place the Table element on the slide.
-
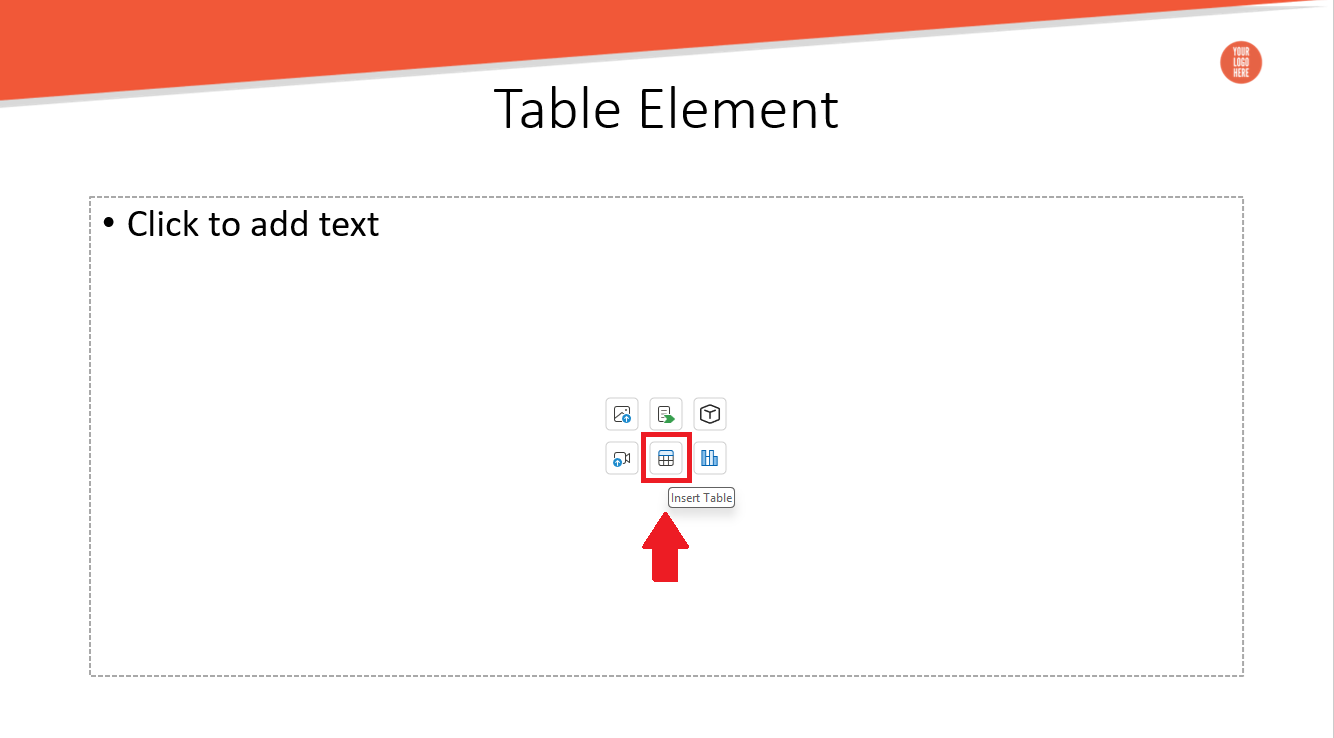
Add the built-in table from PowerPoint to the slide. Set the necessary number of rows and columns.
-
In the first cell, manually add the Table element's body:
<mdoc:table name="Table Element" value="The needed collection of records" variable= "Variable Name" repeatingRow="The order number of the row" hidden="false" />. -
Using the information from the Query Builder, populate the cells with the necessary data.
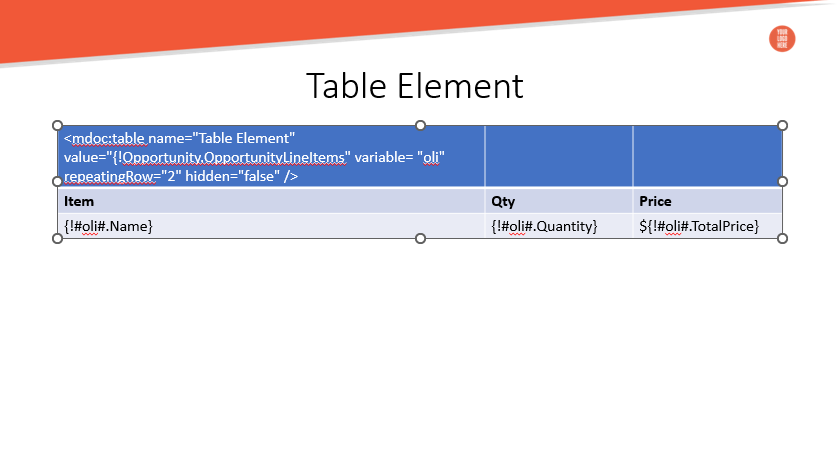
-
To hide rows or columns in the output table, use the Table Row or Table Column elements.
To get more detailed information about the element, check the following page.
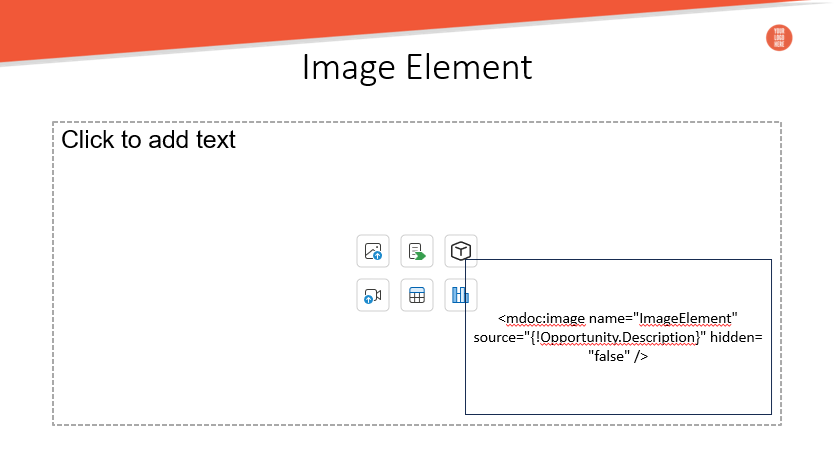
¶ The Image element
This element allows you to render an image from the specified URL or base64 data inside the defined shape.
The Source parameter can define the merge field containing the base64 data or the URL of the image. You can also place the image's URL/base64 data itself in that parameter.
The Hidden parameter defines whether the content of the Image is visible in the generated document or not. The parameter supports expressions that result in true or false.
-
Insert the ready-made shape from the PowerPoint collection.

-
Insert the element's body inside the shape:
<mdoc:image name="ImageElement" source="The image source" hidden="false"/>
To get more detailed information about the element, check the following page.
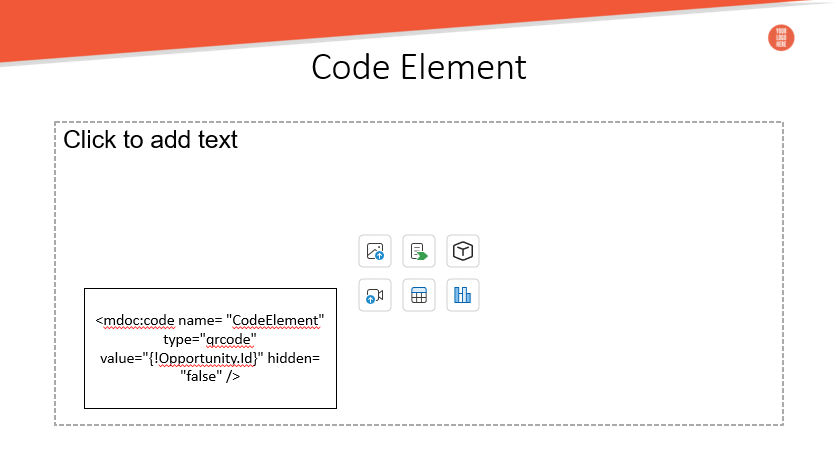
¶ The Code element
This element renders various types of codes, such as QR Codes, Barcodes, etc inside the defined shape.
The Type parameter defines the code type.
The Value parameter defines the merge field with the value that is replaced with the code image.
The Hidden parameter defines whether the content of the Repeater is visible in the generated document or not. The parameter supports expressions that result in true or false.
-
Insert the ready-made shape from the PowerPoint collection.

-
Insert the element's body inside the shape:
<mdoc:code name= "CodeElement" type="qrcode" value="The value that code represents" hidden="false"/>
To get more detailed information about the element, check the following page.
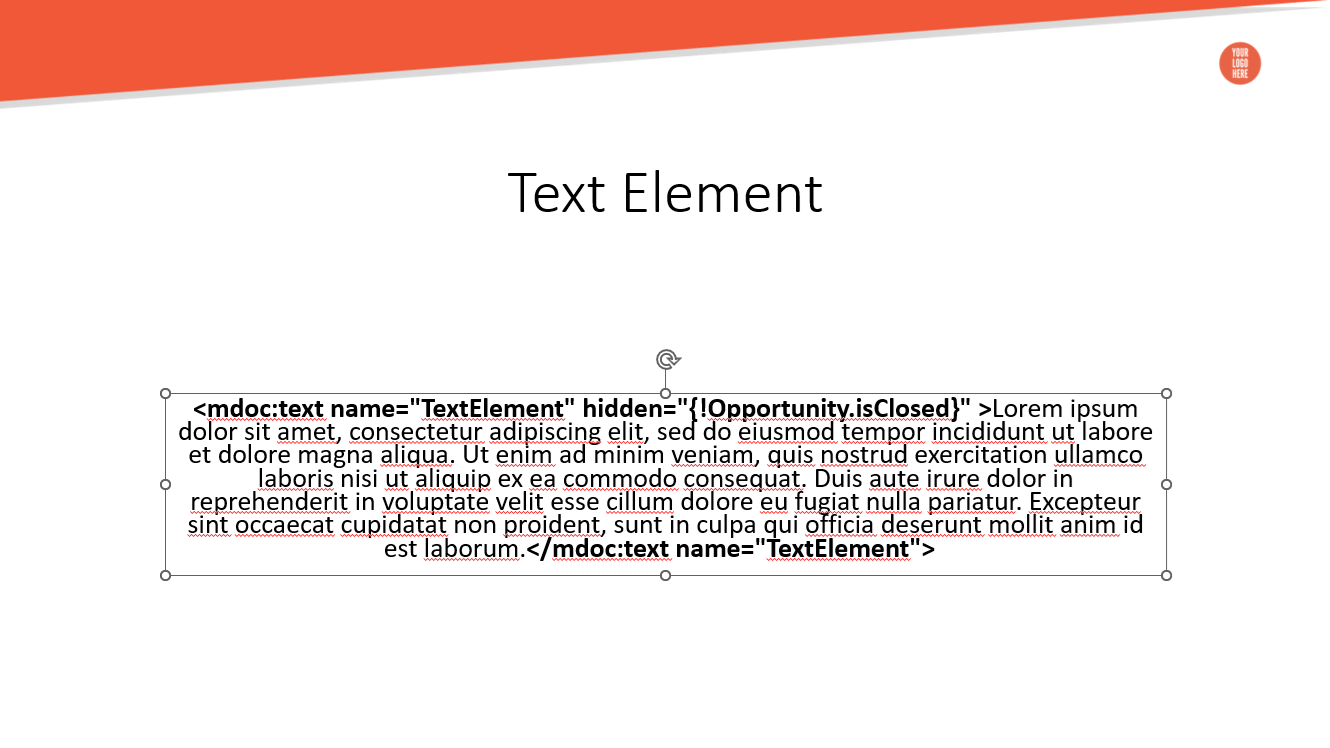
¶ The Text element
The element shows/hides only the inline part of the text. The body of the element contains text that is shown or hidden.
The Hidden parameter defines whether the content of the Text is visible in the generated document or not. The parameter supports expressions that result in true or false.
Insert the element's body in the needed place on the slide: <mdoc:text name="TextElement" hidden="Merge Field or Expression">Text Here</mdoc:text name="TextElement">.
To get more detailed information about the element, check the following page.
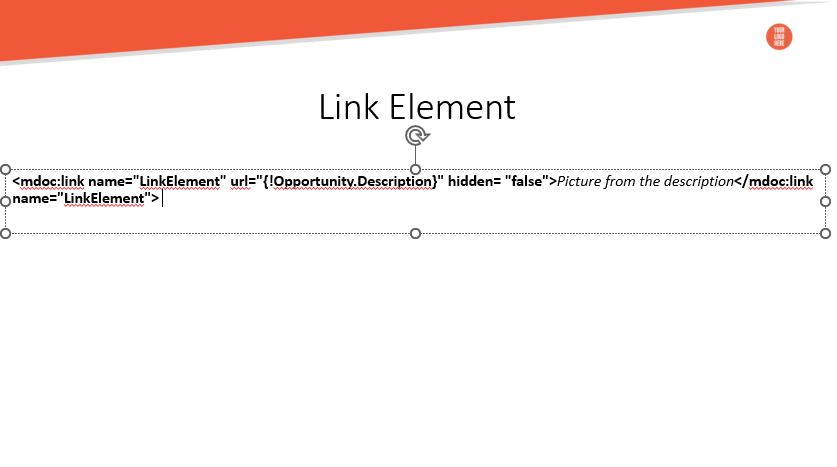
¶ The Link element
The element renders a hyperlink into the document. The body of the element contains the text of the hyperlink.
The URL is defined in the respective parameter.
The Hidden parameter defines whether the content of the Repeater is visible in the generated document or not. The parameter supports expressions that result in true or false.
Insert the element's body in the needed place on the slide: <mdoc:link name="LinkElement" url="Merge Field with the URL or the URL itself" hidden="false">Text that represents the link </mdoc:link name="LinkElement"> .
To get more detailed information about the element, check the following page.
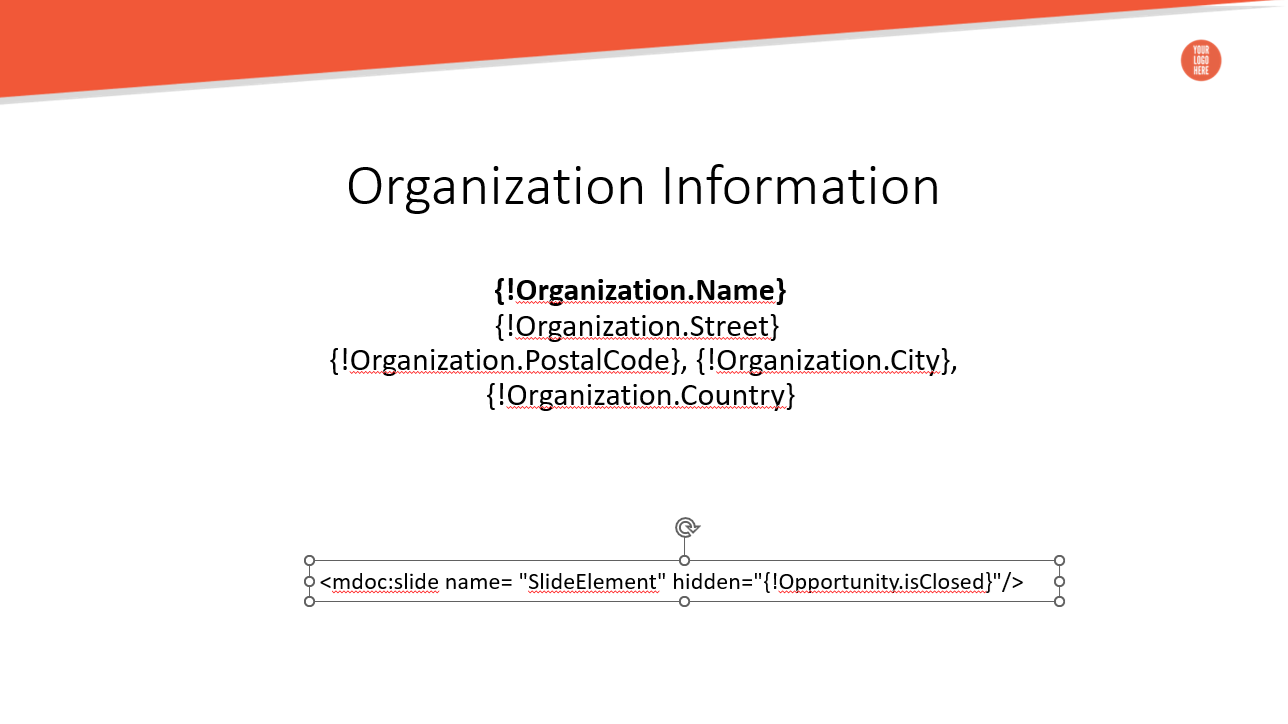
¶ The Slide element
It removes the slide that contains the element from the Google Slides presentation.
The Hidden parameter in this element defines whether the slide is removed, not the element itself. Even if there is any content on the slide, it still gets removed if the Hidden parameter results in true.
Insert the element's body in the needed place on the slide: <mdoc:slide name= "SlideElement" hidden="Merge Field or Expression"/>
To get more detailed information about the element, check the following page.
¶ Upload the PPTX Document to the Document Template
The offline PPTX documents are uploaded to the Document Template record differently from connecting the online PPTX documents.
¶ Offline
-
Go to the needed Document Template record and navigate to the Files section.
-
Click the Add Files button.

-
Click Upload and select the needed PowerPoint file from your device.

-
Once the file is successfully uploaded, click Done.
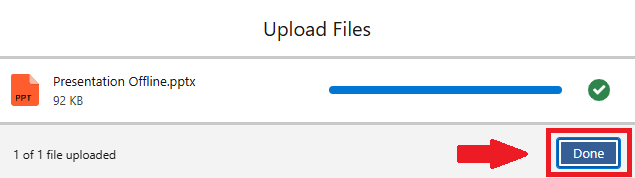
After that, the respective documents appear in the Files section.

¶ Online
-
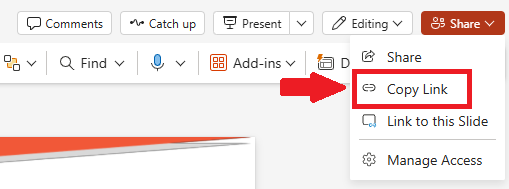
Go to the online PPTX document and in the Sharing settings, click Copy Link.
-
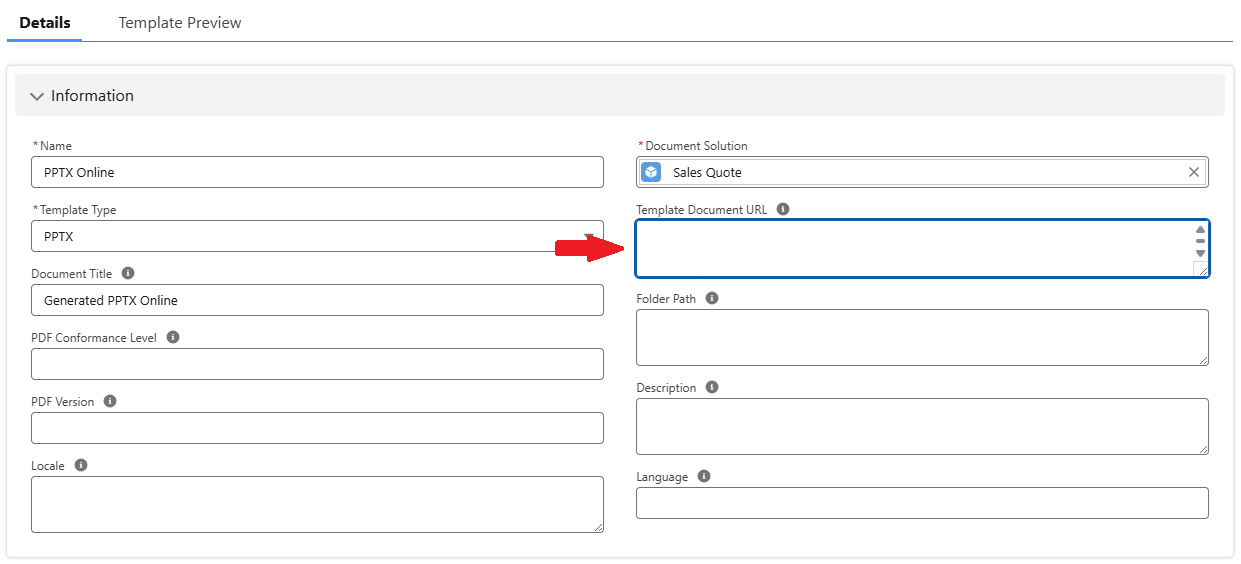
Go to the needed Document Template record and edit the Template Document URL field under the Details tab.
-
Paste the copied URL in the Template Document URL field and save changes.
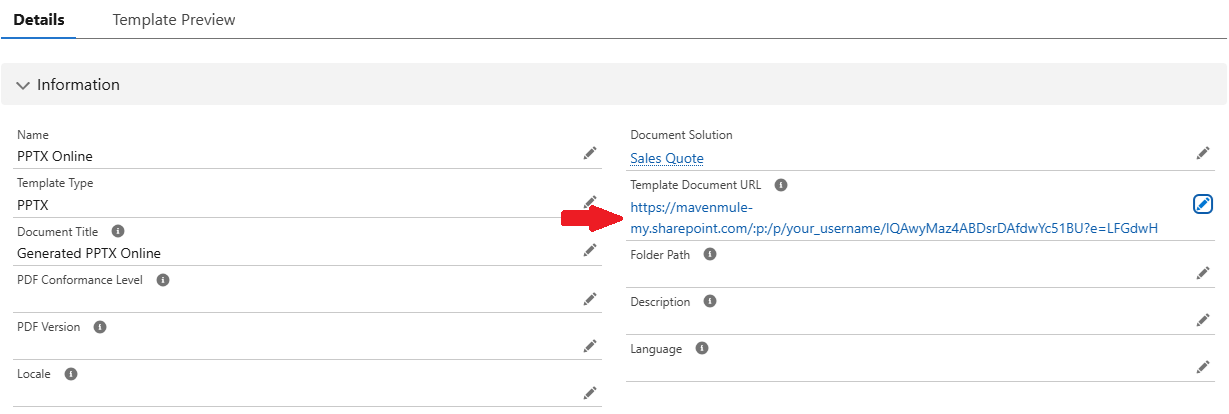
After the file is uploaded to the Document Template, you can generate it with Maven Documents.