¶ Elements Reference for DOCX files
This is the reference page for all the Elements you can use in DOCX templates. Here we provide basic information and the full list of available parameters.
Basic information contains the description of the element and covers the following qualities:
selfClosing. Represents whether an element is closed immediately, as opposed to standard HTML tags, which have both an opening and a closing tag.displayType. Represents whether an element is displayed in the inline or block type.containers. Shows where an element can be present inside the document: header, footer, and/or body.
The list of parameters differs from element to element. However, there are basic parameters common to every element:
| Parameter | Type | Description | isRequired | Default Value | Expression |
|---|---|---|---|---|---|
| name | string | Name of the element. | true | - | false |
| hidden | boolean | Determines whether the element is visible or hidden. | false | false | true |
The Expression column indicates whether an Expression can be used as that parameter's value.
¶ Repeater (mdoc:repeater)
The iteration component outputs the content of a collection according to a structure that you specify. The whole body of the Repeater element is shown for every record in the collection. This element can nest other elements, such as a Table, a Paragraph, or an Image, inside.
- selfClosing: false
- displayType: block
- containers: body
¶ Parameters
| Parameter | Type | Description | Required | Default Value | Expression |
|---|---|---|---|---|---|
| value | string | Collection of records to use in the Repeater. | true | - | true |
| variable | string | The current record in the iteration. | true | - | false |
| mode | string | Defines whether values are repeated under each other or next to each other. Available values: standard, append. |
false | Standard | true |
¶ Example
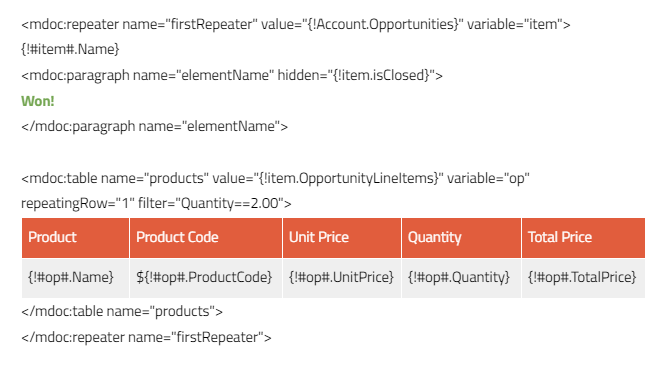
The hash # is used to wrap around the "item" and "op" variables referenced inside the Repeater and the Table.
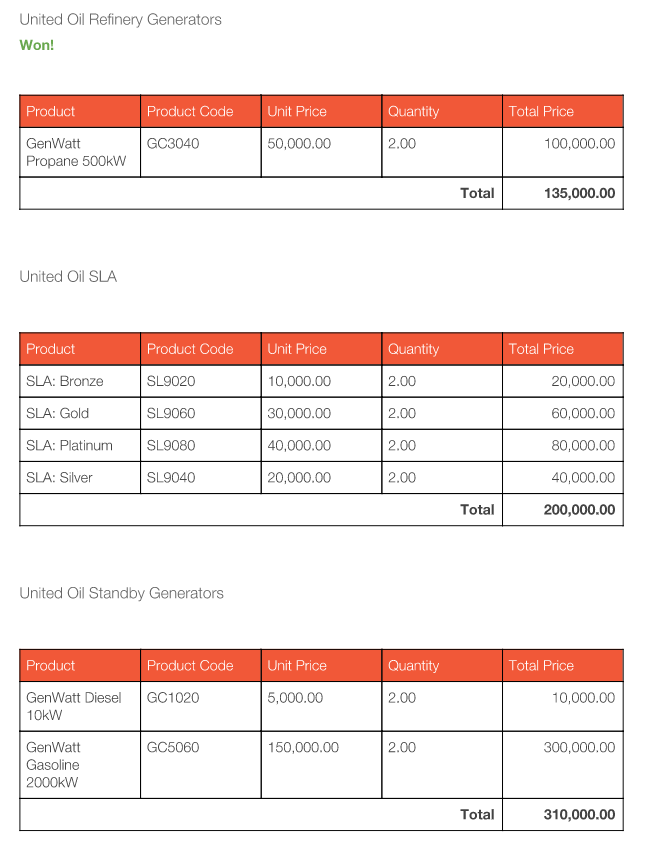
The example above generates something like this (as you can see, the Repeater has the Table and Paragraph elements nested inside):
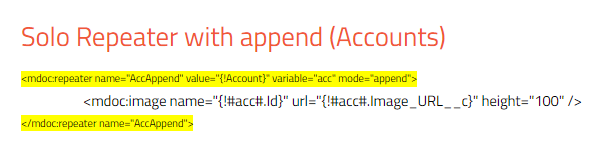
¶ Append Mode
If you insert the "Image" element inside the Repeater and need to have the rendered images "appended" side by side to each other, use the Append Mode in the Repeater:
So if you have two images linked in the Description field on the Contact Object, the result looks like this:

There is also a possibility to use the Index Expression inside the Repeater. This expression returns the index of the repeating variable inside the Repeater.
¶ Table (mdoc:table)
This element inserts a table that's defined to iterate over a collection of data. The element displays information about one item per row. The body of the element contains a table in which one row is repeated through the iteration, as the element adds as many rows as there are records in the collection.
- selfClosing: false
- displayType: block
- containers: body
¶ Parameters
| Parameter | Type | Description | Required | Default Value | Expression |
|---|---|---|---|---|---|
| value | string | Collection of records to use in the table. | true | - | true |
| variable | string | The current record in the iteration. | true | - | false |
| repeatingRow | integer | The index of the row to be repeated. | false | 1 | true |
¶ Example

The hash # symbol is used. You must place # before and after any Variable referenced inside Tables and Repeaters.
The example above generates a table like the one shown in the screenshot below. The table expands with as many rows as there are records:
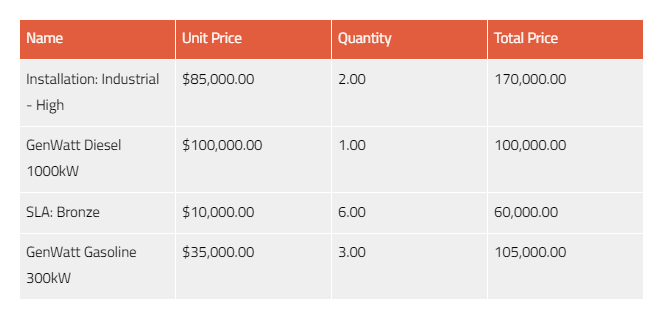
There is also an option to use the "Index" expression inside the Table. This expression returns the index of the repeating variable inside the Table.
Just place the cursor inside the Table and insert the "Index" expression in the selected place.
¶ Paragraph (mdoc:paragraph)
Use the Paragraph element if you want to show/hide the entire section of the document.
- selfClosing: false
- displayType: block
- containers: header, footer, or body
¶ Example
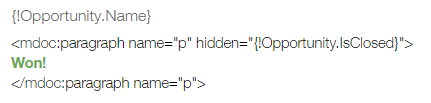
In the example above, the Paragraph is only shown if the Opportunity.IsClosed field is false. Otherwise, it is hidden.

If you want to hide the last paragraph in the template, make sure that it ends with an empty row. Otherwise, it could throw an error when generating the document.
¶ Image (mdoc:image)
This element allows you to render an image from the specified URL or base64 data.
- selfClosing: true
- displayType: inline
- containers: header, footer, or body
¶ Parameters
| Parameter | Type | Description | Required | Default Value | Expression |
|---|---|---|---|---|---|
| source | string | The merge field that holds base64 data or the URL of the image. Or the URL/base64 data of the image itself. | true | - | true |
| width | integer | Width of the image in pixels. | false | - | true |
| height | integer | Height of the image in pixels. | false | - | true |
¶ Example
¶ URL
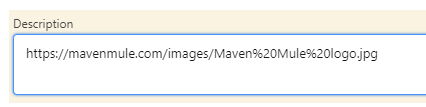
You can have a URL of the image as the source for the image. Here is how it works:
-
Fill the Salesforce field with the URL of the image.
-
Insert the field into the document using the Maven Add-in.
-
Generate the document and get the content of the field rendered into the image.

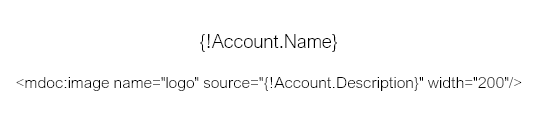
The example above renders the image from the URL that's in the Account's Description field. Width is set to 200px, while height is adjusted to keep the aspect ratio.
¶ base64
You can have base64 code as the source for the image. The procedure is the same:
-
Fill the Salesforce field with the base64 code.
-
Insert the element into the document using the Maven Add-in.
-
Generate the document and get the content of the field rendered into the image.
)
The example above renders the image from the base64 code that's in the Account's Description field. Width is set to 200px, while height is adjusted to keep the aspect ratio.
If you wish, you can put the URL of the image or the base64 code straight into the element in the document.
The outcome is the same as with the merge field.

¶ Rich Text (mdoc:richText)
We don’t currently support Rich Text fields with images.
Rich Text is used to insert the Rich Text Area field in the document. You would first need to add such a field to the query in the Query Builder tab of Maven Documents.
- selfClosing: true
- displayType: block
- containers: body
¶ Parameters
| Parameter | Type | Description | Required | Default Value | Expression |
|---|---|---|---|---|---|
| value | string | The merge field that holds the rich text. | true | - | true |
¶ Example
The element in the document looks like the following:

Once the document is generated, the content of the corresponding field is rendered.

¶ Code (mdoc:code)
Renders various types of codes such as QR Codes, Barcodes, etc.
- selfClosing: true
- displayType: inline
- containers: header, footer, or body
¶ Parameters
| Parameter | Type | Description | Required | Default Value | Expression |
|---|---|---|---|---|---|
| type | string | Code type. | true | - | true |
| value | string | The merge field holds a value that is replaced with the code image. | true | - | true |
| scale | integer | The scale of the rendered code. Must be an integer > 0. | false | 2 | true |
| rotate | string | Defines the rotation of the code image to one of the four orthogonal orientations. Available values: N, R, L, I. |
false | N | true |
| includeText | boolean | Displays text below the code for some code types (e.g. code128). | false | false | true |
Rotation values:
- N. Normal, not rotated.
- R. Clockwise, right.
- L. Lounter-clockwise, left.
- I. Inverted.
¶ Example
<mdoc:code name="qr" type="qrcode" value="{!Opportunity.Account.Name}" />
The example above renders the QR code with the Account's name as the code value.

¶ Page Break (mdoc:pageBreak)
The Page Break element dynamically renders a page break into the document.
- selfClosing: true
- displayType: block
- containers: body
¶ Example
<mdoc:pageBreak hidden="{!Opportunity.IsClosed}"/>
The example above adds a page break into your document if the used Opportunity record is not closed.
¶ Text (mdoc:text)
The Text element shows/hides and formats only the inline part of the text.
The body of the element contains the text that is shown or hidden, or formatted.
- selfClosing: false
- displayType: inline
- containers: header, footer, body
¶ Parameters
| Parameter | Type | Description | Required | Default Value | Expression |
|---|---|---|---|---|---|
| font | string | Defines the font of the element's content. | false | none | true |
| size | number | Defines the size of the element's content. | false | none | true |
| color | string | Defines the color of the element's content. | false | none | true |
| bold | boolean | Defines whether the element's content is bold. | false | false | true |
| italic | boolean | Defines whether the element's content is italic. | false | false | true |
| underline | boolean | Defines whether the element's content is underlined. | false | false | true |
| underlineStyle | string | Defines the style of underline. Not applied if underline=false. Available values: none, single, words, double, dotted, thick, dash, dotDash, dotDotDash, wavy, dottedHeavy, dashHeavy, dotDashHeavy, dotDotDashHeavy, wavyHeavy, dashLong, wavyDouble, dashLongHeavy |
false | none | true |
| underlineColor | hex string | Defines the color of the underline. Not applied if underline=false. | false | none | true |
Such parameters as font, underlineStyle, and underlineColor may not be applied when the output is a PDF or DOCX file on OneDrive because of the format and platform limitations.
But, for example, when a DOCX file is downloaded from OneDrive, the desktop version has all the formatting applied.
¶ Example

In the example above, the inline text is shown for the Opportunity.IsWon field is false. Otherwise, the element is hidden.

¶ Link (mdoc:link)
The Link element renders a hyperlink into the document. The body of the element contains the text of the hyperlink, while the URL is defined in the attribute.
- selfClosing: false
- displayType: inline
- containers: header, footer, body
¶ Parameters
| Parameter | Type | Description | Required | Default Value | Expression |
|---|---|---|---|---|---|
| url | string | The merge field that holds the URL. Or the URL value itself. | true | - | true |
¶ Example

The example above creates the Link element with the URL stored inside the Opportunity.Description field.

¶ Table Row (mdoc:tableRow)
This element is only referenced inside the Table element. Its purpose is to hide rows of the Table element based on some criteria.
- selfClosing: true
- displayType: block
- containers: body
¶ Parameters
| Parameter | Type | Description | Required | Default Value | Expression |
|---|---|---|---|---|---|
| hidden | boolean | Defines whether the row is removed. | false | - | true |
| indexes | integer | Comma-separated row indexes that are hidden if the Hidden paremeter is true. | true | - | true |
The Hidden parameter in this element has a different meaning from the one we mentioned at the beginning of this page. This Hidden parameter defines if the row is removed, but not the element itself.
¶ Table Column (mdoc:tableColumn)
Table Column is similar to the Table Row element. The only difference is that the Table Column hides columns instead of rows.
- selfClosing: true
- displayType: block
- containers: body
¶ Parameters
| Parameter | Type | Description | Required | Default Value | Expression |
|---|---|---|---|---|---|
| hidden | boolean | Defines whether the column is removed. | false | - | true |
| indexes | integer | Comma-separated column indexes that are hidden if the Hidden paremeter is true. | true | - | true |
The Hidden parameter in this element has a different meaning from the one we mentioned at the beginning of this page. This Hidden parameter defines if the column is removed, but not the element itself.
¶ Example
This example includes both the Table Row and Table Column because they have similar definitions and are most likely used together.
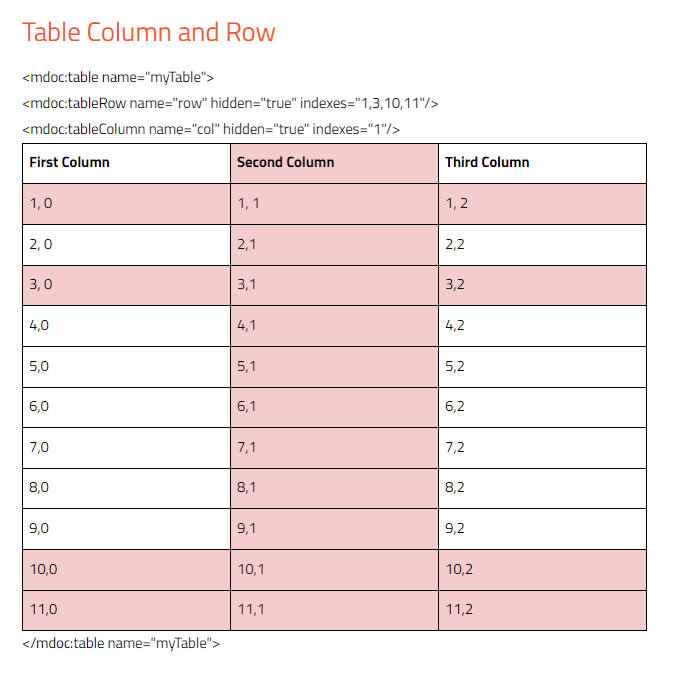
The coordinates of the cells are row/column. Numbering starts from zero.
In the image above, colored rows on indexes 1, 3, 10, and 11 should be hidden. Only the second column on the index of 1 should be hidden.
Here is the result:
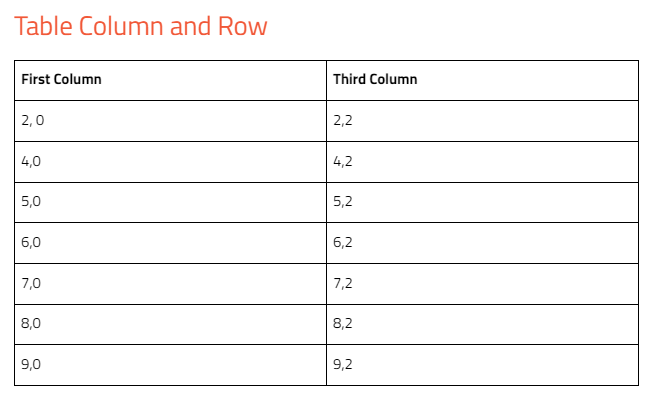
The overall table width stayed the same.
¶ Include (mdoc:include)
The element allows you to take elements from another template or the template itself and use them to build a new, unique document.
- selfClosing: true
- displayType: inline
- containers: body
¶ Parameters
| Parameter | Type | Description | Required | Default Value | Expression |
|---|---|---|---|---|---|
| sourceType | string | A list of available source types. | true | - | false |
| source | string | A list of available Document Templates or merge fields that can hold the ID of the needed document as a value. | true | - | false |
| elementName | string | A list of elements from the defined template. Available only if Content Type is the Document Template. | true | - | false |
¶ Example
The Include element below inserts the element called RichText from the Template DOCX Document Template into the template you are working on.

There's also an option to insert the whole content of the document from the template you've chosen. For that purpose, you can use the Salesforce File Source Type. Select the Include the Whole Document option in the Source parameter of the Document Template Source Type.
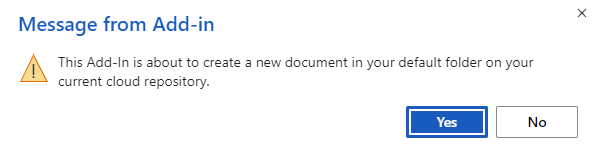
Due to Microsoft limitations on online DOCX files, you can't currently select the specific element from the needed Document Template. Once you pick the template in the "Source" field, a warning message appears.
However, if you close the message and insert the Include element into your document, you include the whole content of the selected Document Template. If needed, you can manually add the needed element from the required Document Template by putting theelementName="The Name of the needed element"attribute into the body of the inserted Include element.