¶ Google Docs Templates
The Maven Add-on is an add-on that you can install and use to build a template document with the data you have on Salesforce.
¶ Install the Maven Add-on
-
Go to https://workspace.google.com/u/0/marketplace/app/maven_documents/681581155147?flow_type=2 and click Install.
-
Click Continue in the appeared message.
-
In the opened window, select the Google account you want to use.
-
Choose the parts of your Google data Maven Documents Add-on can access and click Continue.

Be aware that our Add-on needs these permissions to deliver its capabilities. If some of the permissions are not given, some core features might not work as expected. To make sure that you'll get all of the Add-on's capabilities, give all the requested permissions.
-
Read the information message and click Done.
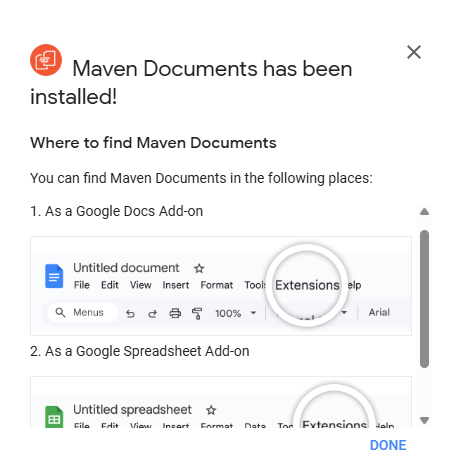
After completing these steps, you can create your template in Google Docs and use the Maven Add-on.
¶ Run the Maven Add-on
-
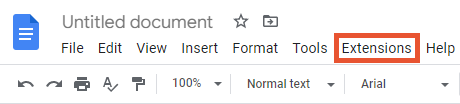
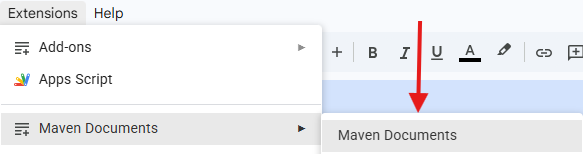
Open the Google Doc that you've connected to the Document Template in Maven Documents and click on the Extensions tab.
-
Hover over Maven Documents in the dropdown list and click on the Maven Documents.
-
You'll find the Add-on work pane on the right side of Google Doc. Select the needed option to authorize:
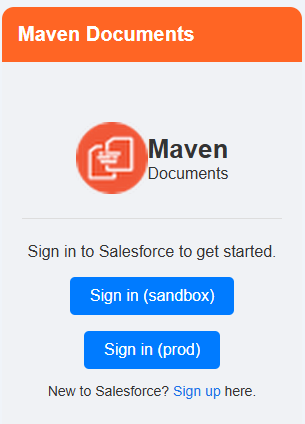
- Sign in (sandbox). Retrieves data from the Sandbox Salesforce Org.
- Sign in (prod). Retrieves data from the Production Salesforce Org.
-
Finish the authorization process using your credentials in the new opened browser tab.
Once you finish, the objects and fields from the query from the connected Document Solution are reflected in the Add-on.
¶ Meet the Maven Add-on
Before you start building the template, let's have a glance at what we call the Maven Add-on's work pane.
-
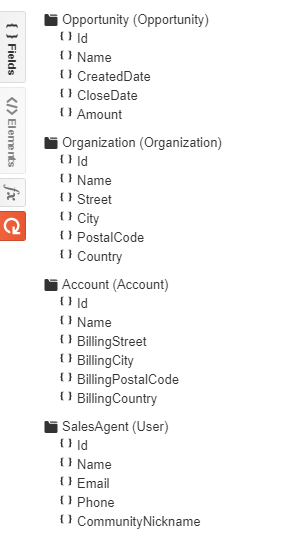
The {} Fields tab.
Here you'll find the objects and fields you added to the query in the Document Solution. Each object and field can be inserted into the document with a single click.

-
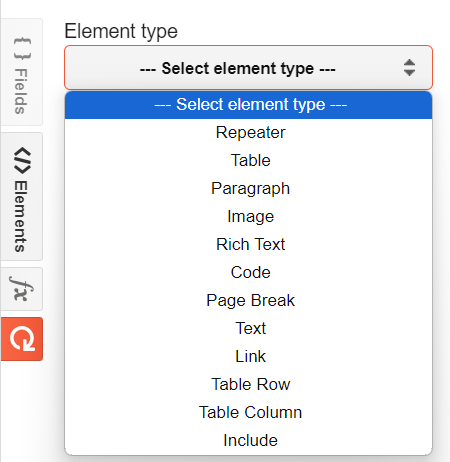
The </>Elements tab.
Here you have a picklist with the elements that could be inserted and used in the document. For detailed information on every element, you can check the Google Docs Elements reference page.
-
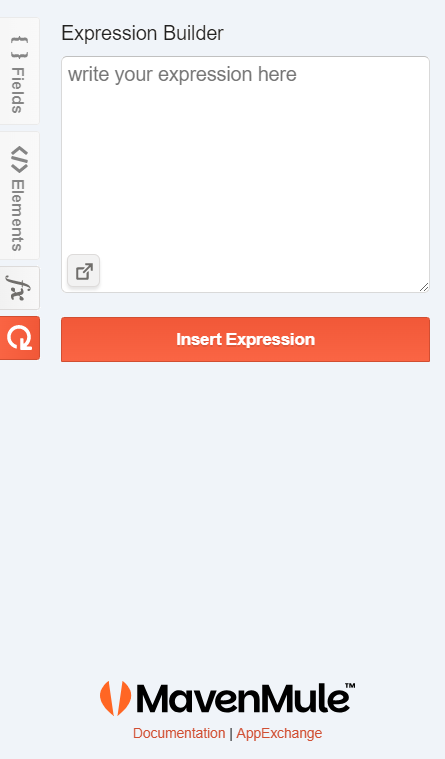
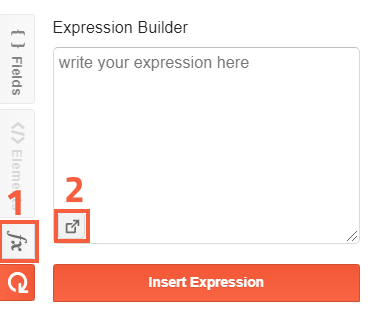
The fx or Expression Builder tab.
Expression Builder lets you create expressions (similar to formula fields in Salesforce) without needing a formula field directly on your document. More on how Expression Builder operates can be found in the corresponding sub-section. You can also read more about expressions and their syntax on the Expressions page.
-
The Refresh Nodes button.
This button serves two purposes:- Reflect changes made on the Salesforce side. For example, you've changed the name of an object or edited the query in the Query Builder tab on Maven Documents. After clicking Refresh, you will see the changes in the Add-on.
- The second purpose is to refresh the context inside the document to see fields from sub-queries. For example, if the cursor is placed inside a repeater or table, which iterates through a record, its name and included fields will also appear in the list of fields in the Add-on after refreshing.
¶ Build Templates using the Maven Add-on
In Google Docs, you can build your templates using everything that they have to offer. However, Maven Documents allows you to place the Salesforce data in the document. That's what the Maven Add-on is used for.
After successfully adding the document ID to the Document Template in Maven Documents, the Fields section in the Add-on will now show all the fields from the root queries that you created in the previous section. The fields from the OpportunityLineItems query are not yet available, as their availability depends on the context.
If the fields are not showing, click the Refresh button.
Click the desired field, and it will be inserted into the document. The fields from the Add-on are shown in the {!QueryName.FieldName} notation. You can use that notation to add the fields manually, but in most cases, the Add-on is the easier option.
Now it's time to add some fields to your quote document. Let's see how you can do that:
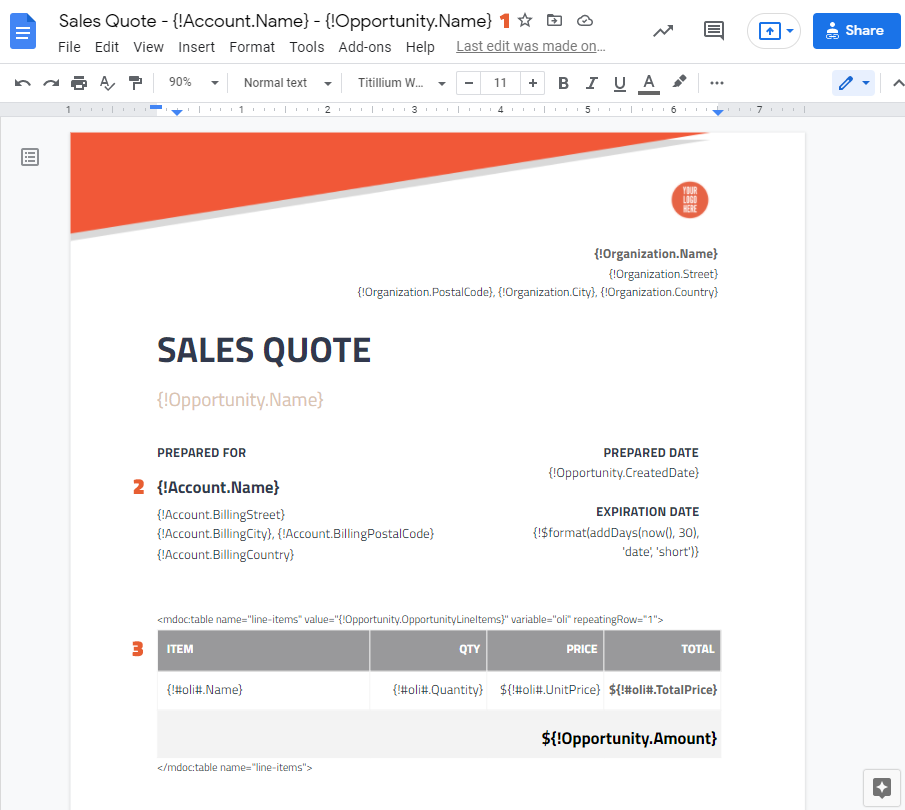
- From the Account and Opportunity queries, you use the Name fields in the title of the document.
- From Account, you use the Billing Address fields. From Opportunity, take the CreatedDate field.
Pretty simple, right? All the fields you've put using the Maven Add-on or manually in the {!QueryName.FieldName} notation is dynamic. It means they depend on the results that the query returned.
You need to show the information about Opportunity's products from the OpportunityLineItems sub-query. For a sub-query to be available in the Add-on, you need to be in a specific context. Sub-queries can only be accessed from "inside of an element" that belongs to its parent query (the Repeater or Table Element).
Let's see how you can do that:
-
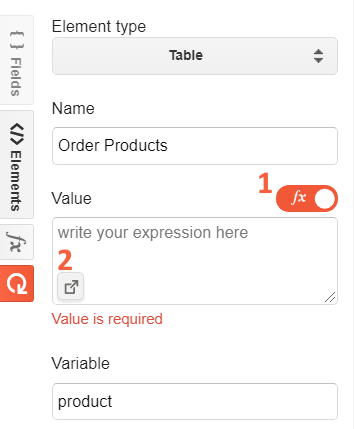
Place the cursor where you want the products to be shown. In the Add-on, open the Elements tab.
-
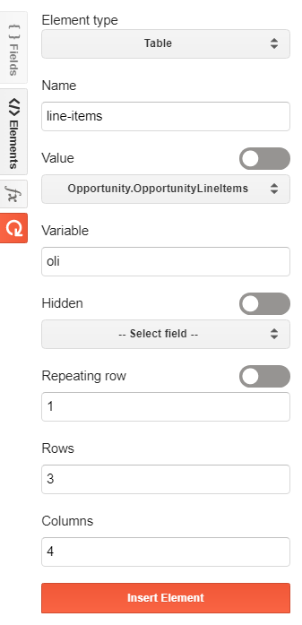
Select the Table Element. The Table iterates through records selected in the Value parameter, and for every record, in the iteration, the table row is repeated. The Variable parameter represents the current record in the iteration.
Referencing variables inside Tables and Repeaters requires you to place the # (hash sign) before and after the name of variables.
-
Put the following values in:
- Name: line-items
- Value: Opportunity.OpportunityLineItems
- Variable: oli
- Repeating row: 1
- Rows: 3
- Columns: 4
-
Leave the Hidden parameter as it is and click Insert Element.

Now, when the Table is inserted, you need to modify a few things.
Since the Table has 4 columns, each column is used for one field from the product. The first row (row 0) is the header row and is filled with field names. As for the bottom row (row 2), you put "Total Opportunity Amount" there by adding the field from the Maven Add-on. Now, all you need to do is fill in the repeating row (row 1) with field values.
Place the cursor inside any cell of the Table and click the Refresh button to get the fields from the oli variable in the Add-on. Then insert those fields into their corresponding cells in the middle row. The Table should look as displayed in the previous screenshot (point 3).
On the second page of the template, you’ll add additional content related to the terms and conditions. Use the standard features of the Google Docs editor to format and edit your content. The Maven Add-on lets you insert placeholders to automatically populate the Account Name and delivery period.
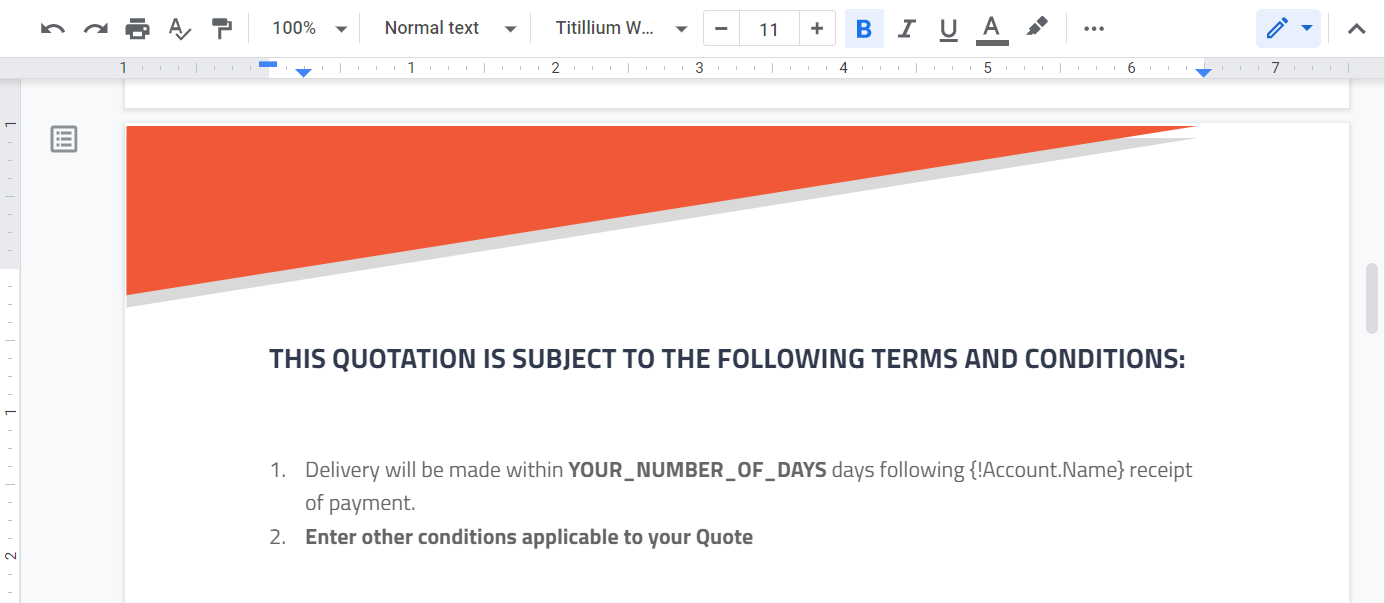
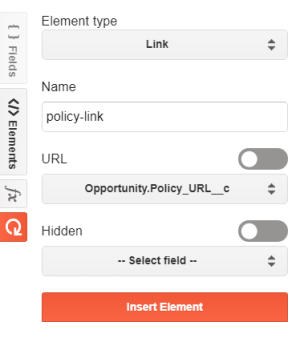
In the second paragraph, for example, you can add a hyperlink that points to the privacy policy related to the Opportunity. First, there should be such a field on Salesforce.
To insert the Link element inside the document, follow the next steps:
-
Place the cursor in the text where you would like to insert the link and click the Refresh button in the Add-on.
-
Select the Link element.
-
Put the following values in:
- Name: policy-link
- URL: Opportunity.Policy_URL__c
-
Leave the Hidden parameter untouched and click Insert Element.
-
In the body of the inserted element, type the text that you would like to display as a link.
On the third page of the template, you'll add payment details, including the company name and address. In the Payment Details paragraph, you can write any specific information according to your quote.
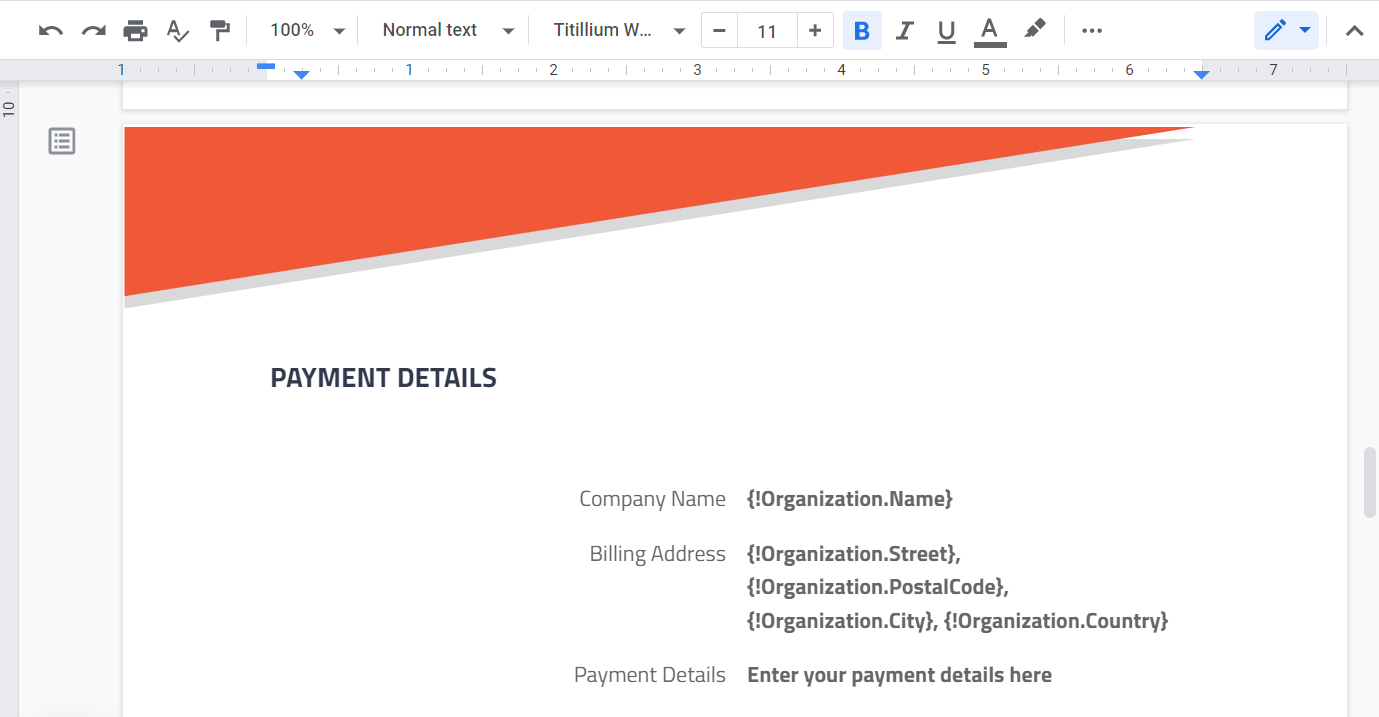
You can also add a payment code that can be used directly from mobile banking applications. To do this, you can use the Code element. Again, don't forget to create the corresponding field in Salesforce, filled with the content required by the PDF417 standard for the code to work.
Insert the payment code following the instructions:
-
Place the cursor in the document where you would like to insert the code and click the Refresh button in the Maven Add-on.
-
Select the Code element.
-
Use the following values:
- Name: payment-code
- Type: PDF417
- Value: Opportunity.Payment_Code_Data__c
-
Leave the remaining parameters empty and click Insert Element.
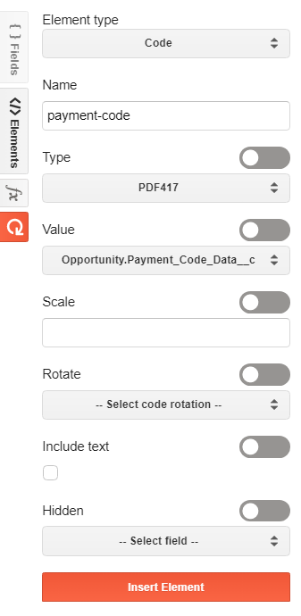
You are left to configure the last page of the Sales Quote template. This page will contain customer contact details, taken from the Opportunity Contact Roles and Sales Agent queries.
To insert the customer contacts, you can use the already-known Table element:
- Place the cursor where you want the information to be shown. In the Add-on, open the Elements tab.
- In the Element Type, field select the Table element.
- Fill the fields in with the following values:
Name: contacts
Value: Opportunity.OpportunityContactRoles
Variable: con
Repeating row: 1
Rows: 2
Columns: 4 - Leave the Hidden parameter untouched and click Insert Element.

When the Table is inserted, fill its cells with the needed data.
- As in the previous example, the first row will be the header row. So, populate its cells with the names of the fields.
- Put the cursor in the second row and refresh the query. With that move, you'll have the fields from the sub-query appear in the Add-on.
- Insert the needed fields inside the respective cells of the table.
This is what the template page looks like:
Now that you have the template, you can move on to the final step: generating the document. But to do that, you first need to set up Button Configuration.
¶ Creating Expressions with Expression Builder
The Expression Builder lets you create expressions (similar to formula fields in Salesforce) without needing a formula field. You don’t need to create formula fields just for your documents. Instead, you can build them directly within the document!
Here are a few examples of what you can do using Expressions and Expression Builder:
- Display or hide text, images, tables, etc., if certain criteria are met.
- Format numbers (e.g., total sum of money).
- Modify a date (e.g., 30 days from now).
- Count and Sum elements in a list.
You can read more about expressions and their syntax on the Expressions page.
Let's see how you can create a simple expression and add an expiration date to the quote. In this example, it expires 30 days after the quote is generated
Place the cursor where you want your date to be inserted, and follow the next steps:
-
Open the Expression Builder from the sidebar.
-
Click on the icon in the bottom left of the expression input field to open the Expression Builder.
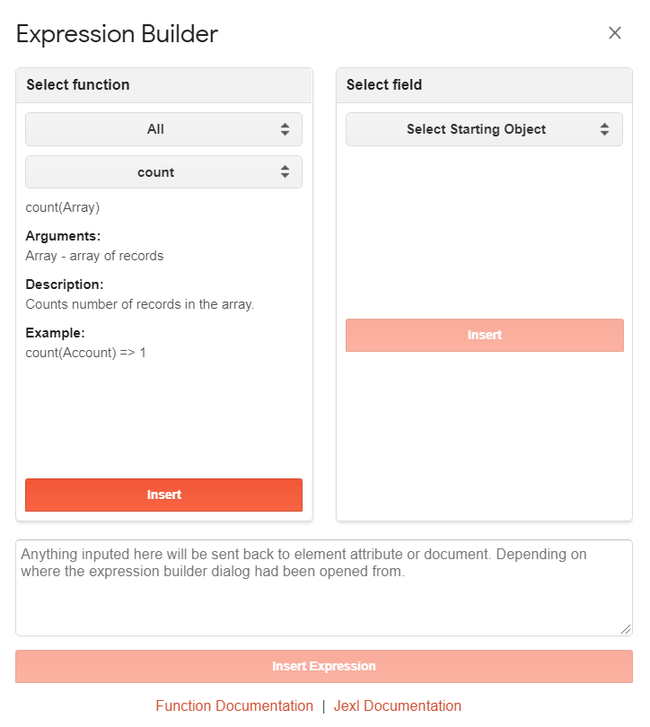
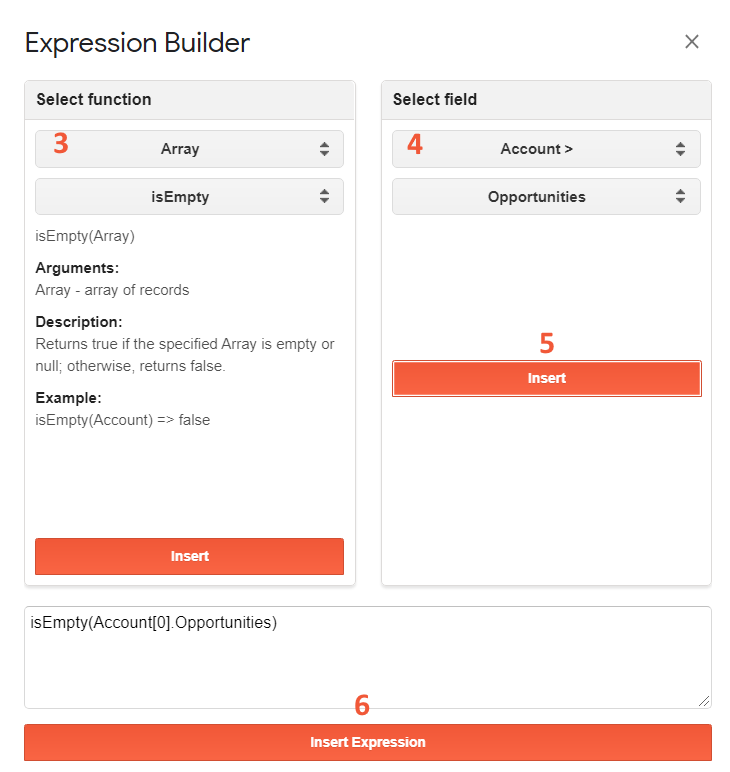
First of all, you can find all the available functions in the Select function menu. The first dropdown menu filters functions by categories (date, number, string, etc.), and the second dropdown menu contains filtered functions you can use.
You can also insert Salesforce fields into expressions by using the dropdown in the Insert field menu (an arrow (>) next to a field suggests that it's a relationship field - e.g., Account > Contact > ...).
Before inserting the function or a field, verify that you've selected the text you want to replace in the text field below.
-
From the Select function menu, choose Date and then choose addDays. Click Insert.
-
You are going to replace DateTime in the expression with the current date (which is a function). From the "Select function" menu, choose Date, then Now.
-
Select DateTime in the text field below. Click Insert. This will replace DateTime with the now() function.
-
Replace NumberOfDays with 30.
-
Click Insert Expression. This inserts the expression back into the Expression Builder view. Click Insert Expression to insert it into the document.
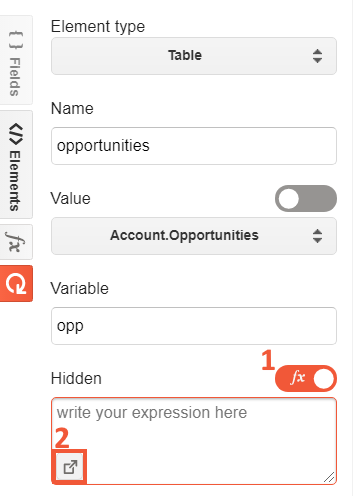
Now, let's see how you can use Salesforce fields within Expressions. Let's say you have the Table element that shows Opportunities for a queried Account. If an Account record has no Opportunities, the table will not be displayed. Let's see how you can show/hide the table using the expression:
-
Start creating the Table element. For the Hidden parameter, click the switch to enable expressions.
-
Click in the bottom left of the input field to open the Expression Builder.
-
In the Select function menu, select array, then select isEmpty. (Again, you need to hide the Table if the Account has no Opportunities). Insert the function.
-
You now have to replace Array with the array field. From the Select field menu, choose Account > (the arrow next to it suggests it's a relationship field), then select Opportunities (not a relationship; this is the actual array field you want).
-
Select Array in the text field below. Click Insert to insert the field into the text field.
-
Click Insert expression to insert it into the Table element.
You can use Expressions on all the Maven Add-on Elements that have parameters with the respective toggle.
- Click on the switch next to an attribute to enable expressions.
- Click in the bottom left of the input field to open the Expression Builder. Follow the tutorials above to see how to create expressions using the Expression Builder.
That's it! You can now create more complex expressions that fit your needs. You can always read more about expressions on the "Expressions" page.
¶ Using parts of another document with the Include element
Imagine a situation where other documents already contain a table or another element you can reuse in your template. You can easily have this building block in your document by inserting it from another file.
There's no need to replicate it from scratch: the Include element can do the magic for you.
-
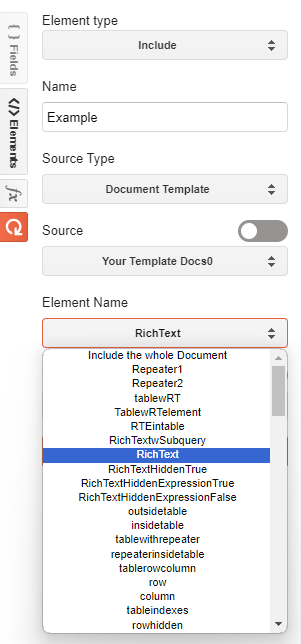
Select the Include element from the list in the Maven Add-on.
-
Name the element and select the needed Source Type:
- Document Template. This Source Type allows you to select the needed element from the file uploaded to the selected Document Template or insert the whole content of that file.
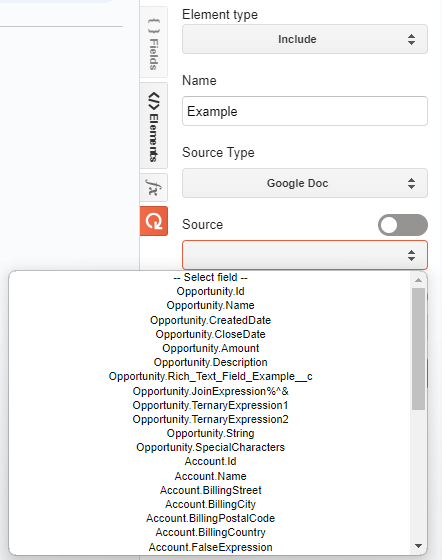
- Google Doc. This Source Type allows you to define the needed Google Docs file by its ID.
You can use a merge field that holds the necessary ID of the Google Docs.
-
Let's say you go for the Document Template Source Type.
-
After Source Type is selected, choose the template from the picklist in the Source field.
-
As you noticed, the Element Name field appears after the template is selected.
-
Pick the needed element and Insert it into the document.
In the screenshot below, you can see what the element's body looks like.

-
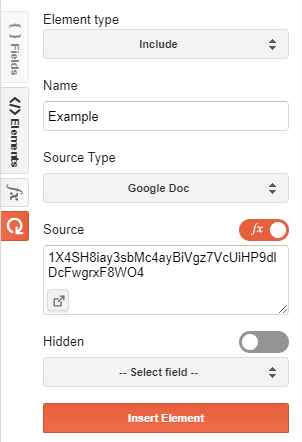
If your choice is Google Doc, you can use a merge field that holds the necessary ID, or you can switch the toggle next to the Source field and enter the ID manually in the Expression Builder textbox.
-
For the merge field option, after choosing the Google Doc Source Type, select the required field in the Source parameter.
-
Once the element is inserted, it will appear as shown in the screenshot below.

-
If you want to insert the ID manually, switch the toggle next to the Source parameter and place the ID of the Google Docs in the Expression Builder text box.
You can find the ID if you do the following:- Open the needed Google Docs.
- In the address bar, copy the ID. The ID is located between "d/" and "/edit" in the address bar.

-
After you insert the element with the manually added ID, you need to remove the braces, the exclamation point, and the dollar sign that wraps up that ID.

Once you generate the document, it will include the selected element or the entire content of the chosen file.
¶ Debug Document with Playground
If you want to see what the actual data will be available on your Document Template, feel free to use the Playground tab. It can also serve as a means to debug the Flow when things aren't going as they should be.
Try changing the Locale definition in your settings, for example, and see how the data changes.