Maven Documents Support Notice: Versions prior to 6.0 (Octopoda) are reaching End-of-Life status.
To ensure uninterrupted service and access to the latest features, please upgrade to the latest version by July 31st.
¶ Administration
¶ User License Management
After acquiring the app via Salesforce AppExchange, the Org gets several app licenses. These licenses need to be assigned to respective users so they can work with the app. There are a few steps to take here:
-
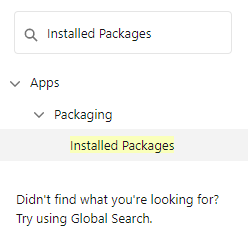
Go to Setup.
-
Search for Installed Packages and open the equally named setting.
-
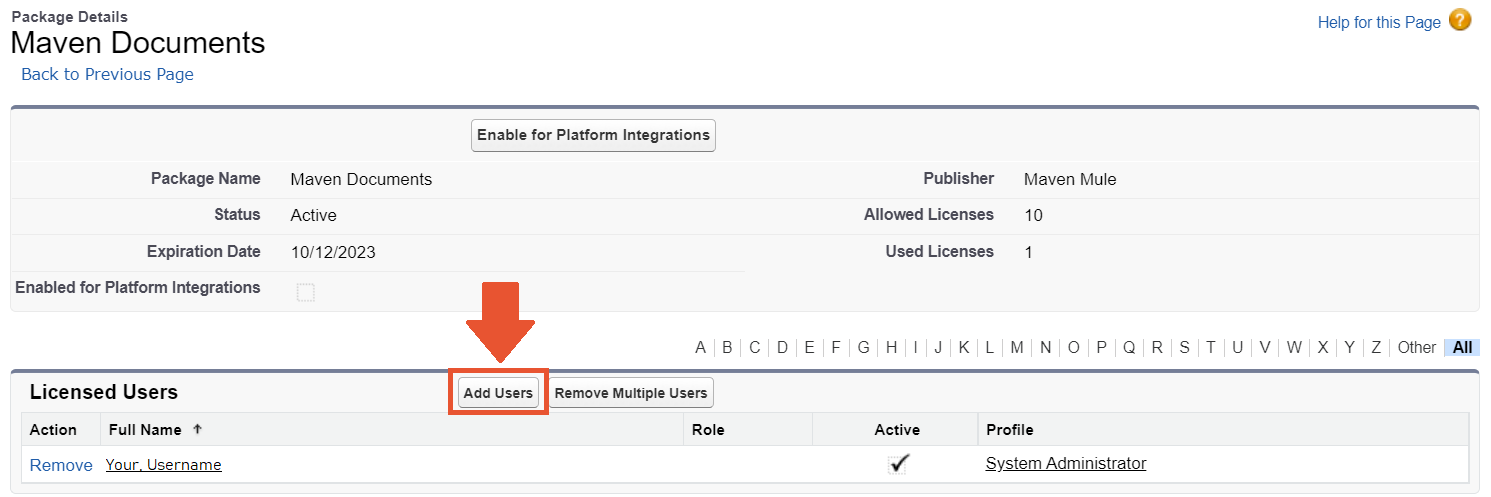
Find the Maven Documents entry in the Installed Packages list, and click on Manage Licenses.
-
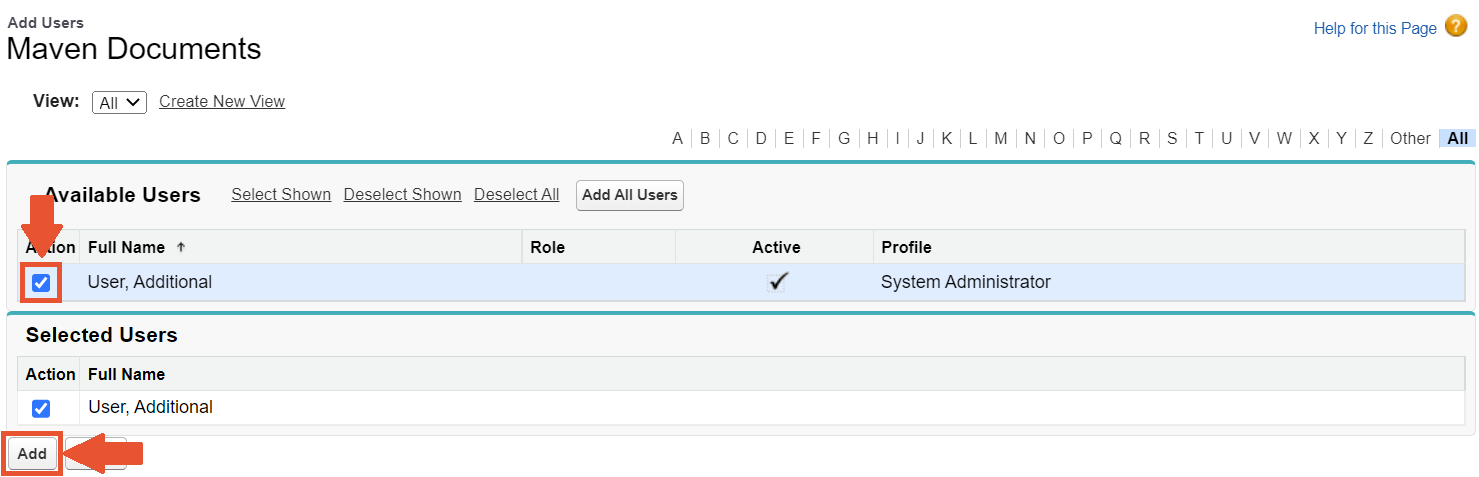
Click the Add Users button and select users by marking checkboxes next to their names.
-
Click the Add button to add selected users.


If the user has no license assigned, they can't generate documents.
There is also fair usage in place for every user.
¶ Permission Sets Management
With the recent changes, Salesforce is enforcing Phishing-Resistant MFA for Privileged users. These are users with a System Administrator profile or any of the following permissions:
- Modify All Data
- View All Data
- Customize Application
- Author Apex
In Maven Documents versions prior to 6.0, the typical setup required an “integration user” with elevated permissions and the Maven Documents API User permission set. This user was authenticated with Microsoft or Google credentials in the Setup Assistant and granted permission to save generated documents to Salesforce.
In version 6.0 and higher, the concept of “integration user” is not used anymore.Authentication with Microsoft or Google credentials can be done in multiple ways, as detailed in our documentation. Any user with the assigned Maven Documents Extended permission set can save documents to Salesforce.Verified Access Configuration
We have explicitly tested and confirmed that the following standard configuration is fully sufficient for using all features of Maven Documents:
- Profile:
- Standard User profile
- Permission Sets:
- Maven Documents Extended
- Maven Documents User or Maven Documents Admnistrator (depending on the user role)
The only time elevated permissions are needed is during package installation and setup, which is typically done by users with the Salesforce Administrator profile.
If your organization has implemented additional security controls, permission restrictions, or custom access policies beyond the standard Salesforce configuration, document generation behavior may be affected. We recommend reviewing your organization’s security settings and validating document generation functionality after upgrading to Summer '26.
The next thing to do is to give certain rights to individual users. The following types of permission sets come with the package:
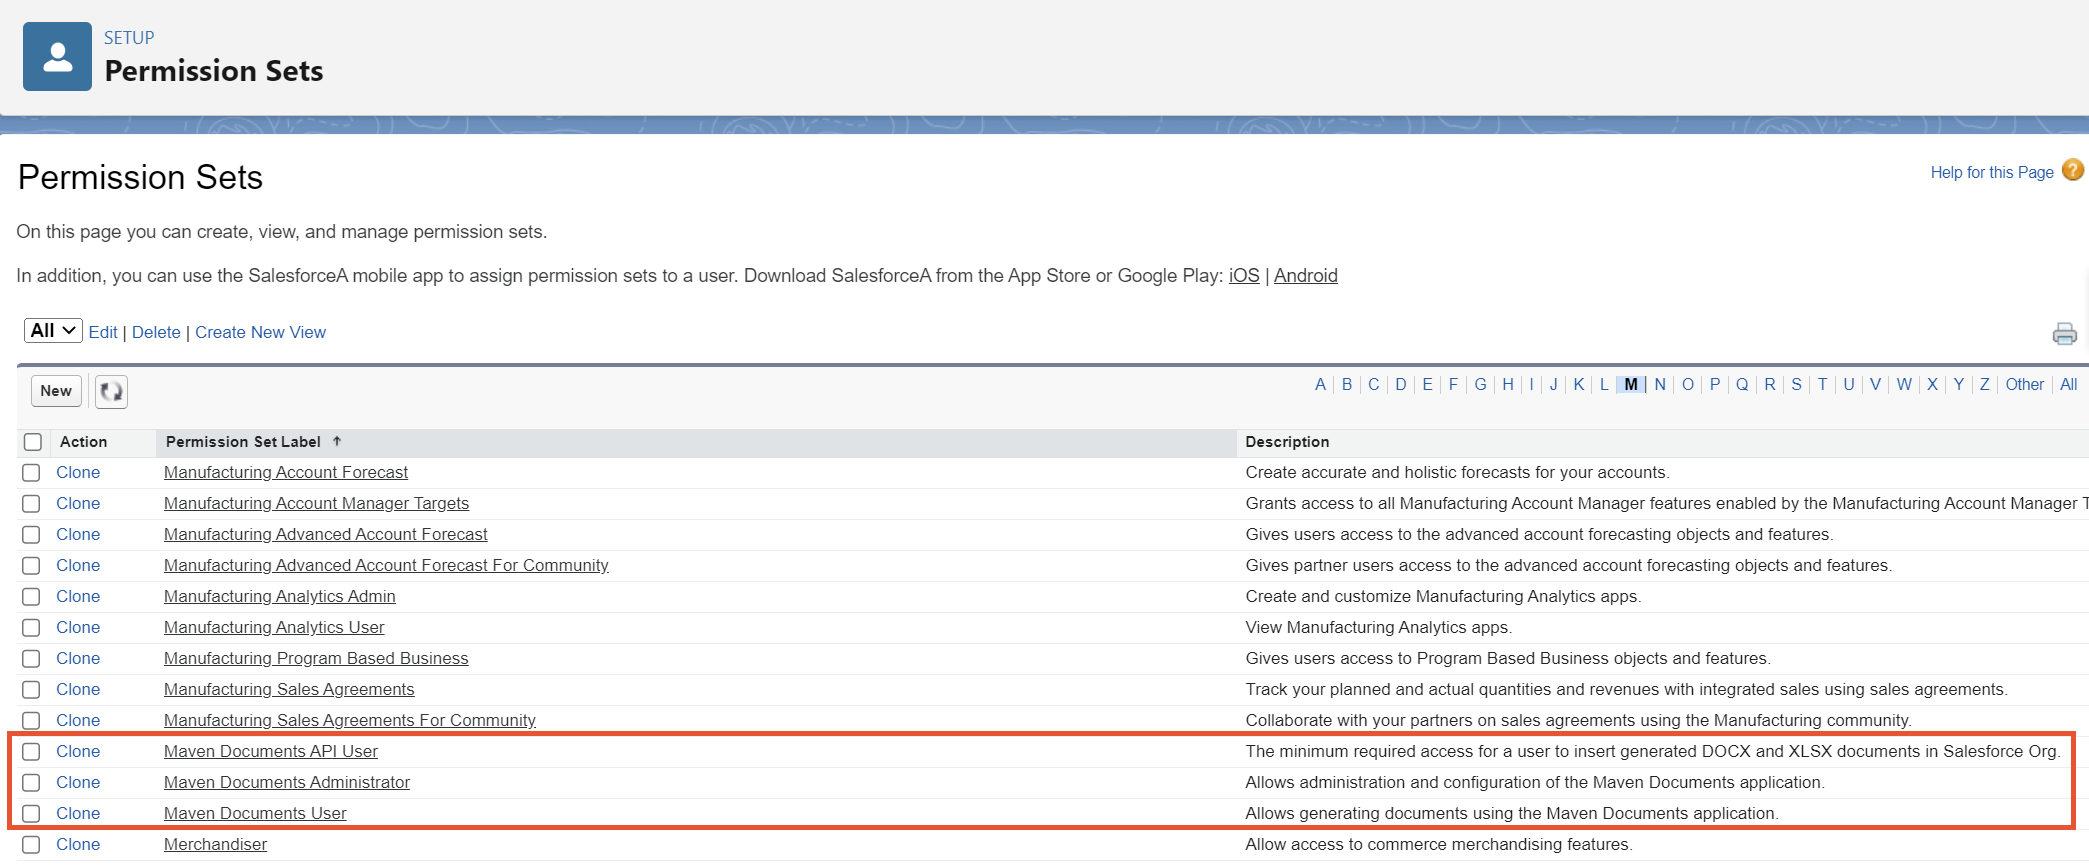
- Maven Documents Administrator. This set has the widest range of permissions and is typically assigned to the admin users.
With it assigned, the user sees all the tabs on the Maven Documents application, including Setup Assistant. It allows the administrator user to configure the Maven Headless and General application settings; create, delete, and edit all the records from the application. - Maven Documents User. This set allows generating documents using the Maven Documents application.
This set is assigned to regular Maven Documents users. Depending on the Salesforce Profile of the user, the combination with permissions may restrict the visibility and functionality of application parts. - Maven Documents API User. The minimum required access for a user to insert generated DOCX and XLSX documents in a Salesforce Org.
- Maven Documents Extended. The permission set is automatically created and assigned to the administrator who configured the Maven Headless settings.This permission set grants access to the security and communication API prerequisites required for document generation. Due to Salesforce constraints, these permissions cannot be included in the default permission sets provided by the package.
Once the Maven Documents Extended permission set is created, the administrator needs to assign it to the users who will work with Maven Documents.For more information, read the Configuration article.
Assigning permission sets to users can be done in a few simple steps.
- In Salesforce Setup settings, search for and open Permission Sets.
- Find the needed permission set and assign it to specific users who will use it:
-
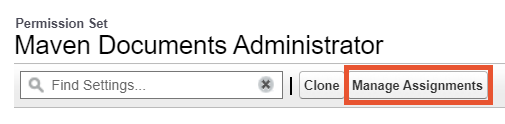
Click on the respective permission set.
-
Click on the Manage Assignments button.
-
Click the Add Assignment button which leads you to the process of selecting the corresponding user.

-
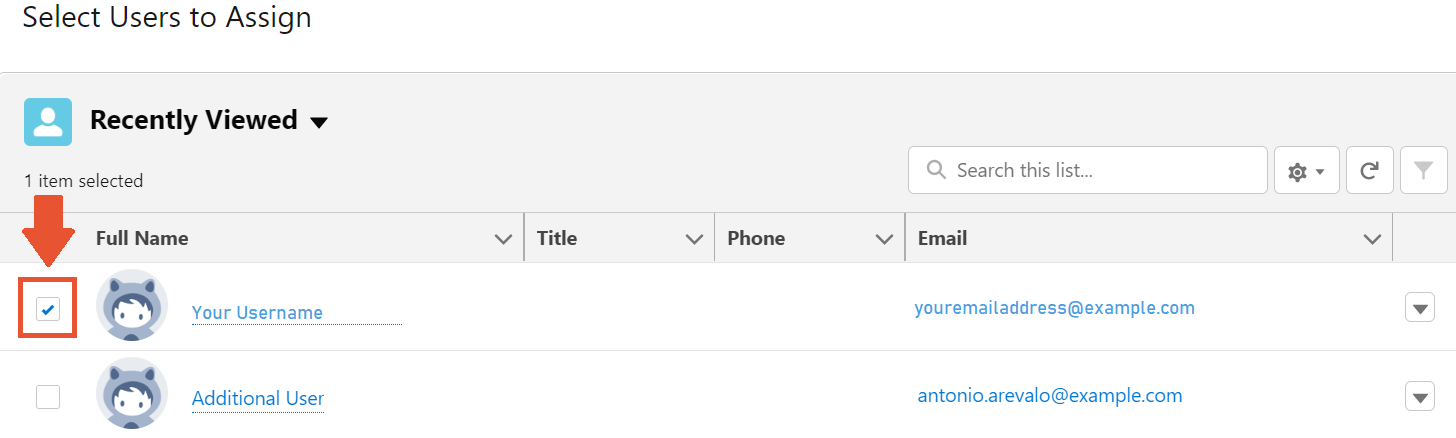
Mark the checkbox on the left of the User's name to choose which users to apply the permission set for and click Next.
-
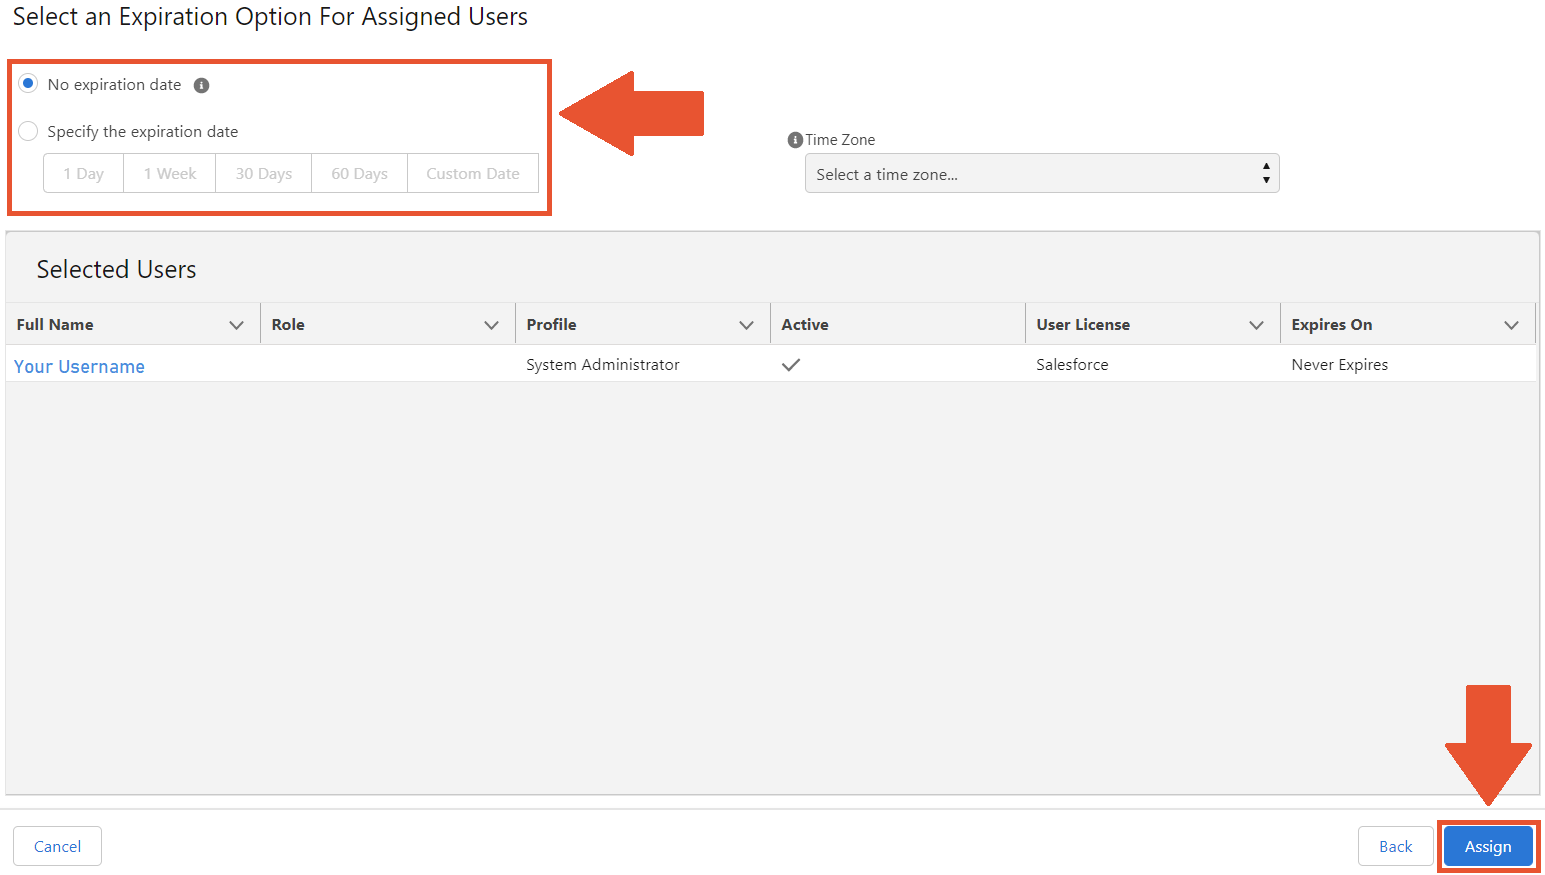
On the next screen, you will be able to set the expiration date for the permission set or leave the default setting with no time limit.
-
Once you have selected all the Users for the permission set and the time frame for those settings, click Assign. That's it, the permission sets are assigned to the appropriate Users.
-


¶ User Access Policies
There’s an option to automate the permissions management process. User Access Policies is the native Salesforce feature that simplifies the work with permissions and makes it more secure and less error-prone.
Here’s a quick manual on implementing this feature in your work process.
-
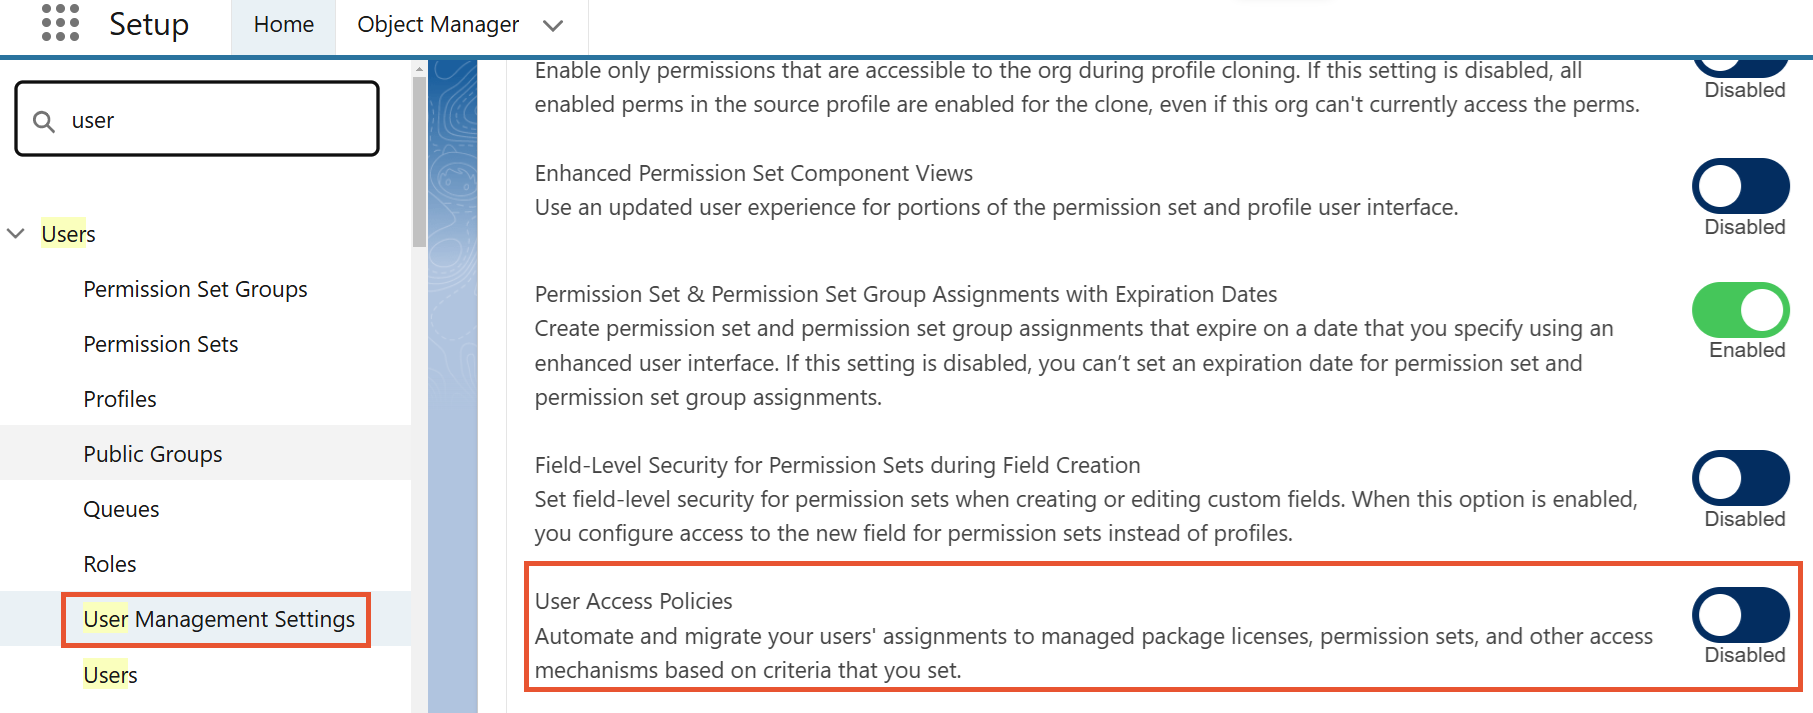
On the Setup page, under User Management Settings, enable User Access Policies.
-
After User Access Policies appear in the list of settings, select it and click New User Access Policy.
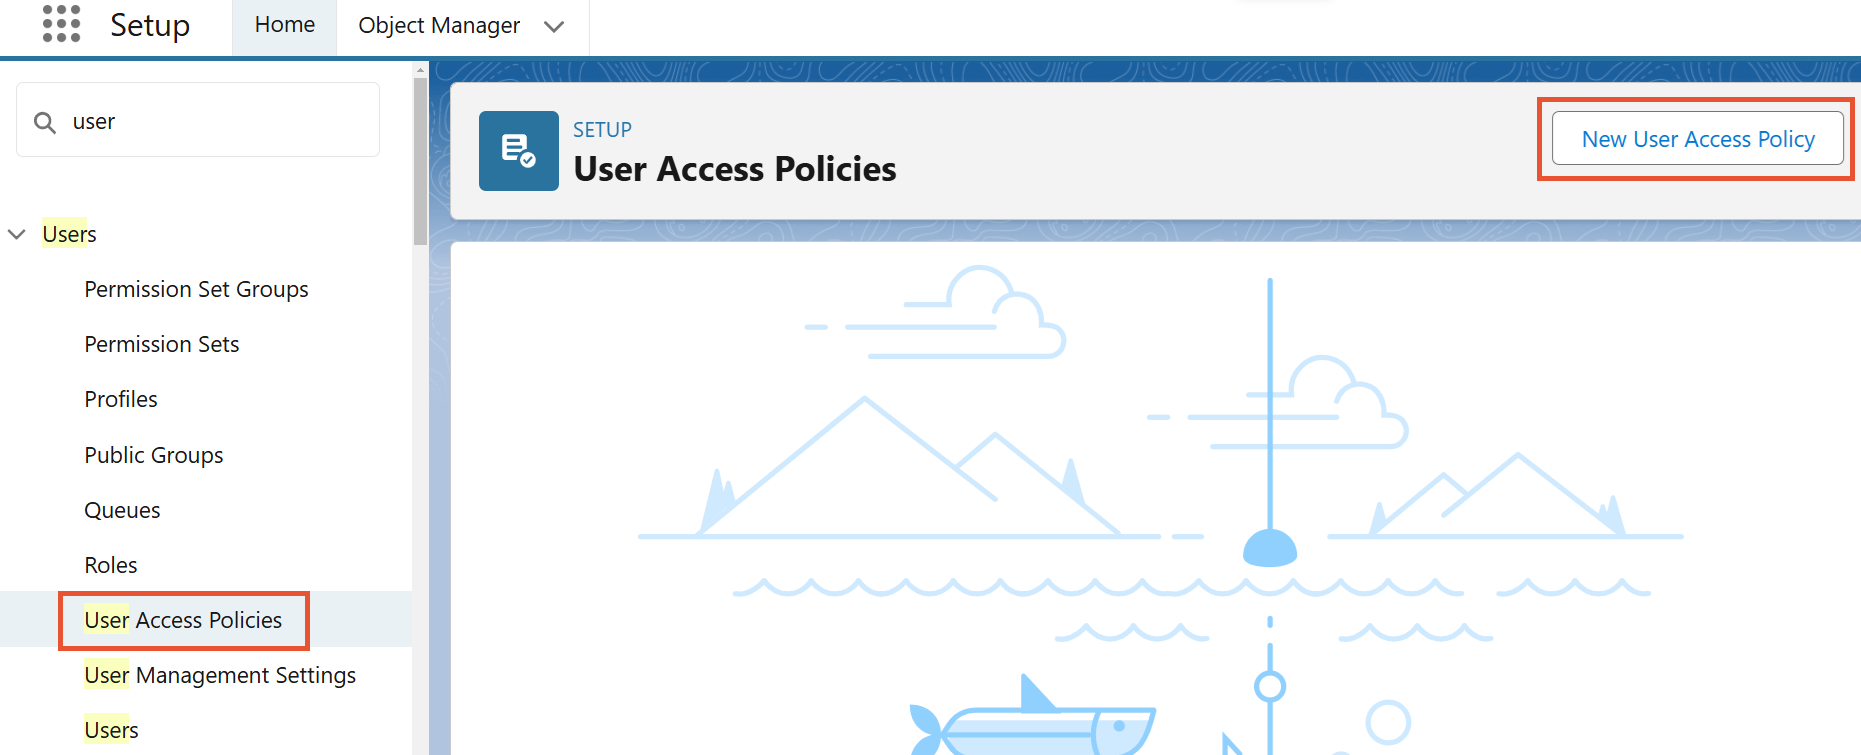
-
Give the new User Access Policy a name and then click Save.
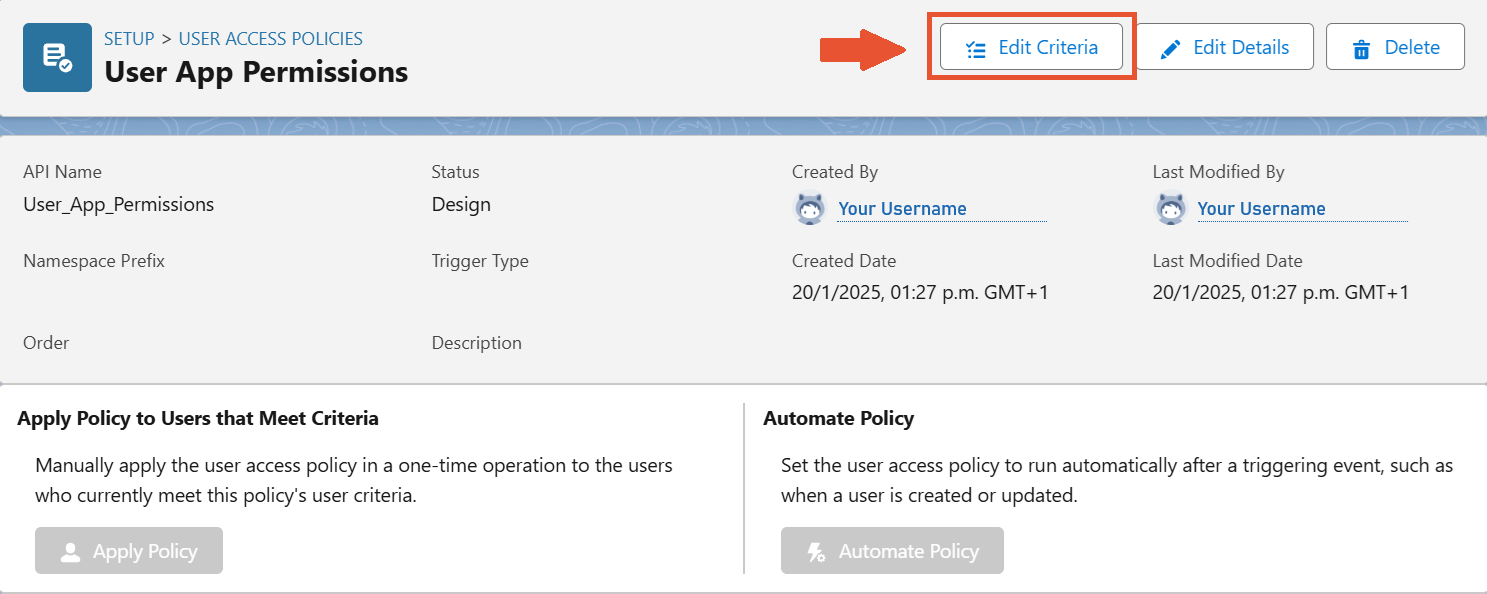
-
In the created policy, click Edit Criteria.
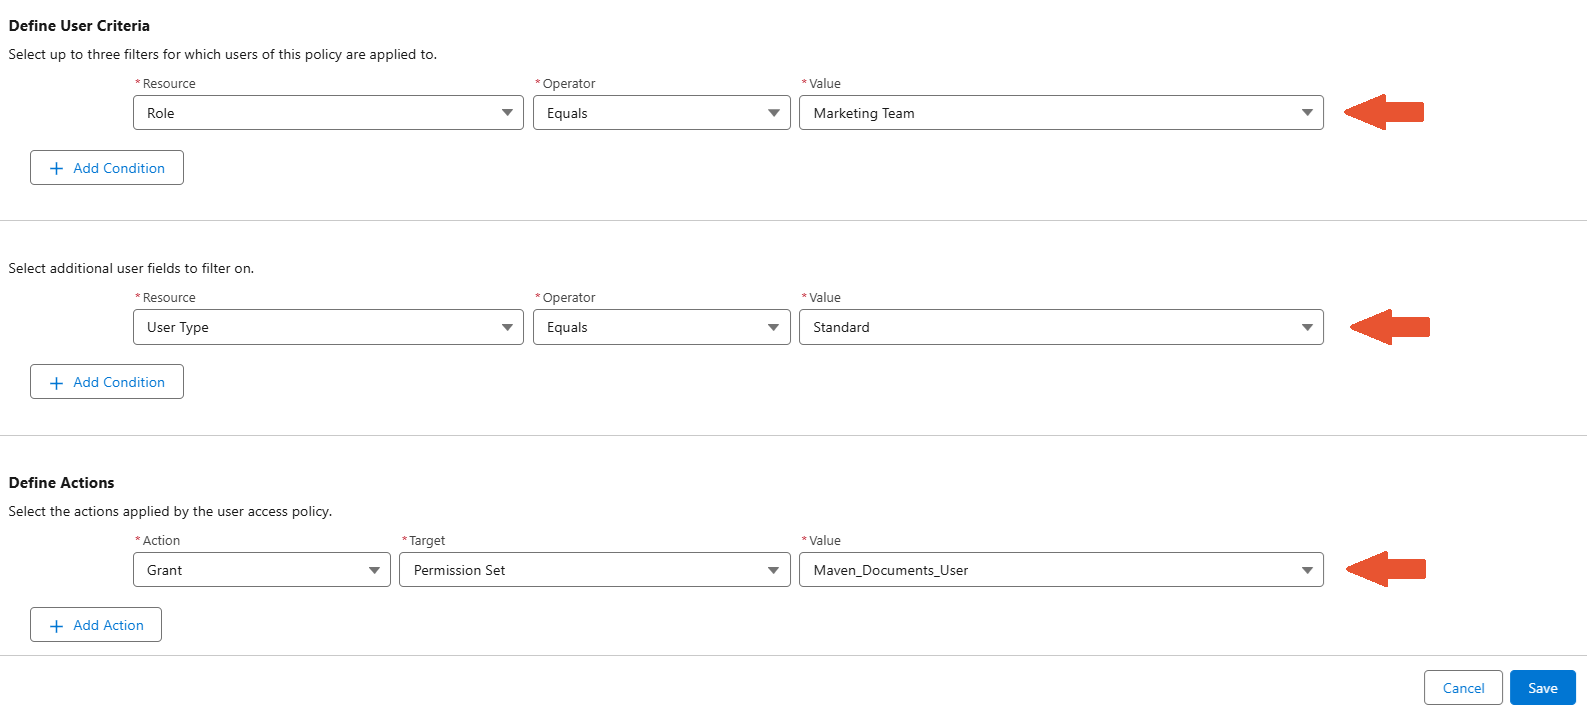
-
Set the needed filters in the respective fields and save the Policy.

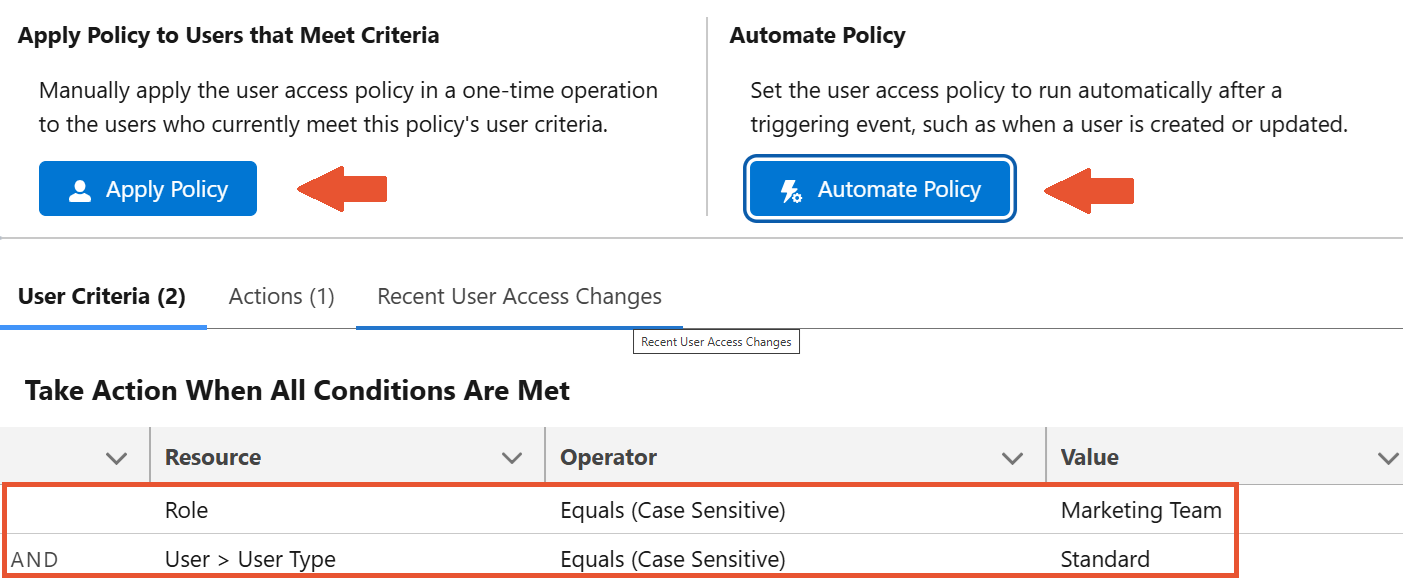
- Now, when the Policy is created, you have two options:
- Apply it to the already existing users. You can apply the Policy to all the users that fit the set criteria or just particular ones.
- Make an automation rule. You can assign the defined permissions automatically to the newly created or edited users that fit the set criteria.
¶ Trusted URLs
To work with OneDrive or Google Drive without having issues, configure the Trusted URL settings for the selected provider.
Go to Setup > Trusted URLs and click the New Trusted URL button.
¶ Microsoft OneDrive
For the Microsoft OneDrive integration, create a new Trusted URL with the following input:
- In the API Name field, write “Microsoft”.
- In the URL field write “*.sharepoint.com”.
- Make sure the Active checkbox is marked.
- Select Lightning Experience Pages from the CSP Context drop-down.
- Make sure only “frame-rsc (iframe content)” is selected in the CSP Directives.
- Click the Save button.
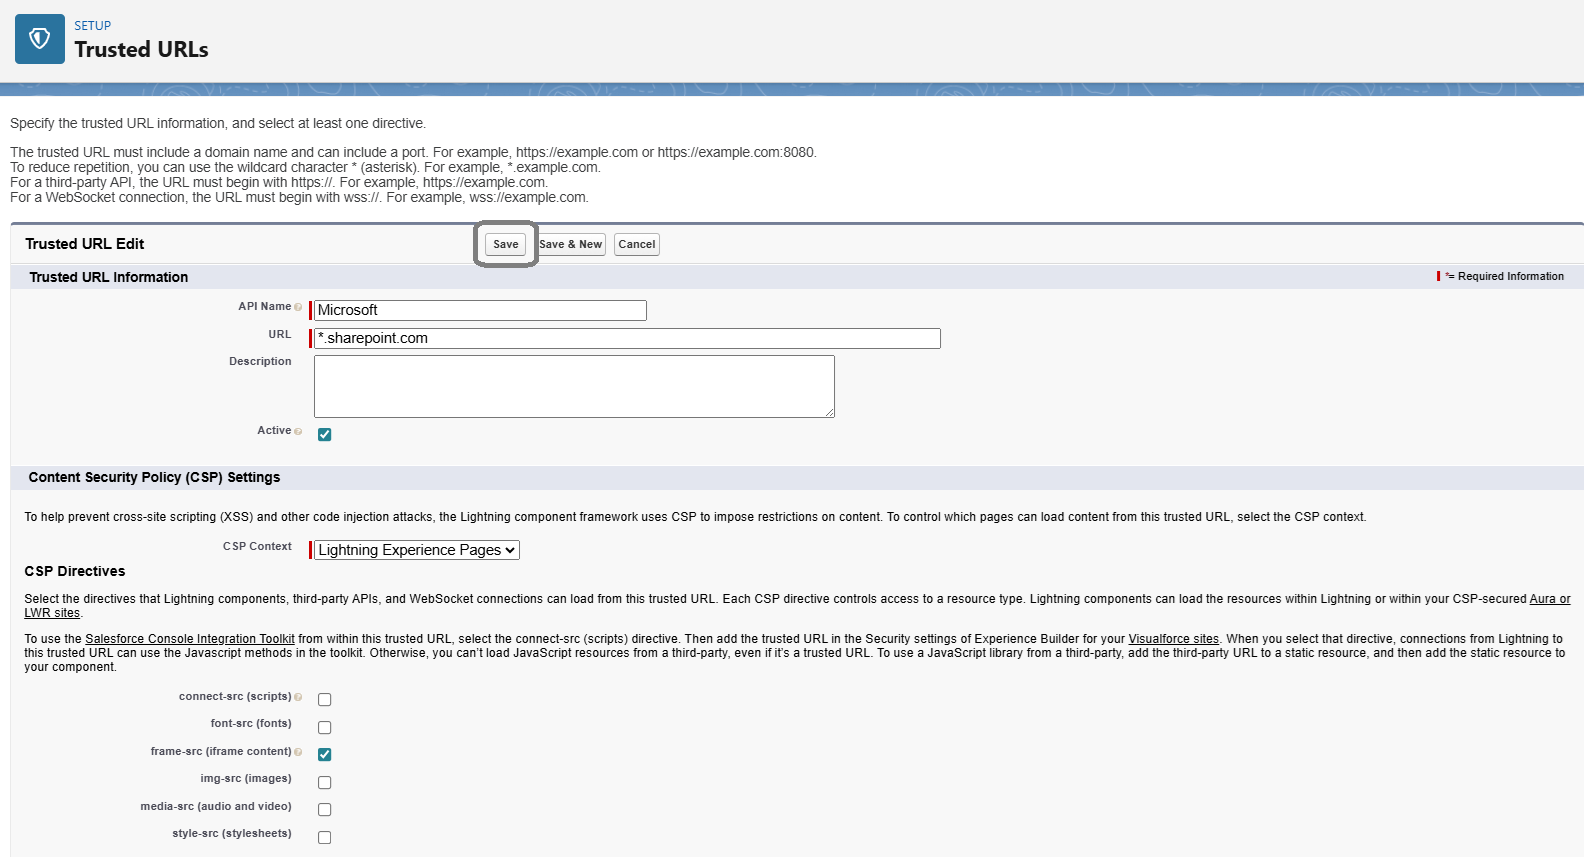
The Trusted URL for Microsoft OneDrive has been added.
¶ Google Drive
For the Google Drive integration, create the new Trusted URL with the following input:
- In the API Name field, write “Google”.
- In the URL field, write “https://docs.google.com”.
- Make sure the Active checkbox is marked.
- Select Lightning Experience Pages from the CSP Context drop-down.
- Make sure only “frame-rsc (iframe content)” is selected in the CSP Directives.
- Click the Save button.
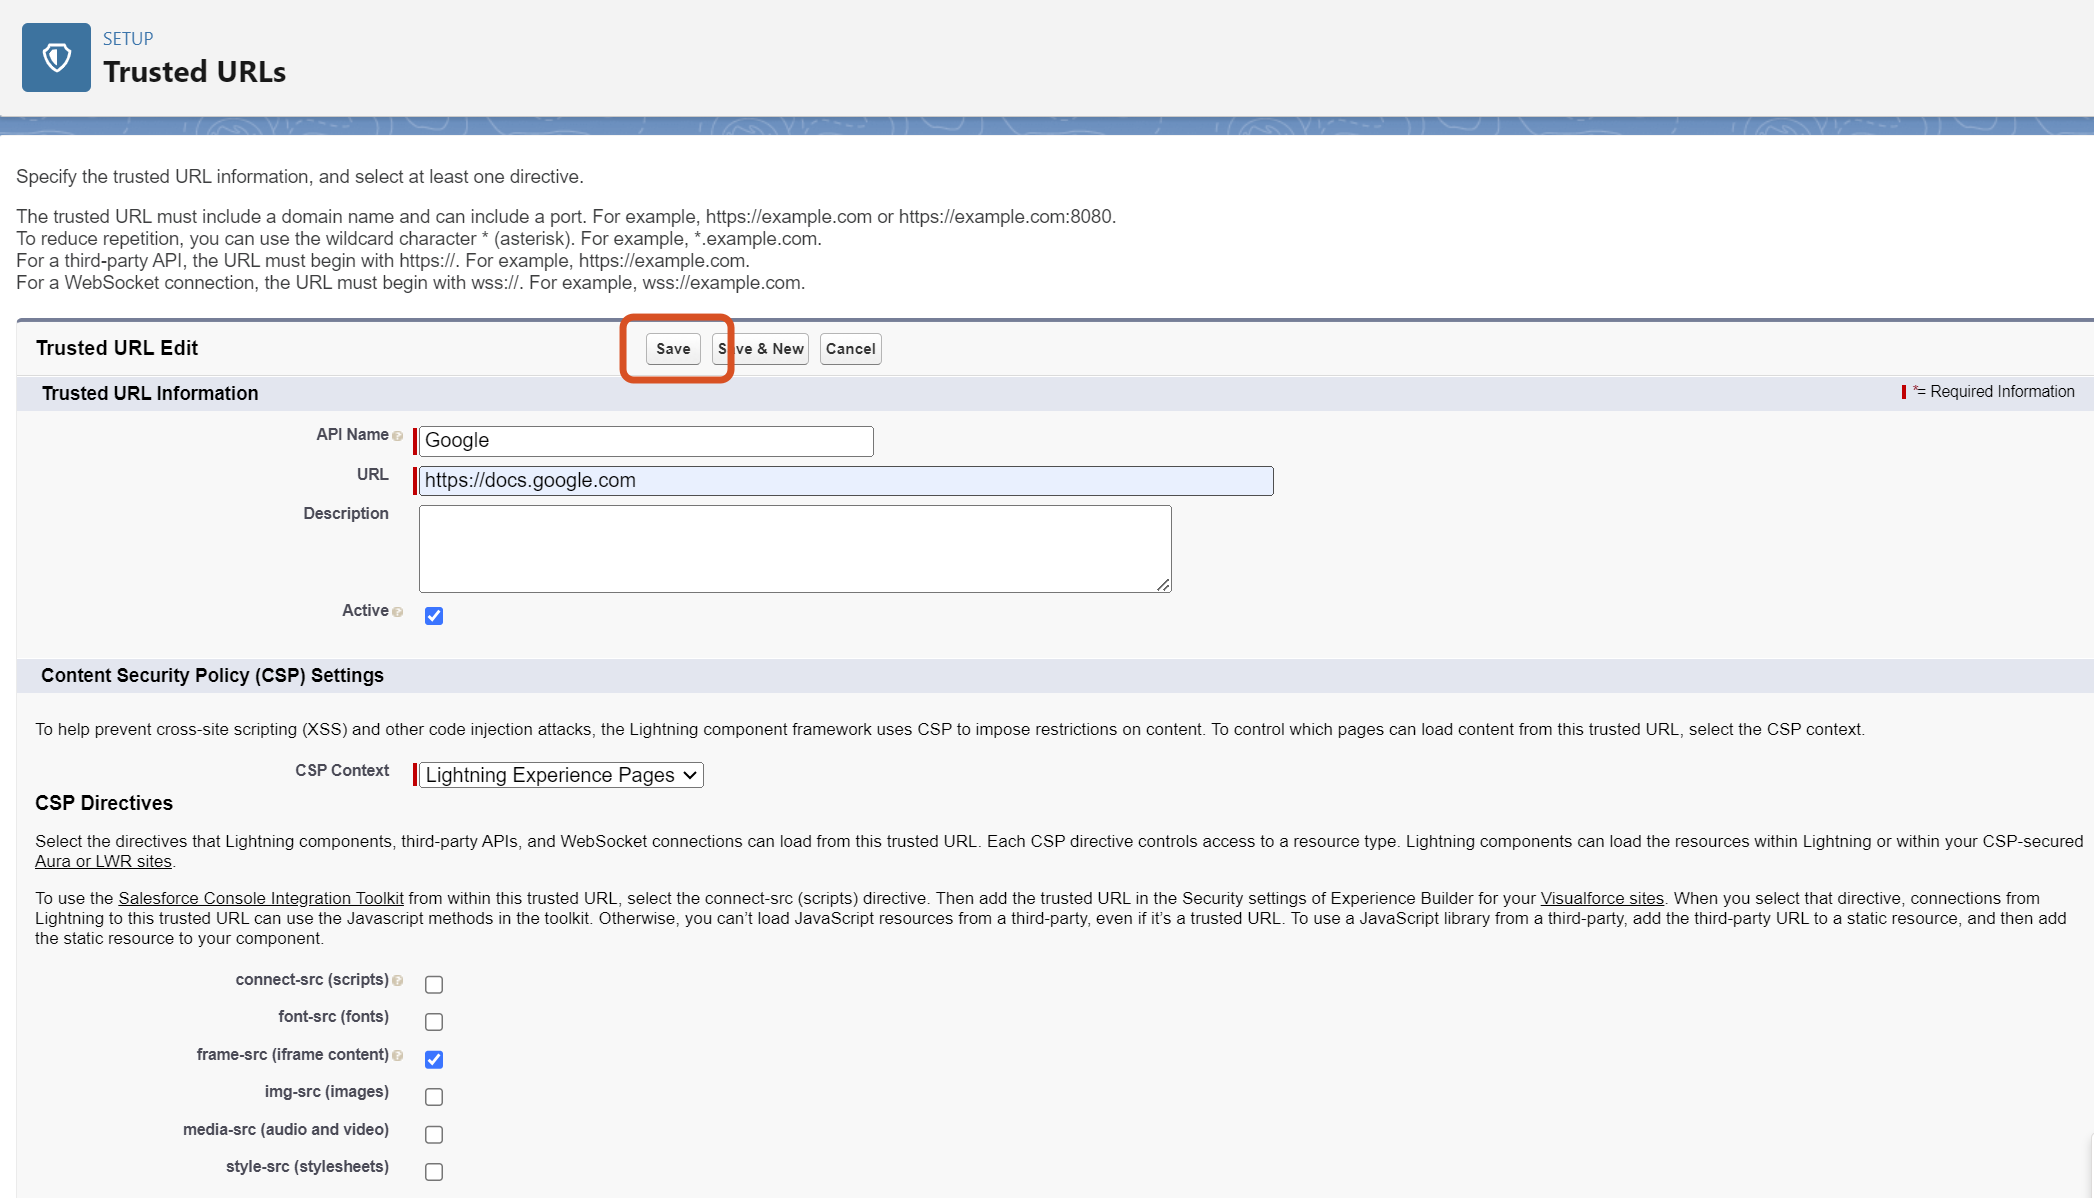
The Trusted URL for Google Drive has been added.