¶ Prepare and Send Envelopes
¶ Envelopes Overview
Envelopes are document containers that you send to recipients. Documents from envelopes include fields that signers can fill in with their signatures or other required information.
An envelope can hold multiple documents, recipients, and fields.
An Audit Log is also automatically created for each envelope. It contains timestamps, the envelope status, and information about recipients and their actions.
Each envelope gets an electronic signature as a whole.
¶ Create Envelope
The basic steps of creating and sending an envelope are:
- Open the envelope creation modal.
- Upload documents.
- Add recipients.
- Edit the email message.
- Set the expiration date.
- Configure reminders and notifications.
- Add the needed fields.
- Send the envelope.
To create a new envelope, click on the "+" button in the top right corner of the MDS layout. The button is placed not only on the main page but also on all others.
It opens the "Create Envelope" screen. There you will find the following sections:
To create an envelope you need to fill in all the required fields.
¶ Add Documents
There are several ways to add the needed document to the envelope:
- Upload the file from your device.
- Retrieve the file from the respective URL.
- Upload the file from OneDrive.
- Upload the file from Google Drive.
Supported file types for documents are .pdf, .doc, .docx, and "Google Docs".
Upload from the device. You can upload needed files by selecting the "Local Files" option. Click the "Browse Files" button or drag and drop the desired file into the required area.
Retreive the file from the URL. Swith to the "URL" option and enter the link to the file in the respective field. Then, click the "Fetch File" button.
Upload from OneDrive. Select the "OneDrive" option and click the "Sign in with OneDrive" button. Finish the log in session with your credentials to view the content of your OneDrive. Select the needed files and add them to the envelope.
The session you've started in the "Add Documents" section only lasts while you are creating the envelope.
Upload from Google Drive. Select the "Google Drive" option and click the "Sign in with Google Drive" button. Finish the log in session with your credentials to view the content of your Google Drive. Select the needed files and add them to the envelope.
The session you've started in the "Add Documents" section only lasts while you are creating the envelope.
MDS converts added files to PDF format for sending and storing.
¶ Add Recipients
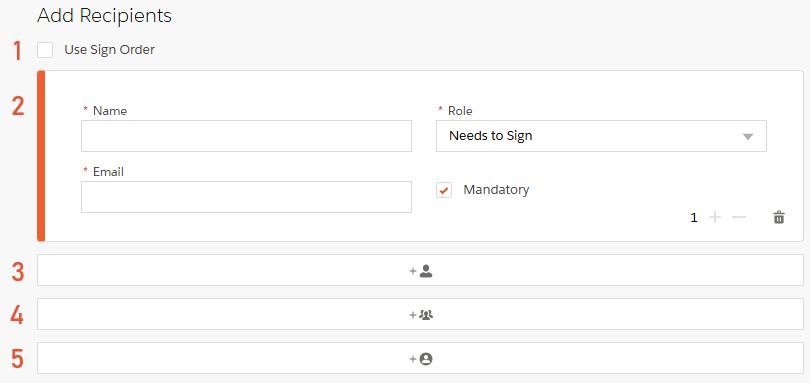
There are the following elements in the section:
- The "Use Sign Order" checkbox.
- The recipient information form.
- The "Add Recipient" button.
- The "Add Group" button.
- The "Add Yourself as a Recipient" button.
Let's deconstruct this section element by element.
¶ 1 The "Use Sign Order" checkbox
The element sets the order in which MDS sends an envelope to users. If the checkbox is unmarked, all the users get the envelope at the same time.
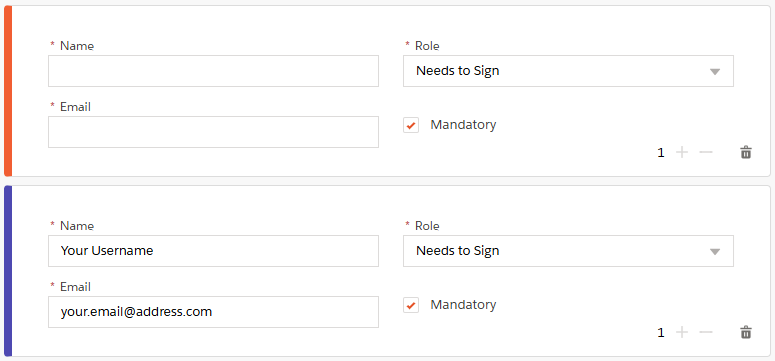
¶ 2 The recipient information form
The "Create Envelope" screen has the recipient information form open by default.
There are the following fields in the form:
| Fields | Type | Description | Required | Default Value |
|---|---|---|---|---|
Name |
string | The recipient's name. | true | - |
Group Name |
string | The recipients' group name. | true | - |
Role |
picklist | Defines an action that the recipient needs to take. | true | Needs to sign |
Email |
string | The recipient's email address. | true | - |
Mandatory |
boolean | Defines whether the recipient is mandatory or not. | false | true |
Multifactor Authentication |
boolean | Defines whether the authentication is needed for the user or not. | false | false |
Sign Order |
counter | Defines the order in which the recipient gets the envelope | false | 1 |
Whereas the "Name" field is self-explanatory, the "Role" field needs additional information.
Recipient roles are:
- Needs to Sign. The user must fill out all the required fields in the received document, primarily the "signature" fields.
- In Person Signer. The user needs to be physically present to sign the envelope. The signing session includes the host. The host initiates the session.
The host must have the active MDS account.
- Receives a Copy. The user receives a copy of the completed envelope via email.
- Needs to View. The user has to view the envelope to make it complete.
The "Email" field is pretty straightforward: it holds the email address where you aim to send the envelope.
When the "Mandatory" checkbox is marked, the envelope is not completed until such a recipient takes the needed action. If the mandatory recipient declines the document, the whole envelope will be canceled and no subsequent actions can be done on the declined envelope.
If you want to add an extra security layer, use the "Multifactor Authentication" option. With this feature, the recipient can't open the envelope without entering the single-use code.
Mark the "Multifactor Authentication" checkbox and you notice the "Phone" field added to the layout. Enter the phone number of the recipient there.
After the recipient opens the envelope, the authentication code is sent to the phone number you defined.
The recipient can generate the new code by clicking the "Resend Code" button.
The code is valid for 5 minutes. After that period the new code is required.
To change the signing order of recipients, mark the "Use Sign Order" checkbox and then use the "+" and "-" buttons to increase or decrease the value.
¶ 3 The "Add Recipient" button
This button adds one more single recipient of the envelope. Clicking on this button opens the recipient information form where you can enter the data of another recipient.
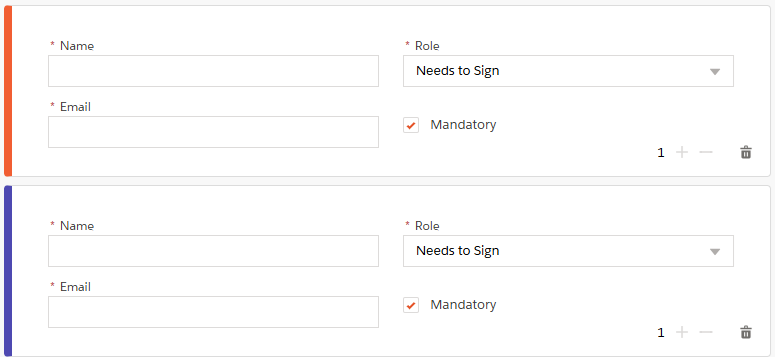
As you can see, recipients are color-coded. Each new recipient or group of recipients is marked with a new color. This color further highlights fields added to the respective recipient.
¶ 4 The "Add Group" button
This button opens the information form for the group of recipients. It creates a list of recipients, where any of the defined participans can take actions on behalf of the entire group.
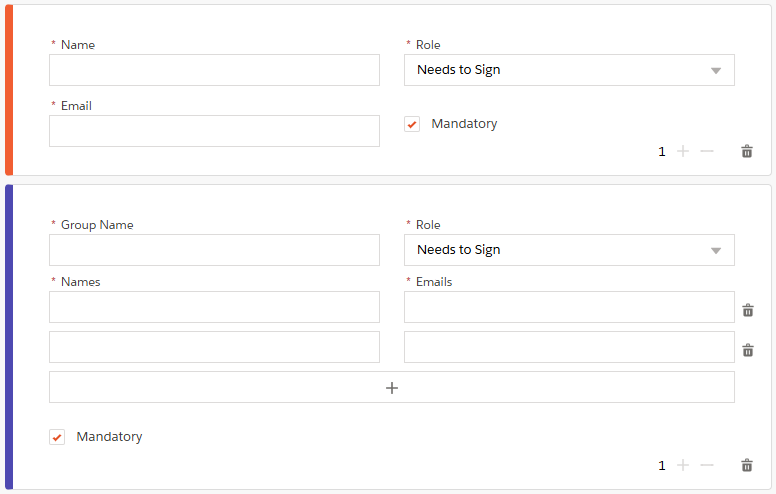
When one of the users from the group takes the needed action, its result spreads to all the group participants.
¶ 5 The "Add Yourself as a Recipient" button
This button adds the current app user as an envelope recipient with all the needed fields populated.
¶ Edit Message
In this section, you define the subject of the email you sent to recipients and the text message inside that email. The message input decides what will be written under the redirect link in the email.
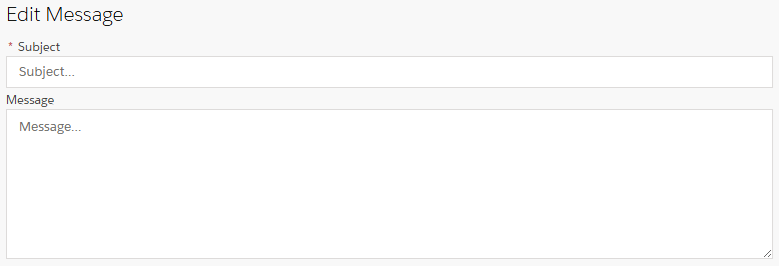
The Subject field is required and cannot be empty.
¶ Expiration
Fields from the section allow you to set the date when the envelope expires and when recipients get corresponding notification emails.
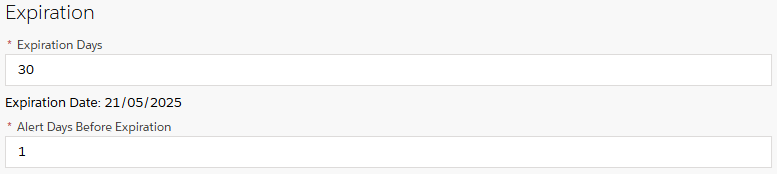
¶ Expiration Days
By default, we set the expiration date to 30 days. This means that if recipients don't take the needed action on the envelope, it will expire. The envelope becomes inactive and no action can be applied.
You can manually put the needed number of days or use arrows inside the field to change it. After you set the value, the exact expiration date is calculated below the field.
The minimum number of days is 2 and the maximum is 999.
¶ Alert Days Before Expiration
The field defines the number of days before recipients start to get notifications about the envelope's expiration.
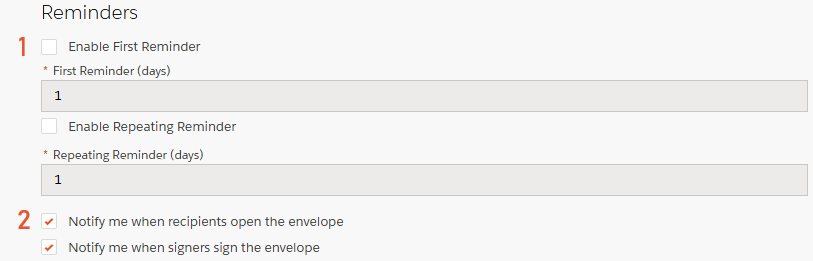
¶ Reminders
Parameters in the "Reminders" section are not required.
This section allows you to enable and configure email notifications that MDS sends you.
The user can:
-
Set envelope reminders for recipients.
Once you mark the reminders checkboxes, you get the respective fields available for editing.
The first field defines the number of days since sending the envelope when recipients start to get reminders.
The second field specifies the frequency with which the recipient receives those reminders.Recipients get email notifications only while the envelope has the "In Progress" status for them.
-
Enable/Disable user notifications on actions taken to the envelope.
Notification checkboxes serve the user who creates and sends the envelope.
With the first checkbox marked, the sender of the envelope gets an email, once any recipient opens the envelope.
Having the second checkbox marked, notifies the sender with an email after each recipient signs the envelope.
Both checkboxes can be marked, meaning the email is sent in both cases. When both checkboxes are unmarked, MDS doesn't send any email after corresponding actions.
After you provide the needed information in the fields on the "Create Envelope" screen you are ready for the next step. Now you can continue to prepare the envelope by adding the fields to the attached document. Just click the "Create Envelope" button in the top right corner.
¶ Prepare the document and Send the Envelope
On the document preparation screen, you can edit parameters from the "Create Envelope" screen and add fields to the attached documents.
Here you will find the following attributes:
Sidebars:- Left sidebar. Shows the content of the selected tab.
- Right sidebar. Shows general actions to the document available.
Tabs:- Documents. Shows documents included in the envelope.
- Recipients. Holds the list of recipients defined for the envelope.
- Fields. Holds the list of fields to place in the document.
Buttons:- Edit Message
- Edit Expiration Date
- Edit Reminders
- Download Document
- Save Draft
- Send Envelope


¶ Sidebars
¶ Add or remove documents
You can always adjust previously set information while in the prepare mode.
For example, you can add and remove documents
- Go to the "Documents" tab in the top left corner.
- In the left sidebar, press the "+" button to add another document or the "Delete Item" button to remove the document from the envelope.

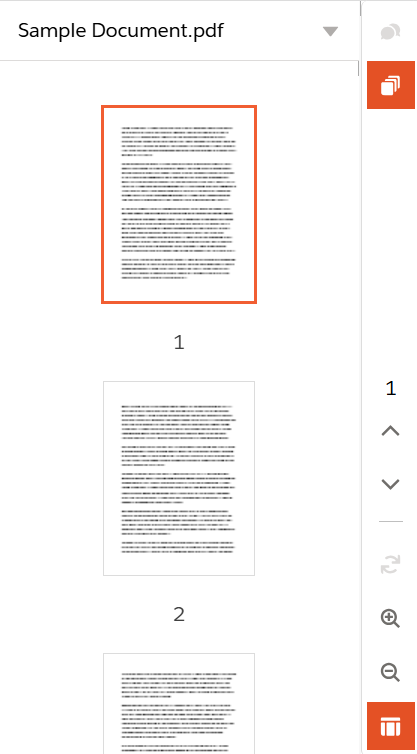
¶ Work with document pages
As previously mentioned, the left sidebar shows you the content of the selected tab.
The right sidebar can be used for easier navigation and faster page switching, zooming, and previewing pages. The button at the bottom of this sidebar toggles automatic zooming to full width.
¶ Tabs
We've already described the content of the "Documents" tab, so let's take a look at the other two.
¶ Edit recipients
This tab contains the list of recipients added in the envelope creation step. It holds a recipient's name, email, and the assigned role. Mandatory users are marked by the small crown icon.
The tab also allows you to change the information on the selected recipients or to add new ones.
You can add either a single or a group of recipients. Or you can edit the added users by clicking the respective button after you hover over that user.
To define the signing order, mark the "Use Sign Order" checkbox at the bottom of the sidebar.
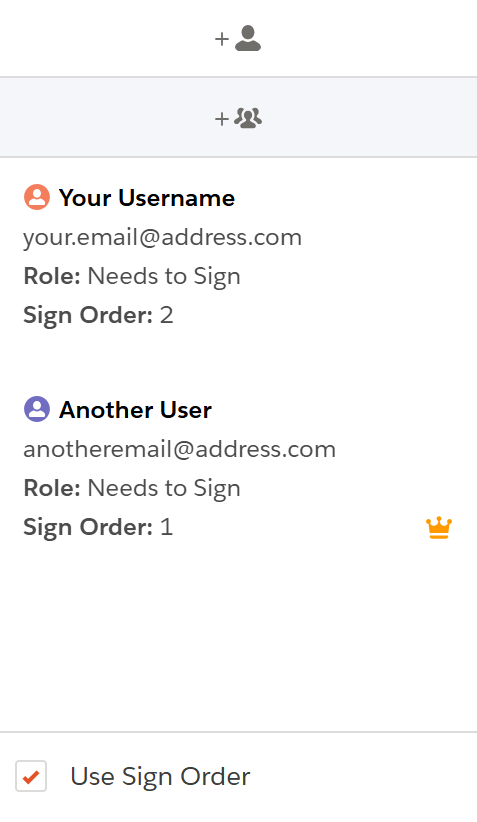
You can notice that recipients' avatars have different colors. Fields assigned to those recipients would have the same color highlight.
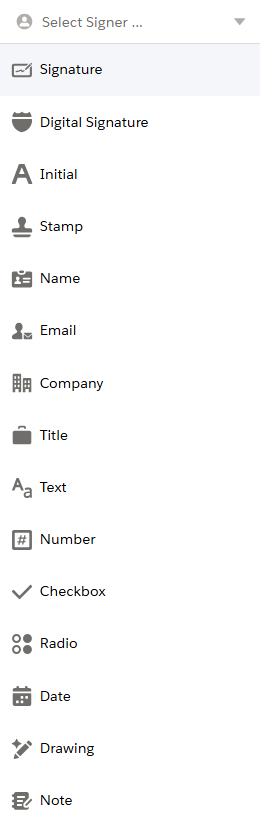
¶ Add Fields
Once the document and recipients are set, we finish document preparation by adding fields for each recipient. Fields instruct users on what action to take or what information to provide. Each recipient gets a unique set of fields that are only visible to them.
Here's how you add the field:
- When the Fields tab is active, select the recipient from the dropdown in the left sidebar.
- Drag & drop the needed fields onto the document. You can also select a field on the panel and place it in the document by clicking on the needed place.
Field types include:
- Signature. Signature placeholder. Draw, generate, or import a signature in the added field.
- Digital Signature. Digital signature placeholder. Draw, generate, or import a digital signature in the added field.
- Initial. Recipient initials, autofilled from name.
- Stamp. Stamp image attachment.
- Name. Recipient's name.
- Email. Recipient's email.
- Company. Recipient's company name.
- Title. Recipient's title.
- Text. The custom text field. You can fill it in preparation mode or leave the field empty for a recipient to fill.
- Number. This is the custom number field. You can fill it in preparation mode or leave it empty for a recipient to fill. It can hold only digits and can't contain floating numbers.
- Checkbox. The checkbox button.
- Radio. The radio button.
- Date. The signed date placeholder. Autofills with the respective date during the signing.
- Drawing. The custom drawing board. You can fill it in preparation mode or leave the field empty for a recipient to fill.
- Attachment. The field allows adding attachments to the document during the signing process.
- Note. The custom text field. Usually used by the creator of the envelope to give additional information to specific recipients. You can fill it in preparation mode or leave the field empty for a recipient to fill.
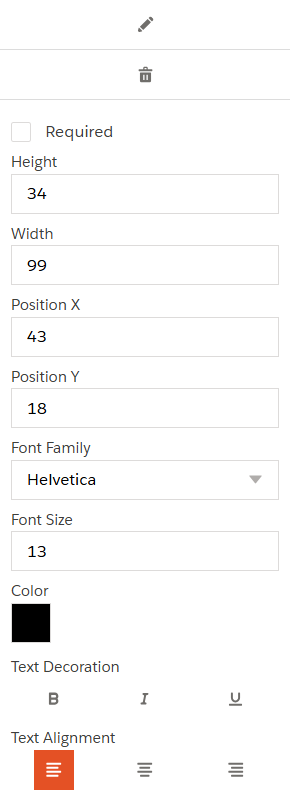
¶ Edit Field Properties
Fields can be customized depending on their type. Click on the needed field and all the properties appear in the left sidebar.
You can change the size and position of any added field in the document. However, some field types provide some additional customizations. For example, text fields additionally allow changing such properties as font, color, etc.
You can also mark a field as required. This means your recipients won't be able to finish the envelope without entering a value for that field.
To delete a field, select it and press the "Bin" button on the "Edit" panel.
¶ Buttons
In the top right corner, you have a set of buttons providing you with some additional actions. With their help, you can edit data from the "Create Envelope" screen, download the document from the envelope, save it, or send the prepared envelope.
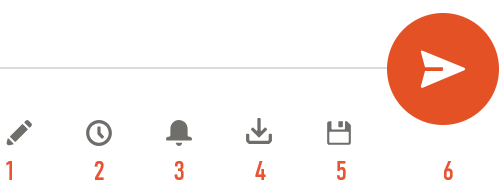
- Edit Message. Edit the subject and the message of the created envelope.
- Edit Expiration Date. Change the number of days when the envelope expires and the number of days when you receive the alert on the expiration.
- Edit Reminders. Change the number of days before the first reminder, the frequency of this reminder, and the envelope creator notification settings.
- Download Document. Download the document from the envelope on the device.
- Save Draft. Save the draft of the prepared envelope.
- Send Envelope. Send the envelope to the defined recipients.
After you finish preparing the envelope, you can finally send it by pressing the "Send Envelope" button in the top right corner of the screen. Once you click it, all the defined recipients receive the corresponding emails with the link to the prepared envelope.
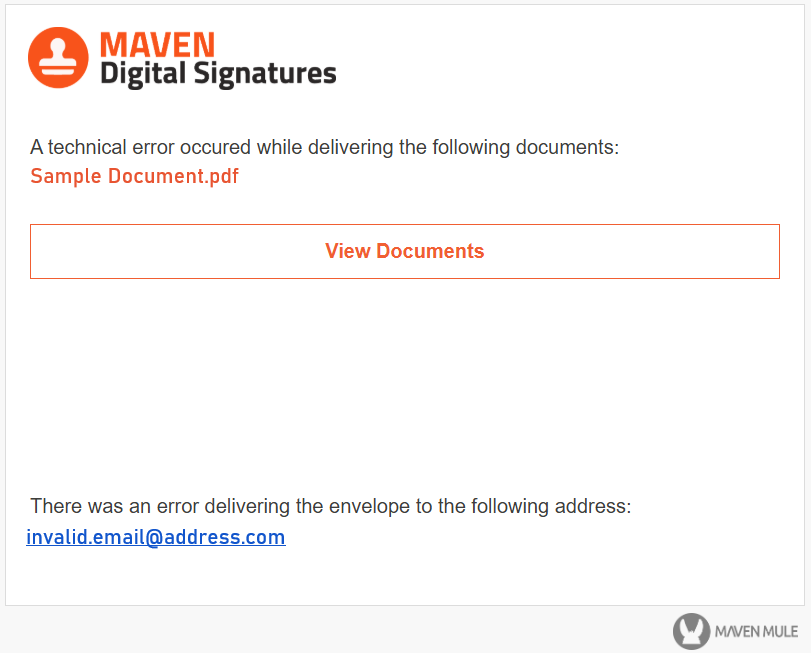
If any email address in the envelope is incorrect, the envelope gets the "Delivery Failed" status and the sender receives the respective email. However, those recipients who had the valid email defined, get the envelope but the information message about the failed delivery is shown to them instead of the content of the envelope.