¶ Administration
¶ User License Management
To work with Maven CLM, a user needs to have a license assigned. After installing the package, several licenses are assigned to the org. These licenses need to be assigned to users for them to be able to work with the app. Here are the steps to assign the licenses:
-
Open the org's Setup element.
-
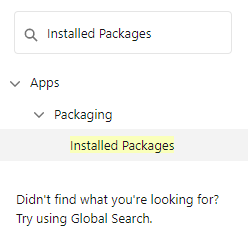
Search for the Installed Packages and open the equally named tab.
-
Find the Maven CLM entry in the Installed Packages list, and click on Manage Licenses.
-
Click the Add Users button and choose the users by clicking the checkbox next to their names.
-
Click on the Add button to add selected users.
Be aware that if the user has no license assigned, such a user will not be able to use the features of our application.
There is also a fair usage in place for every user.
¶ Permission Sets Management
The next thing to do is to assign permissions to individual users. Three types of permission sets come with the package:
- Maven CLM Administrator - allows administration and configuration of the Maven CLM application.
- Maven CLM Super User - allows creating clauses, sections, versions, agreements, and agreements versions.
- Maven CLM User - the minimum required access for a user. Allows creating only agreements and agreements versions.
- Maven CLM Export Import - allows viewing, creating, and deleting export and import records.
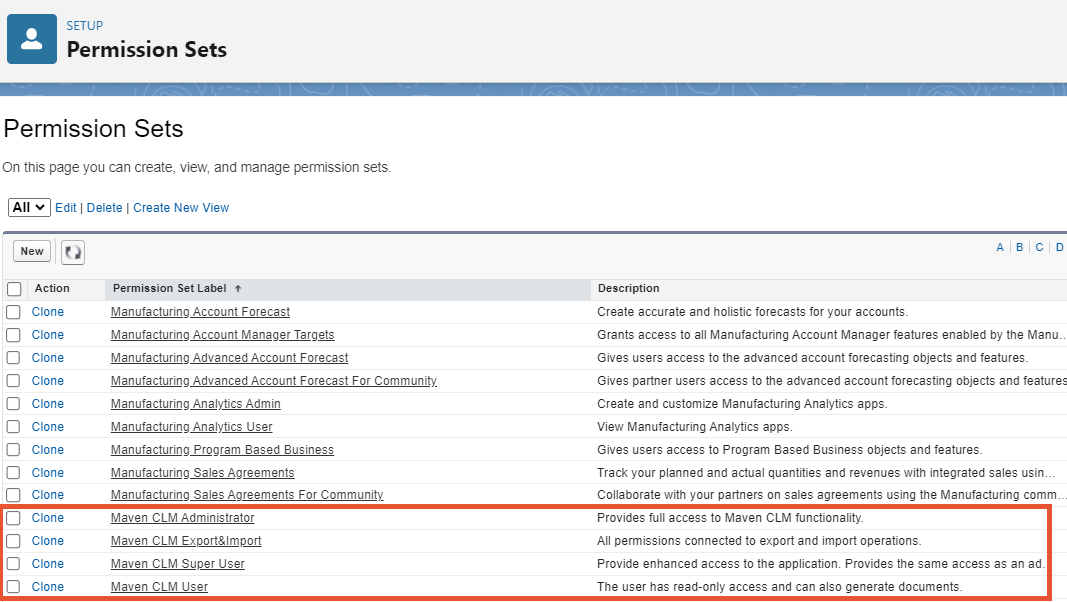
Setting permission sets for users can be done in a few simple steps. First, go to Setup > Permission Sets. There you will be able to see all permission sets and choose the ones you want to work with, in this case, Maven CLM Administrator, Maven CLM User, Maven CLM Super User and Maven CLM Export Import:
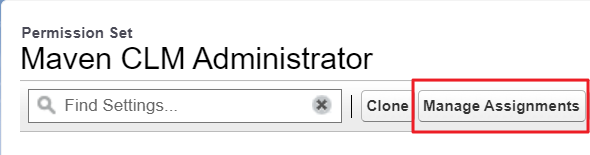
Once the permission set is selected (Maven CLM Administrator, for example), it's time to assign it to the specific users who will use it. First, click on the Maven CLM Administrator permission set and then click on the Manage Assignments button:
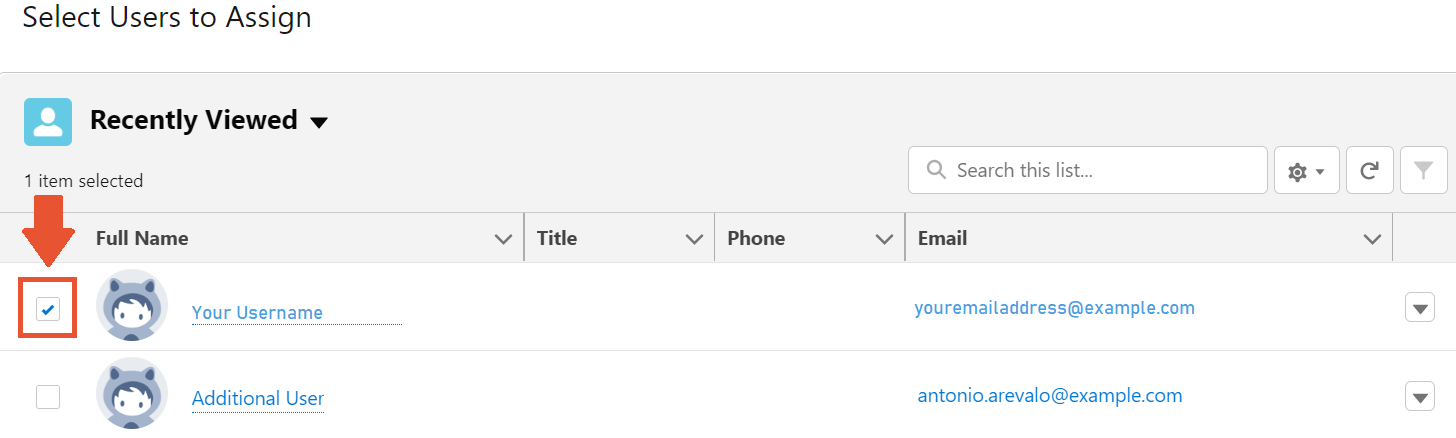
After that, you need to click the Add Assignment button which leads you to the process of selecting the corresponding user.

Mark the checkbox on the left of the user's name to choose for which users to apply the permission set and click Next.
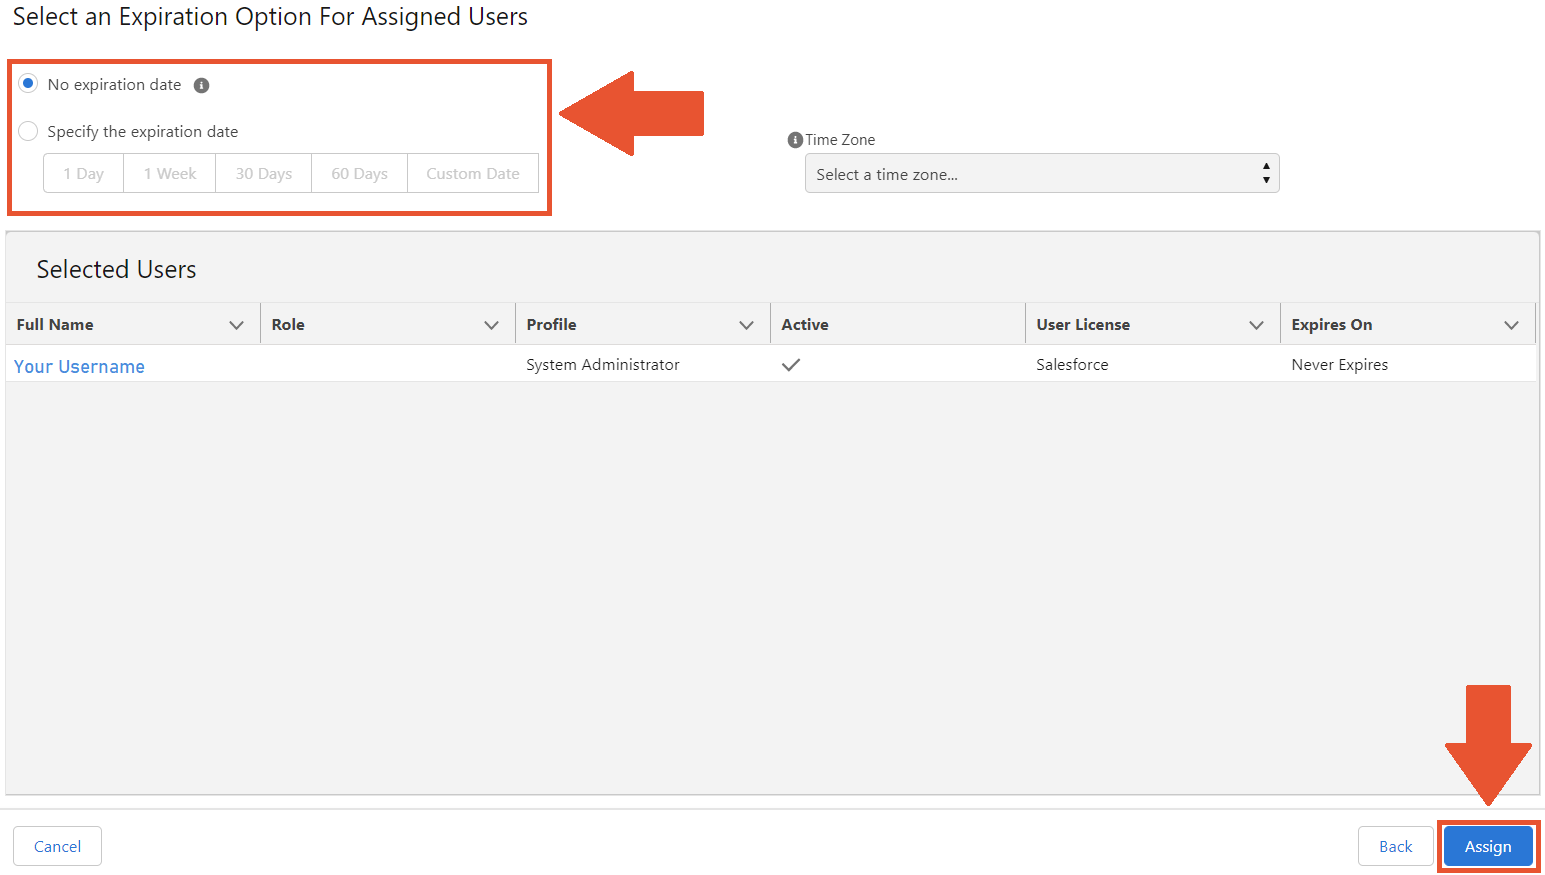
On the next screen, you could be able to set the expiration date for the permission set or leave the default setting with no time limit. Once you have selected all the users for the permission set and the time frame for those settings, click assign and that's it, permission sets are assigned to the appropriate users.
¶ Maven CLM Setup Assistant
To ensure the proper functioning of the Maven CLM application, it is imperative to authorize its use with either Microsoft OneDrive or Google Drive services. This capability is crucial for accessing and storing documents during the creation and management of Agreements and Agreement Versions.
This can be achieved via the Maven CLM Setup Assistant tab. Access to this tab is restricted to users holding the Maven CLM Administrator permission set.
¶ Grant Access
To connect Maven CLM with your Microsoft Azure Service or Google Drive Service, you will need to grant access by following these steps:
-
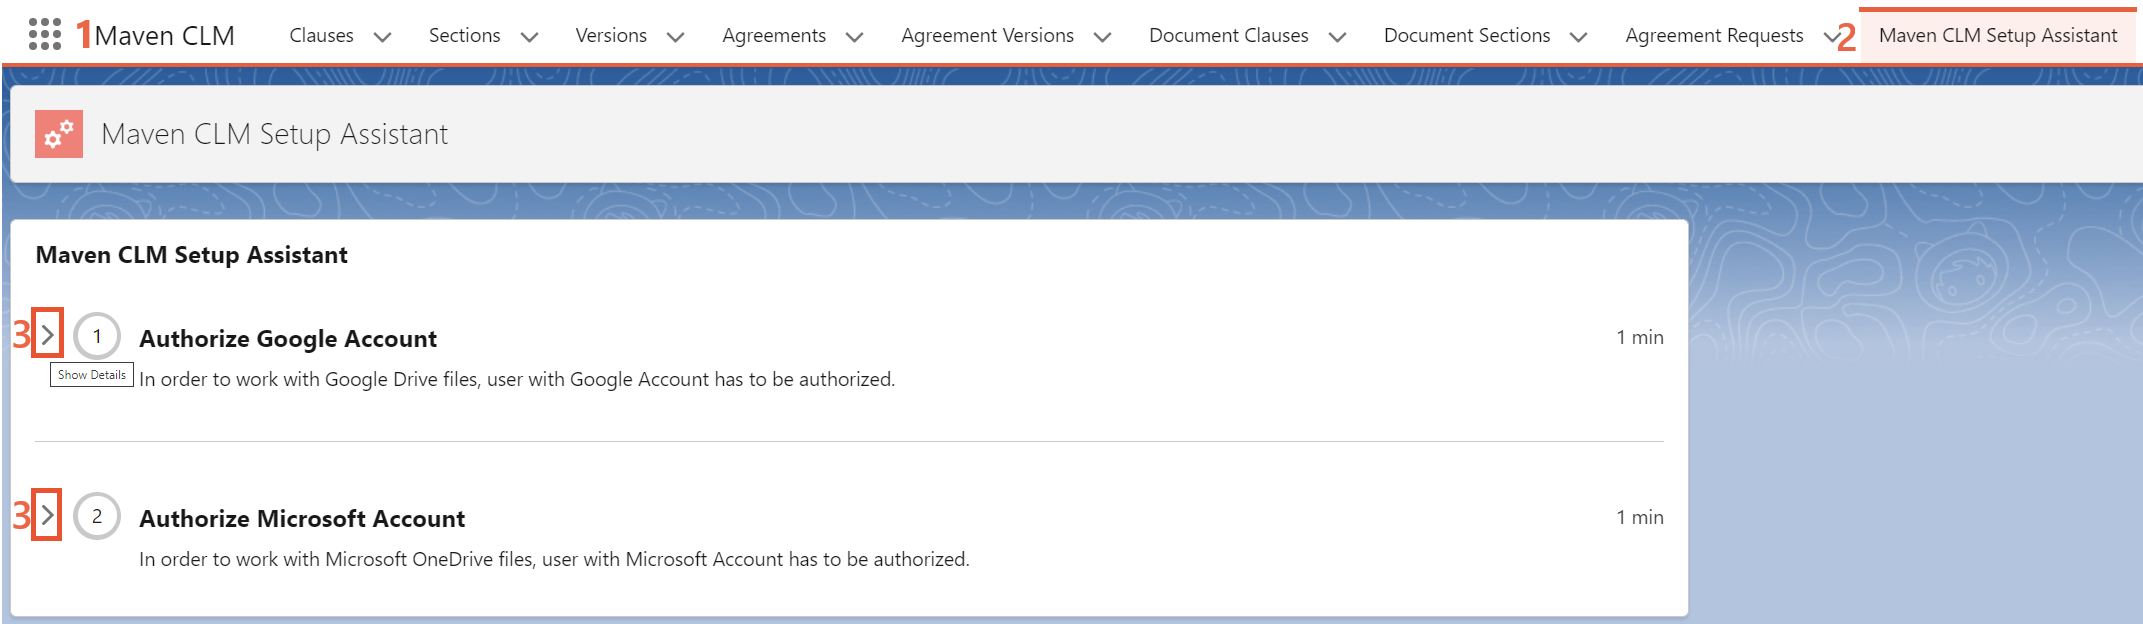
Open the Maven CLM Application.
-
Select the Maven CLM Setup Assitant tab on the far right. There you find two sections with Google and Microsoft authorization settings.
-
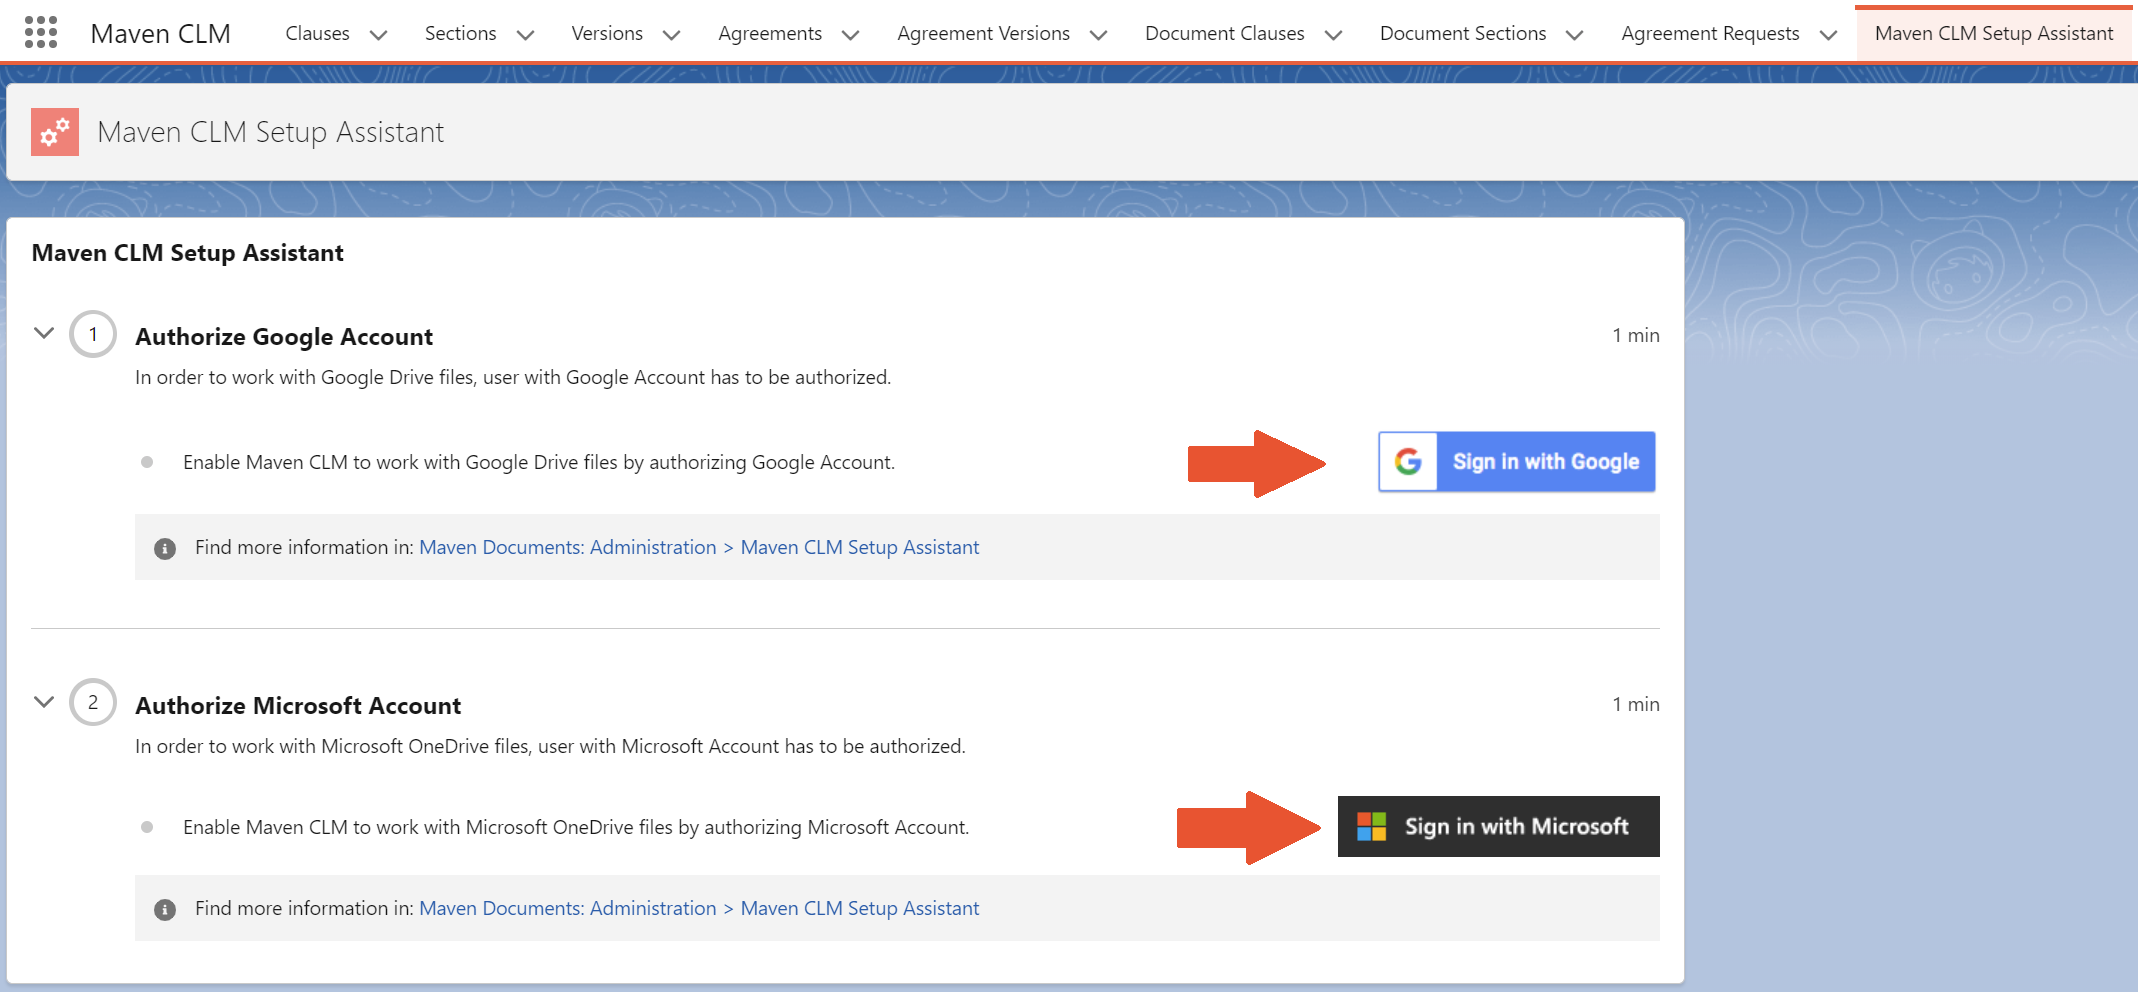
Click on the Show Details button to see the content of sections. Each section holds a short description, the Sign in button, and the link to the corresponding Documentation page.
-
Click on the Sign In button in the needed section.
-
In the appeared dialogue box, select the needed account and click Allow.
-
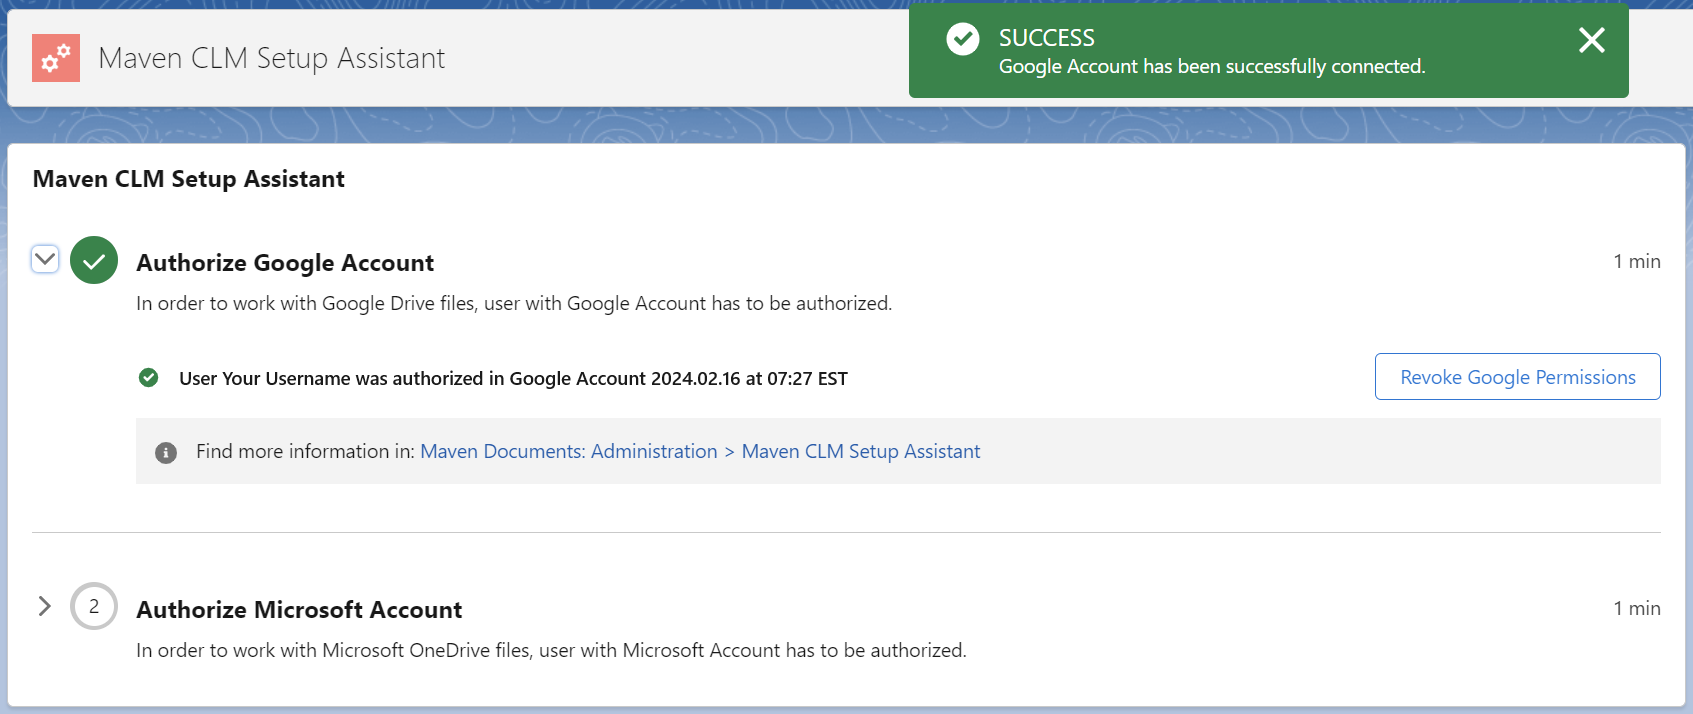
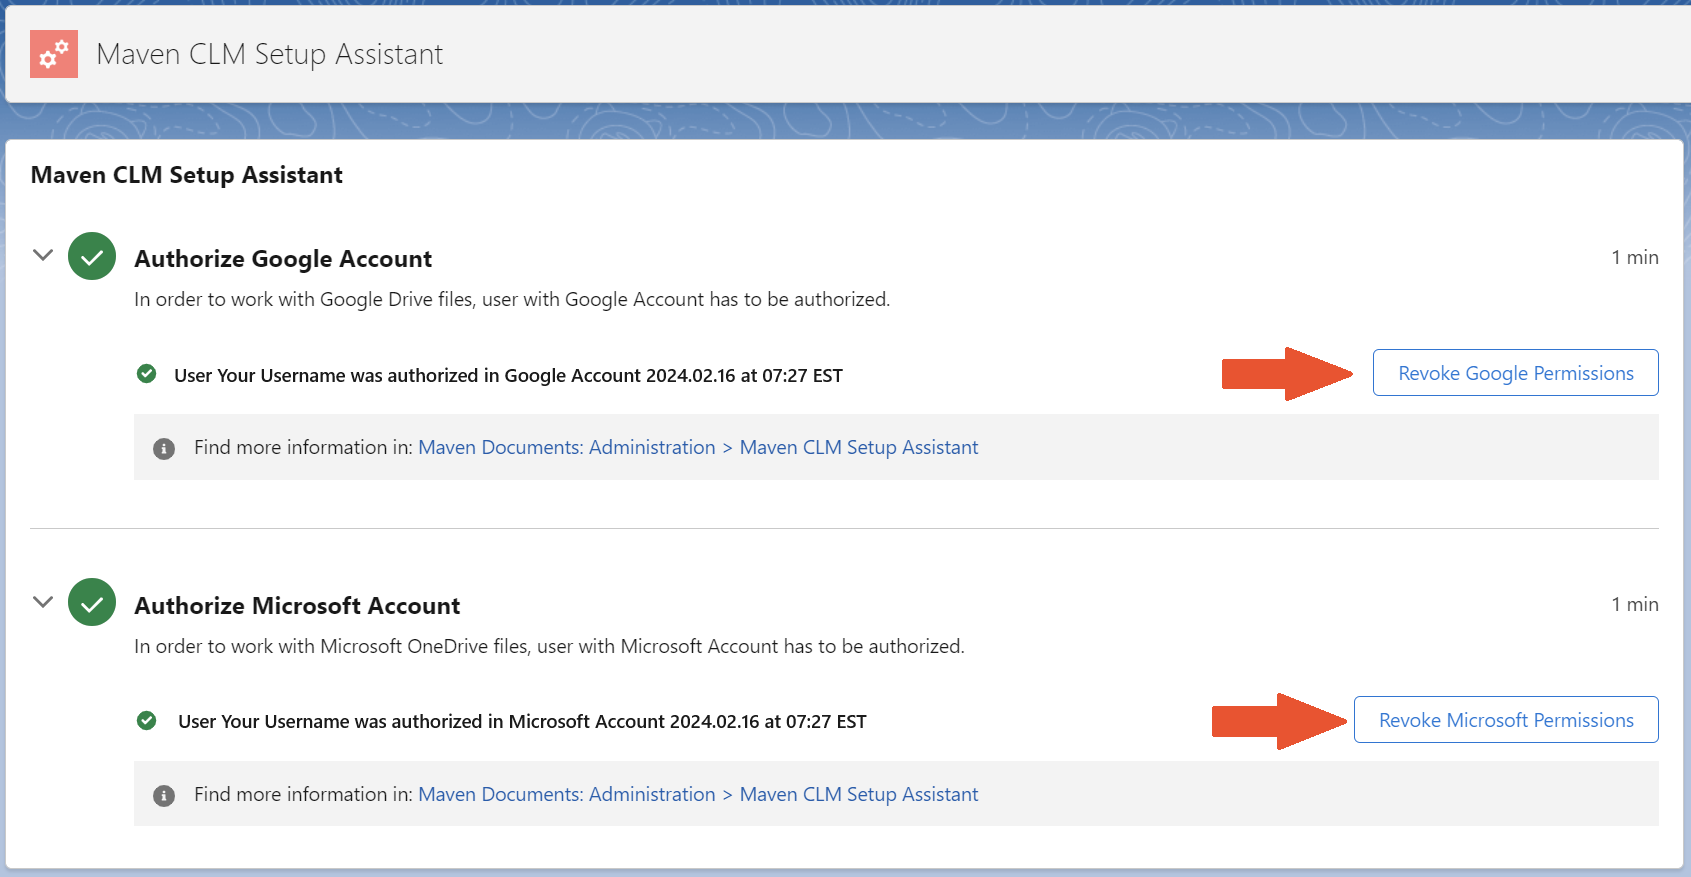
After that, you are back to Setup Assistant, and the green toasted message on successful connection to the selected account appears on the screen. The icon next to the title of the corresponding section is marked and turns green. The username and the date of the connection are also shown in the section. The Sign in button is changed to Revoke Permissions.
After you complete these steps, Maven CLM will be connected to the appropriate third-party Service. You can connect one third-party service or both at the same time. However, at least one of them must be connected. This action is performed only once, and in the future, all operations that our application will perform with documents in these services will be on behalf of this user.
This user must have permissions to read, edit and create for all documents in the folder. There is also a fair usage in place for every user.
Also, don’t forget about the sharing settings. It is set by your salesforce default org-wide settings. You can find out how to change them, or how to share your records with other users in our FAQ.
¶ Revoke Access
If you wish at any time to revoke access to Maven CLM from your Google or Microsoft Account, you can simply click Revoke Permissions.
You can find the Revoke Permissions button in the corresponding section of the Maven CLM Setup Assistant tab.
¶ Trusted URLs
Once Google or Microsoft account is authorised, last step is adding Trusted URL for the selected provider.
Go to Setup > Trusted URLs and click the New Trusted URL button.
¶ Microsoft OneDrive
For the Microsoft OneDrive integration create new the Trusted URL with the following input:
- In the API Name field write "Microsoft".
- In the URL field write "*.sharepoint.com".
- Make sure the Active checkbox is marked.
- Select "Lightning Experience Pages" from CSP Context drop-down.
- Make sure only "frame-rsc (iframe content)" is selected in the CSP Directives.
- Click the Save button.
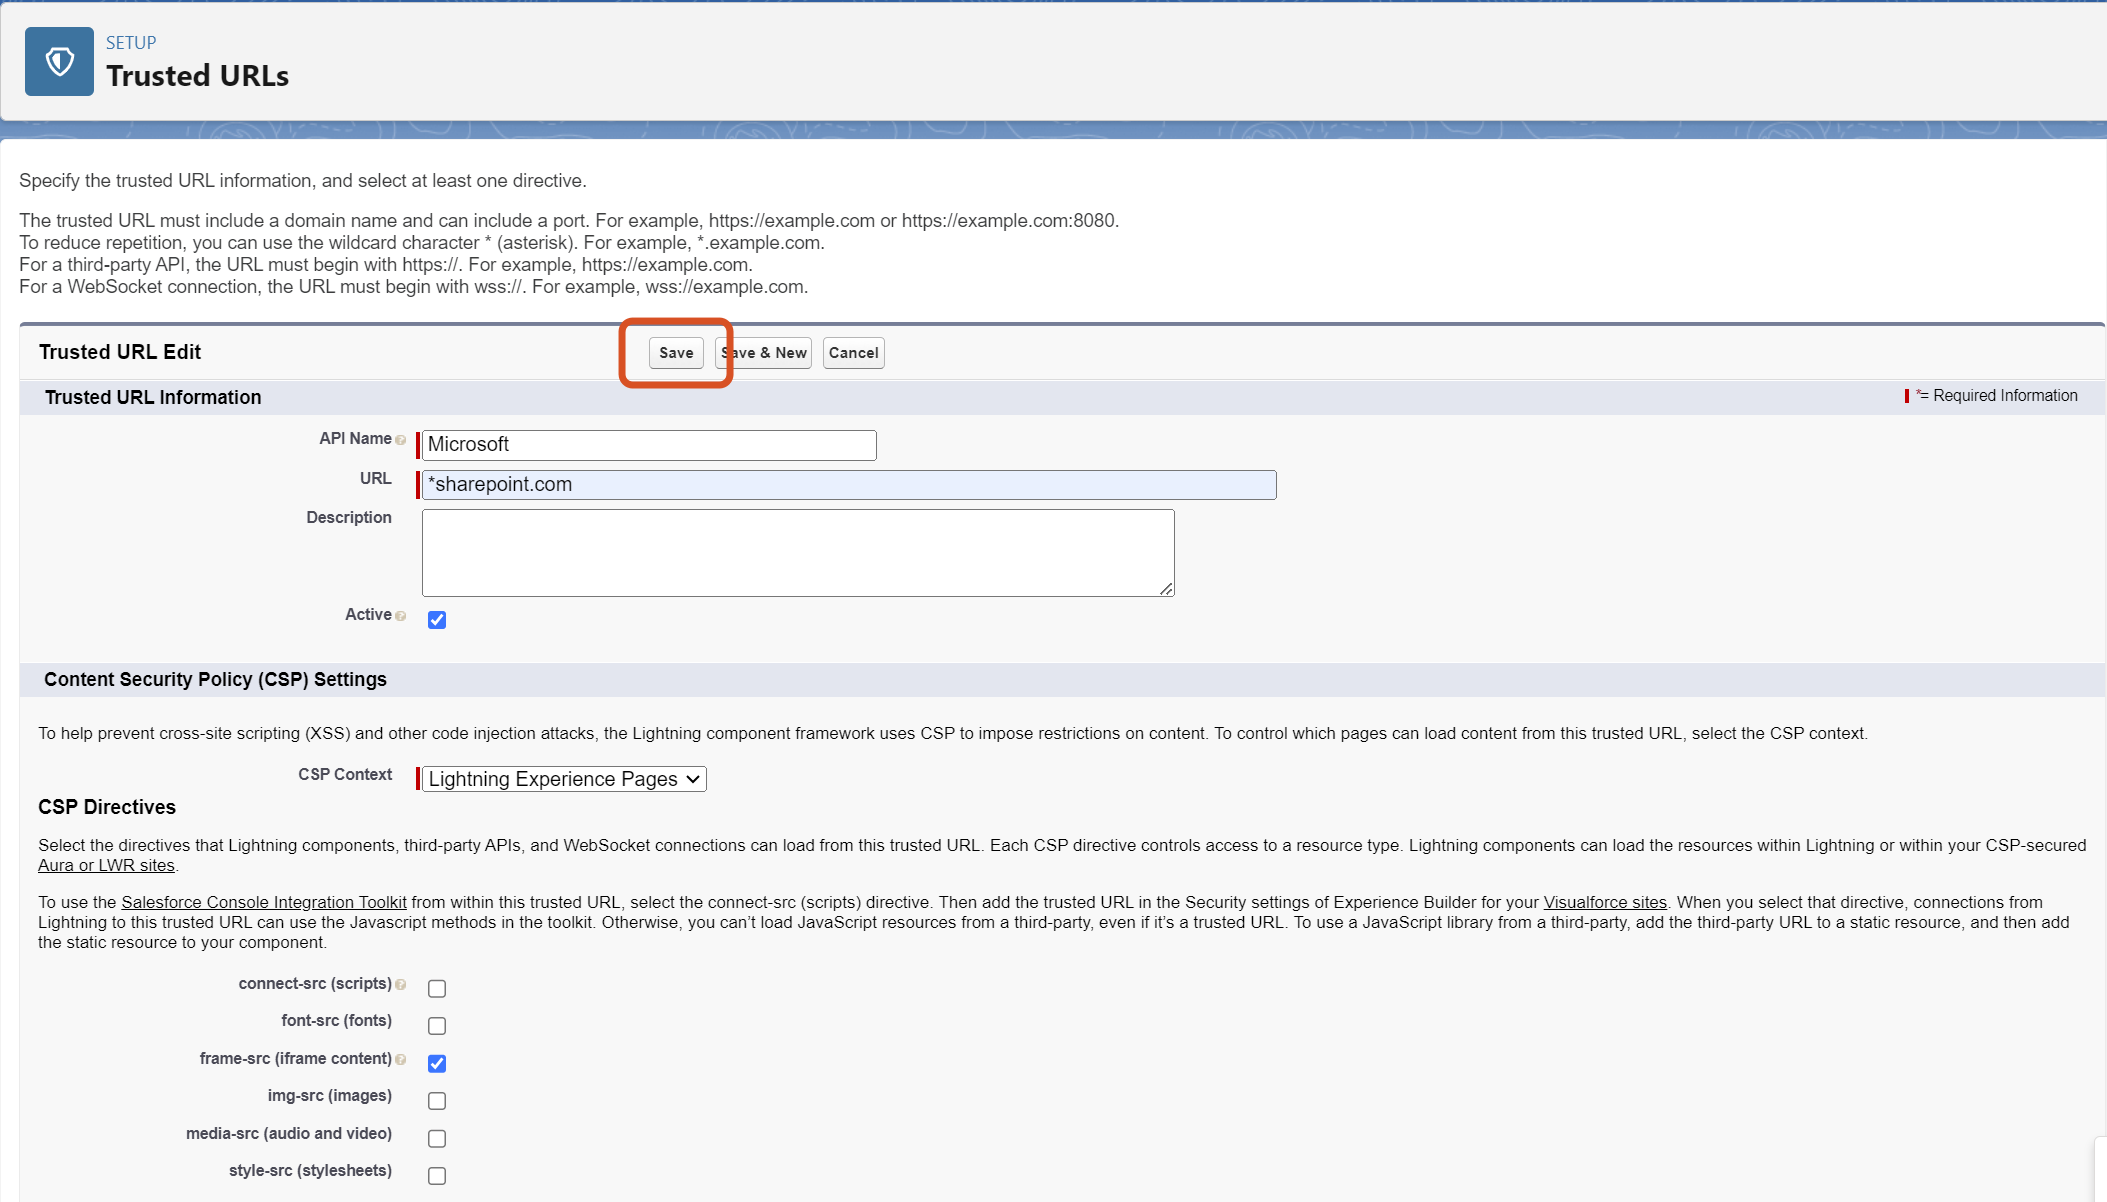
The Trusted URL for Microsoft OneDrive has been added.
¶ Google Drive
For the Google Drive integration create the new Trusted URL with the following input:
- In the API Name field write "Google".
- In the URL field write "https://docs.google.com".
- Make sure the Active checkbox is marked.
- Select "Lightning Experience Pages" from CSP Context drop-down.
- Make sure only "frame-rsc (iframe content)" is selected in the CSP Directives.
- Click the Save button.
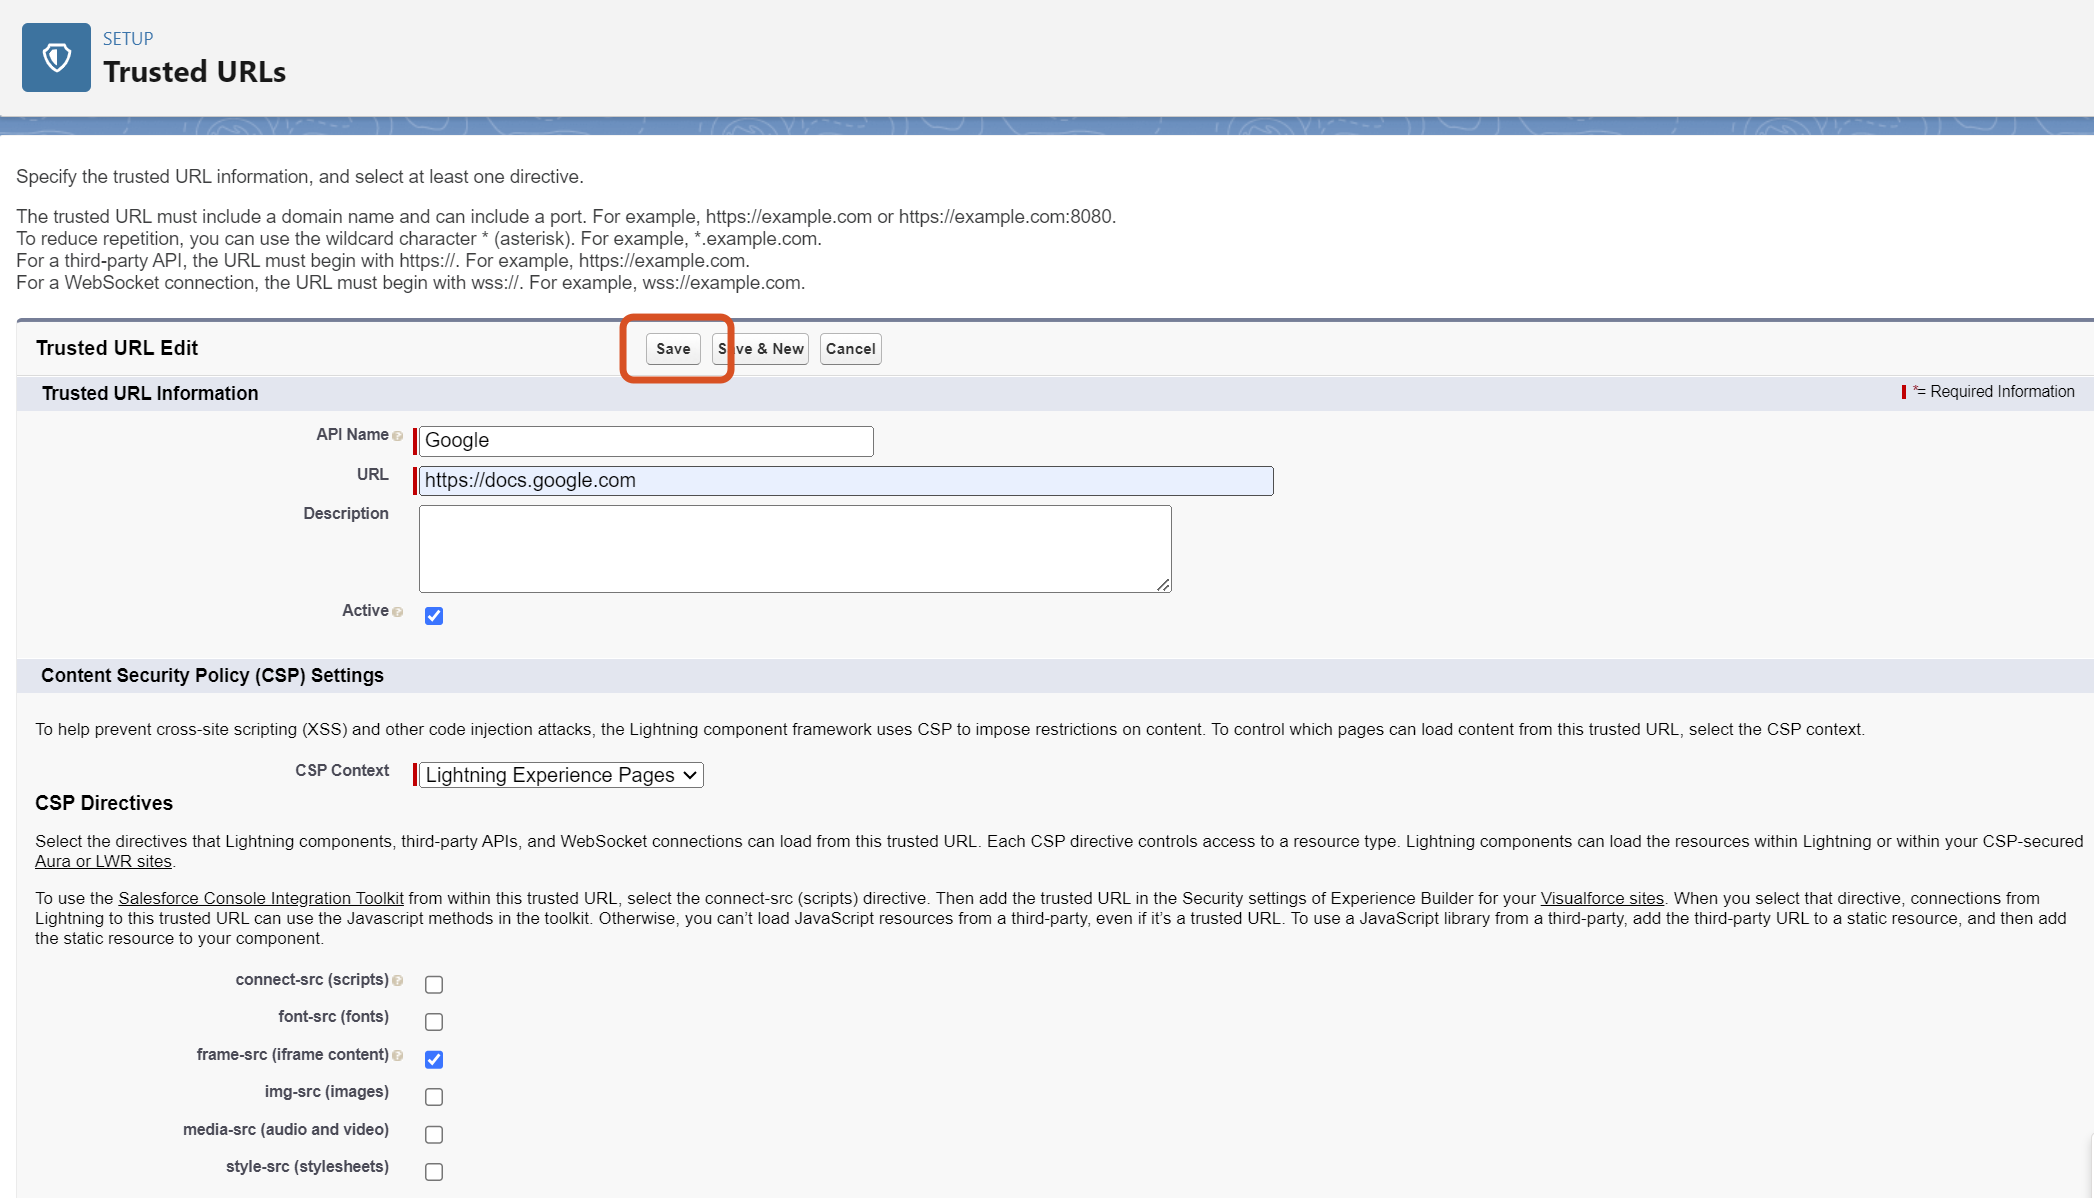
The Trusted URL for Google Drive has been added.
¶ Custom Settings
Custom Settings provide possibilities to configure certain parts of the application.
¶ Trigger Configuration
Available only for administrators. Enter Custom settings in the search bar. Select Trigger Configuration for Namespace prefix mmclm and click on the Manage next to the record.
Under Default Organization Level Value click on the New button.
Our application uses triggers. If you want to write your own logic that will conflict with ours, you can disable triggers out of the box simply by checking the Is Disabled checkbox. However, we strongly do not recommend doing this as it may affect the correct work of the application. Use this feature only as a last resort.